> ## Documentation Index
> Fetch the complete documentation index at: https://docs.thinkrr.ai/llms.txt
> Use this file to discover all available pages before exploring further.
# Agency Onboarding
> Complete onboarding guide for AVA agency users, including setup, subaccount management, creating your first Inbound Agent, and best practices for scripting and testing.
## Overview
The **AVA Voice AI Studio** enables marketing firms, service providers, and sales agencies to deploy AI-powered voice agents at scale — both for inbound and outbound communication.
This platform is ideal for **GoHighLevel (GHL) agency owners** and other resellers looking to offer advanced AI voice solutions as part of their service packages. It supports multiple client sub-accounts, branded call agents, and integration with scheduling tools and CRMs.
With AVA, agencies can:
* Automate lead follow-up and appointment booking
* Deploy receptionist-style inbound agents for 24/7 support
* Configure outbound campaigns with sales coaching and persona simulation
* Monitor call logs, transcripts, and performance across all clients
The platform offers a flexible foundation to **resell Thinkrr** as part of your existing marketing or sales services.
## Getting Started with Your Agency Workspace
After purchasing your agency plan:
* Check your inbox for an email from AVA. Your email for you AVA account should be the same as the main agency account in GHL you intened to associate it with.
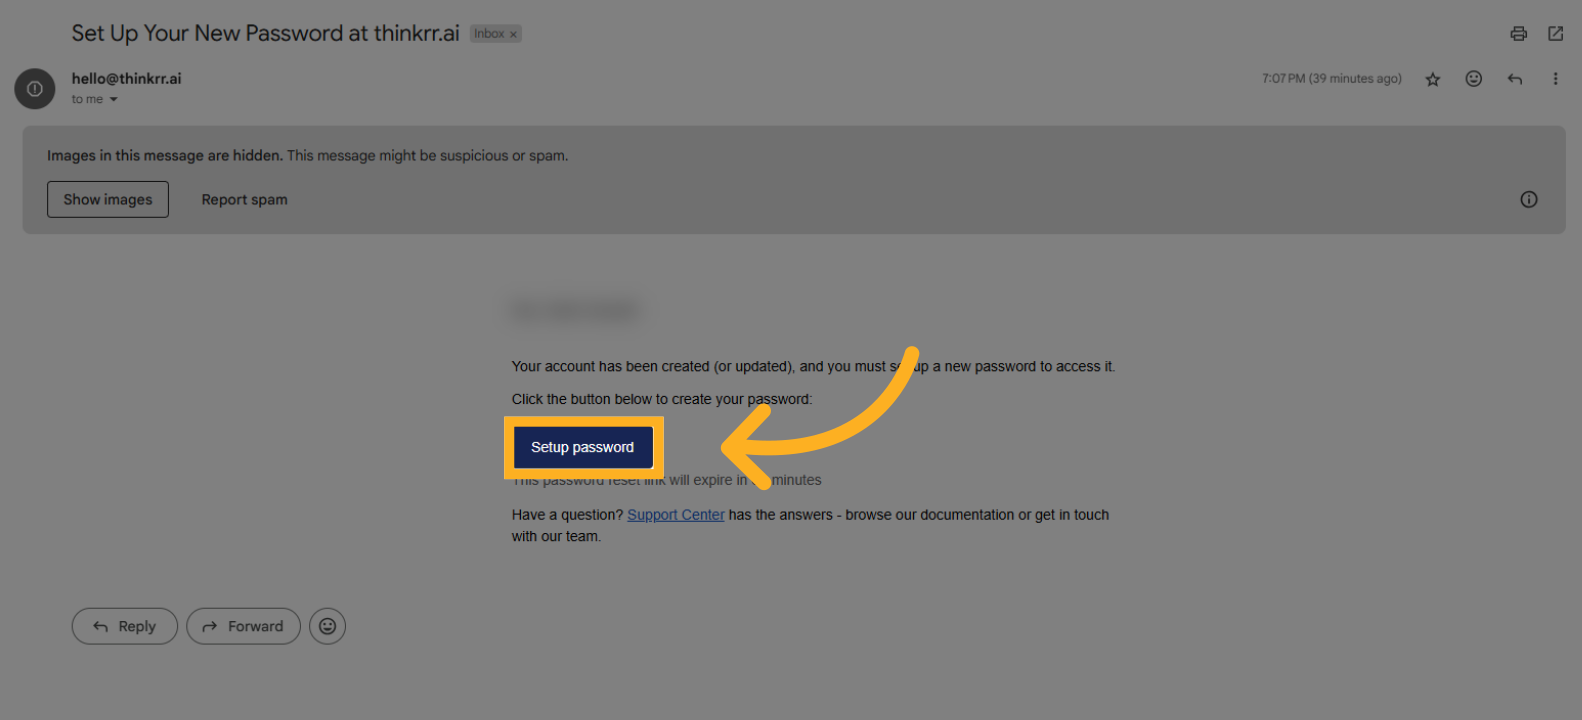 * Click the **"Set Your Password"** link to create your login credentials.
This will take you to the Ava onboarding environment.
* Click the **"Set Your Password"** link to create your login credentials.
This will take you to the Ava onboarding environment.
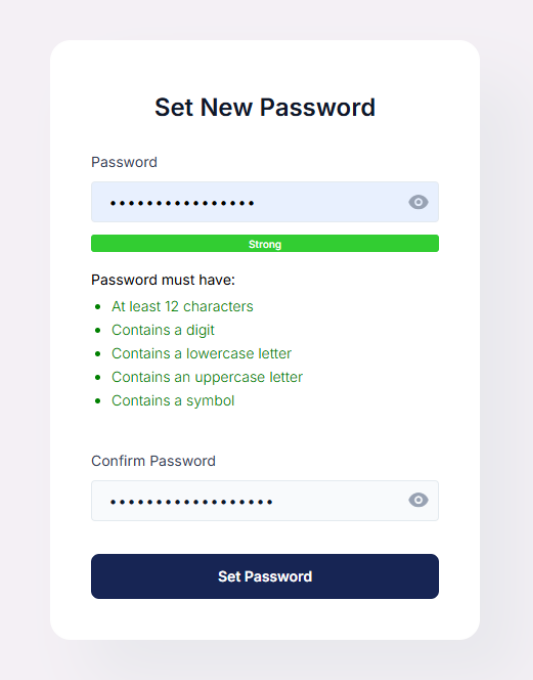 You'll start by selecting a phone number for your voice agent:
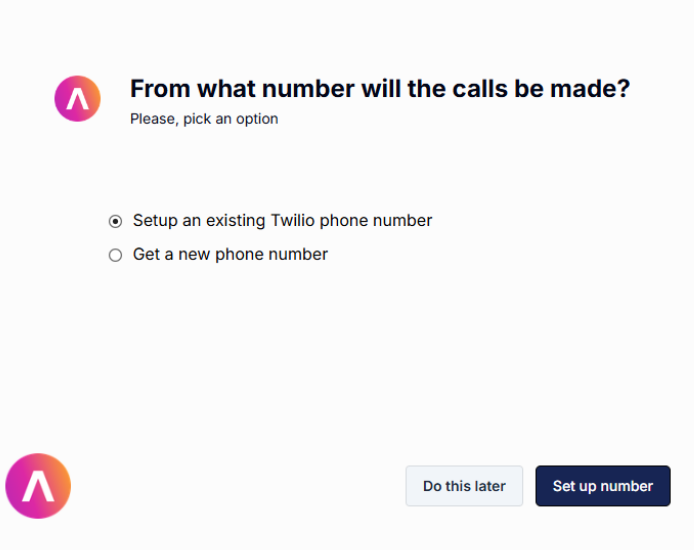 * Choose from existing numbers (if any)
* Or click **"Create New Number"**
* Enter your area code
* Select a number from the list
* Choose from existing numbers (if any)
* Or click **"Create New Number"**
* Enter your area code
* Select a number from the list
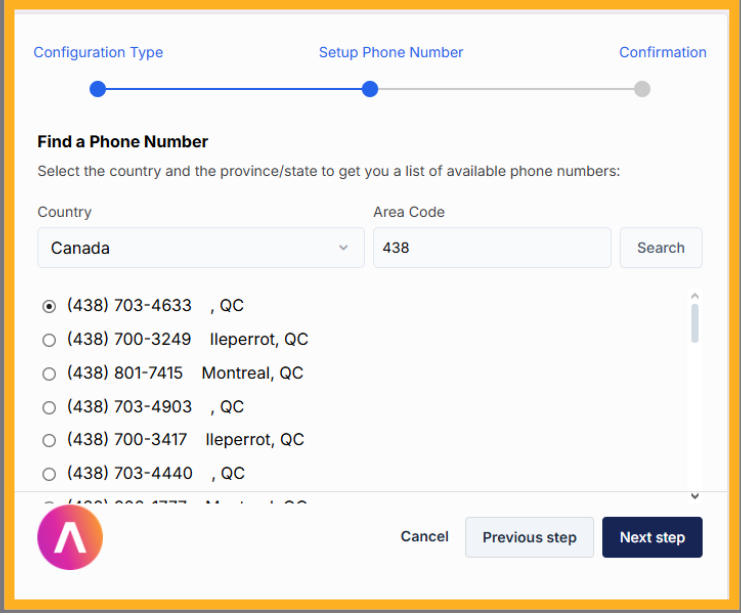 * Confirm and continue
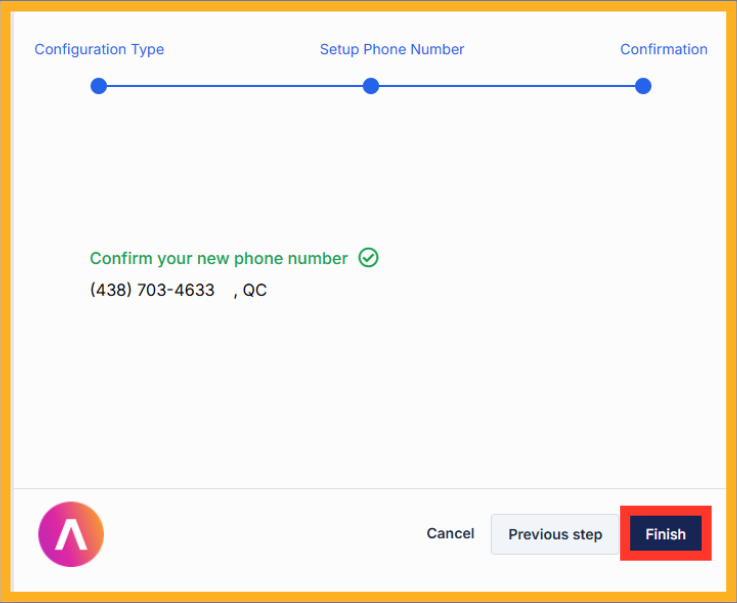 Click **"Connect"** to begin the GHL integration:
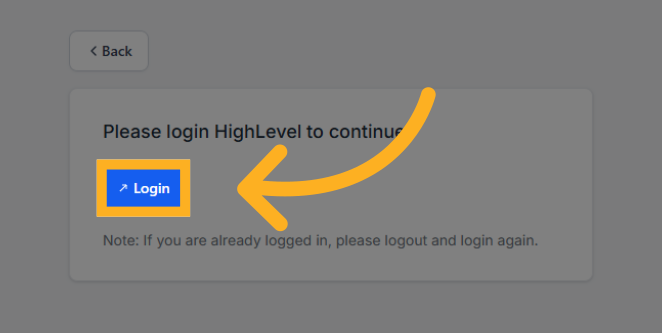
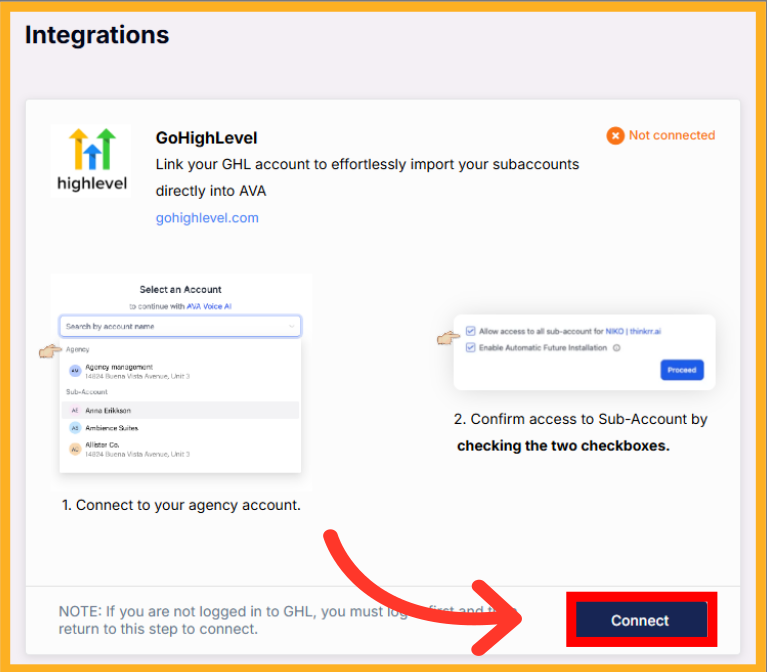 * Authorize AVA to access your **GHL agency account**
 > ⚠️ **Important:**
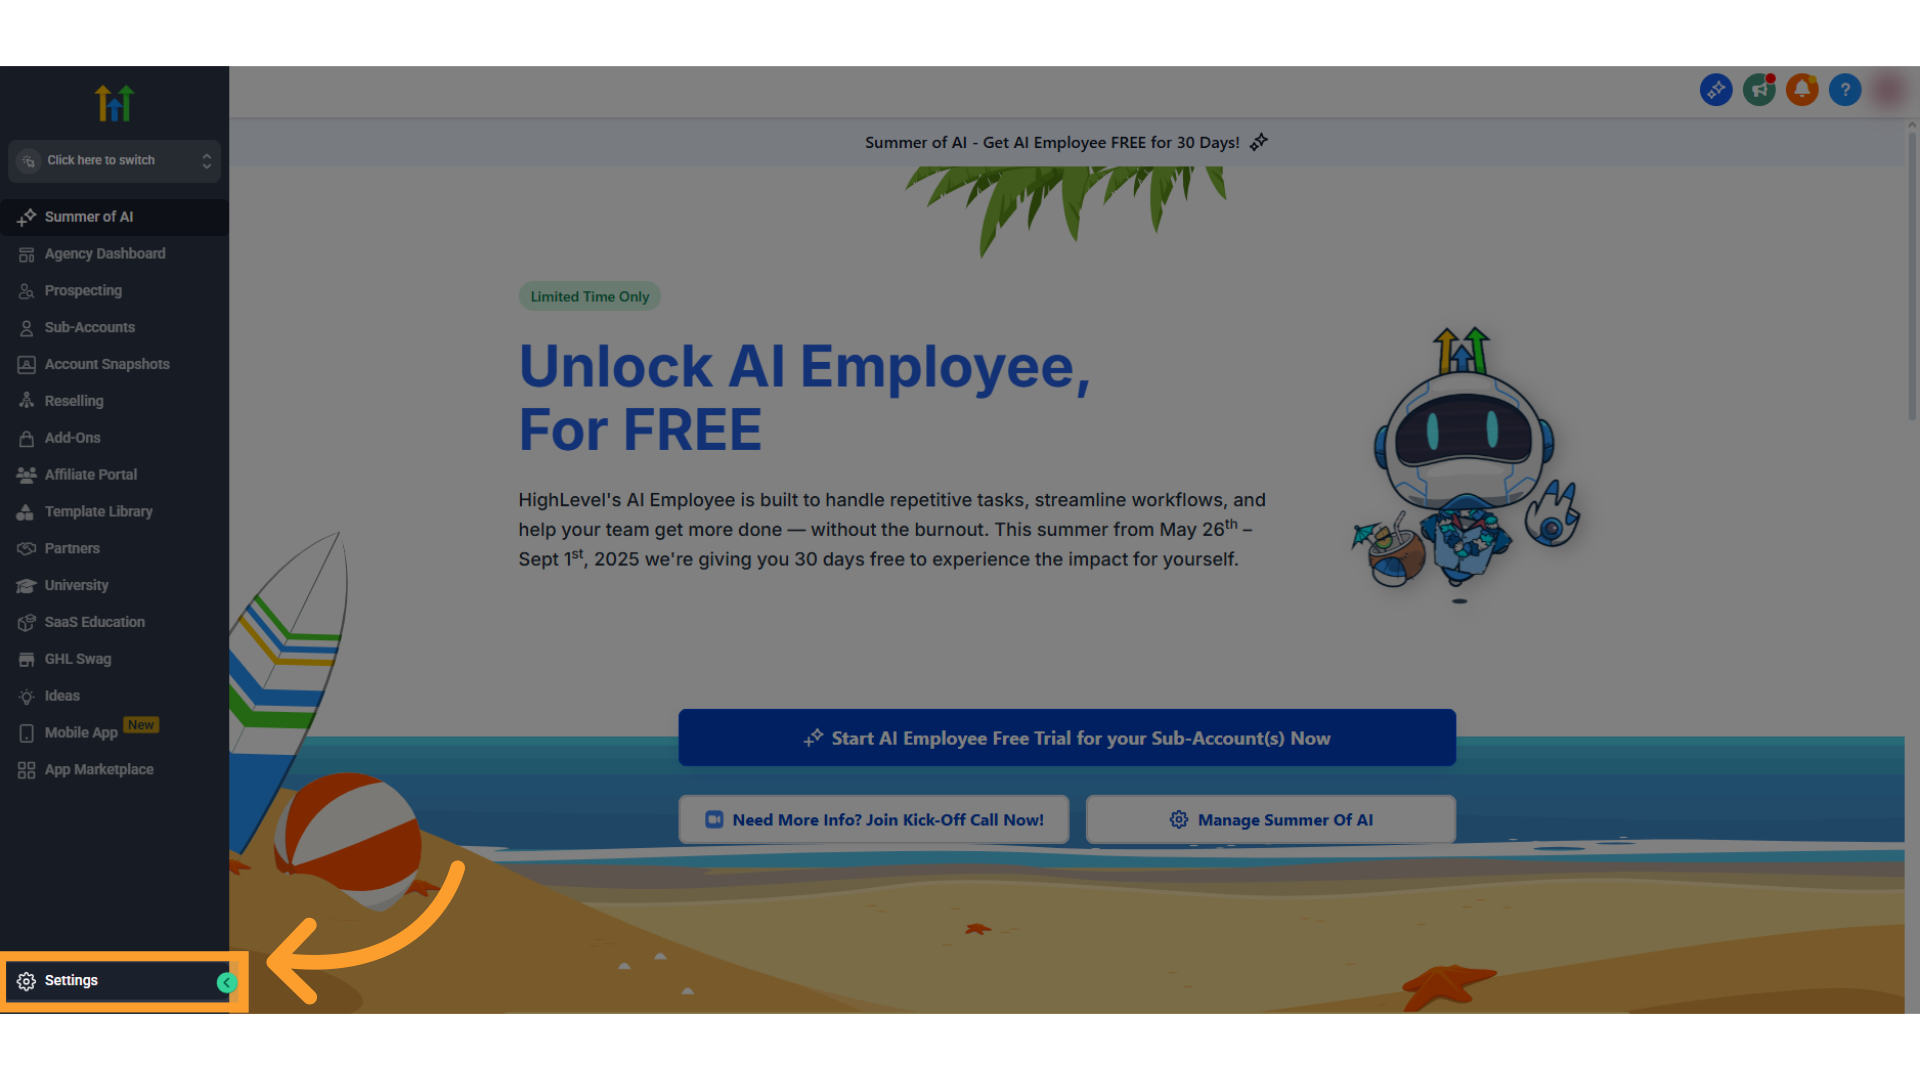
> You must connect your **primary agency account** in GoHighLevel — this will also serve as your **primary subaccount** in AVA.
>
> To verify you are connected to the correct account:
>
>
>
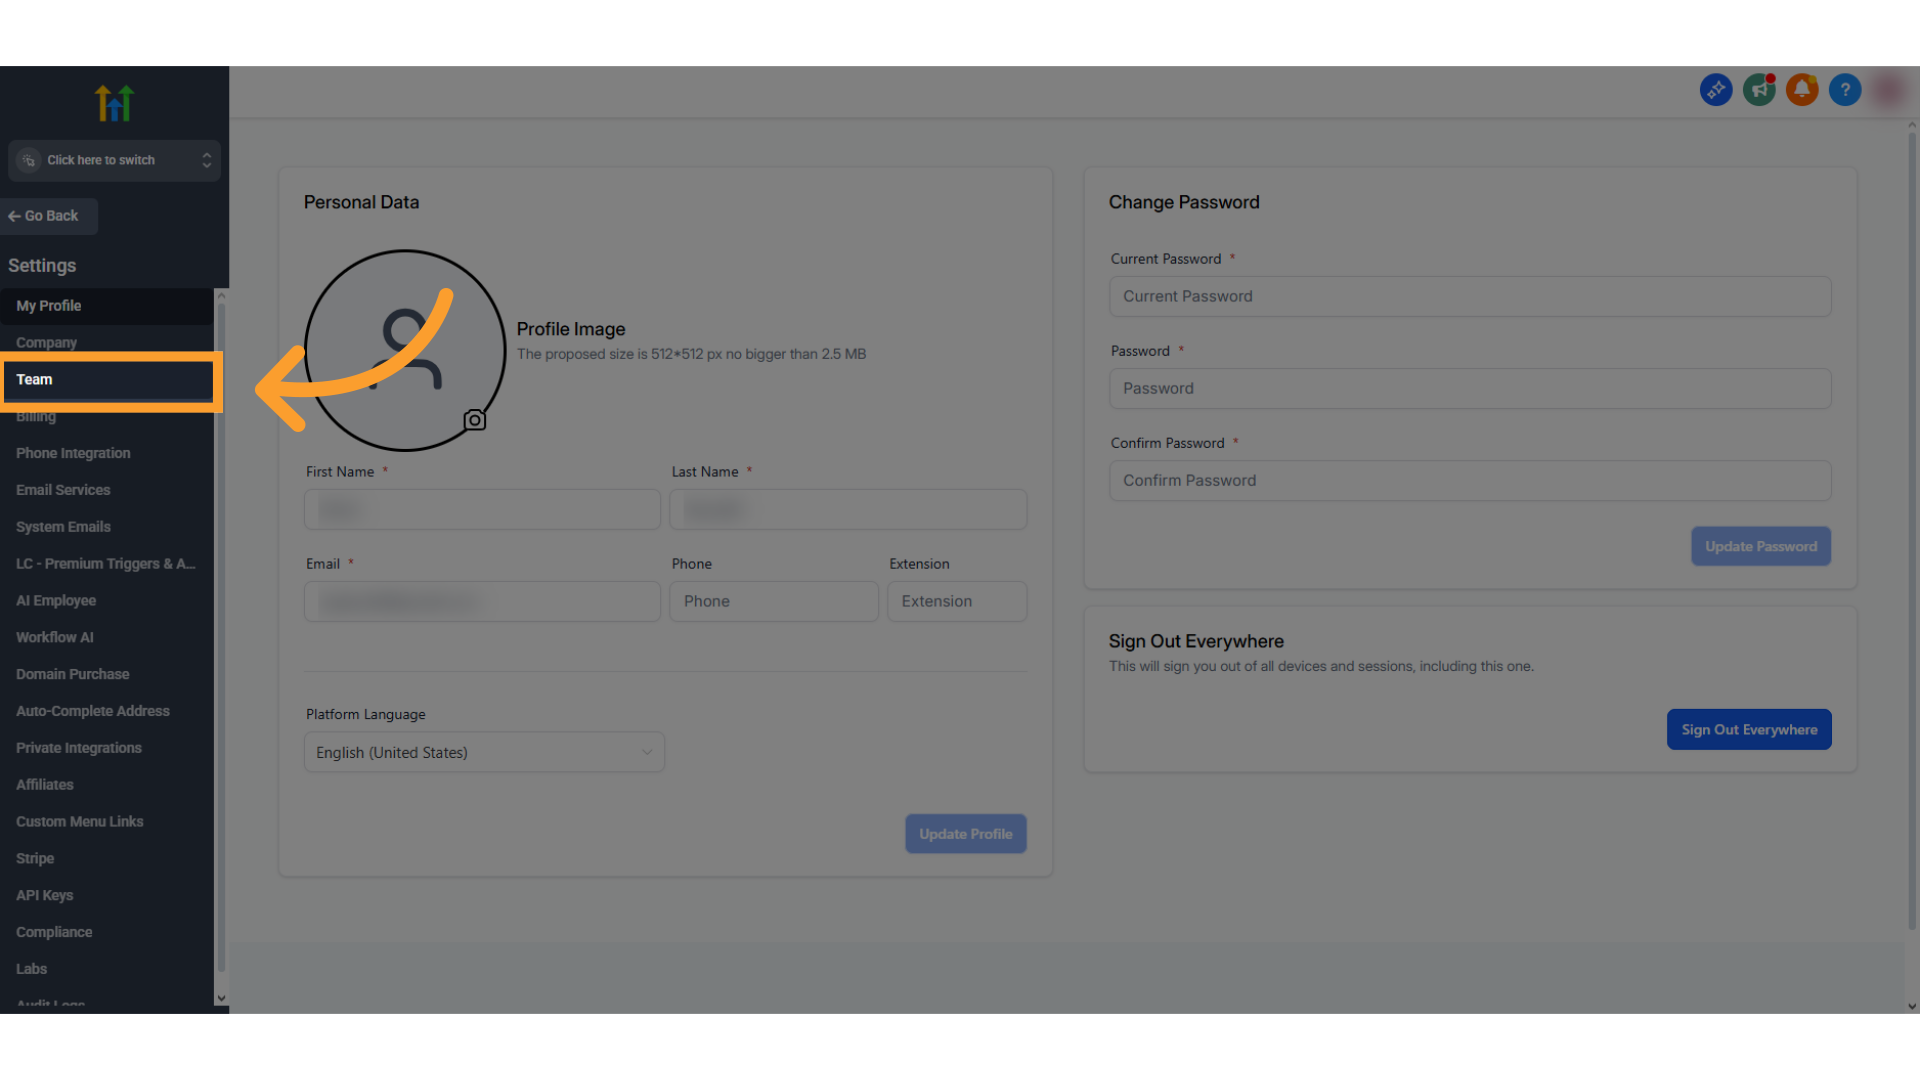
> Click **"Team"** or **"My Staff"** (if using NIKO) from the sidebar menu.
>
>
> ⚠️ **Important:**
> You must connect your **primary agency account** in GoHighLevel — this will also serve as your **primary subaccount** in AVA.
>
> To verify you are connected to the correct account:
>
>
>
> Click **"Team"** or **"My Staff"** (if using NIKO) from the sidebar menu.
>
>  >
>
>
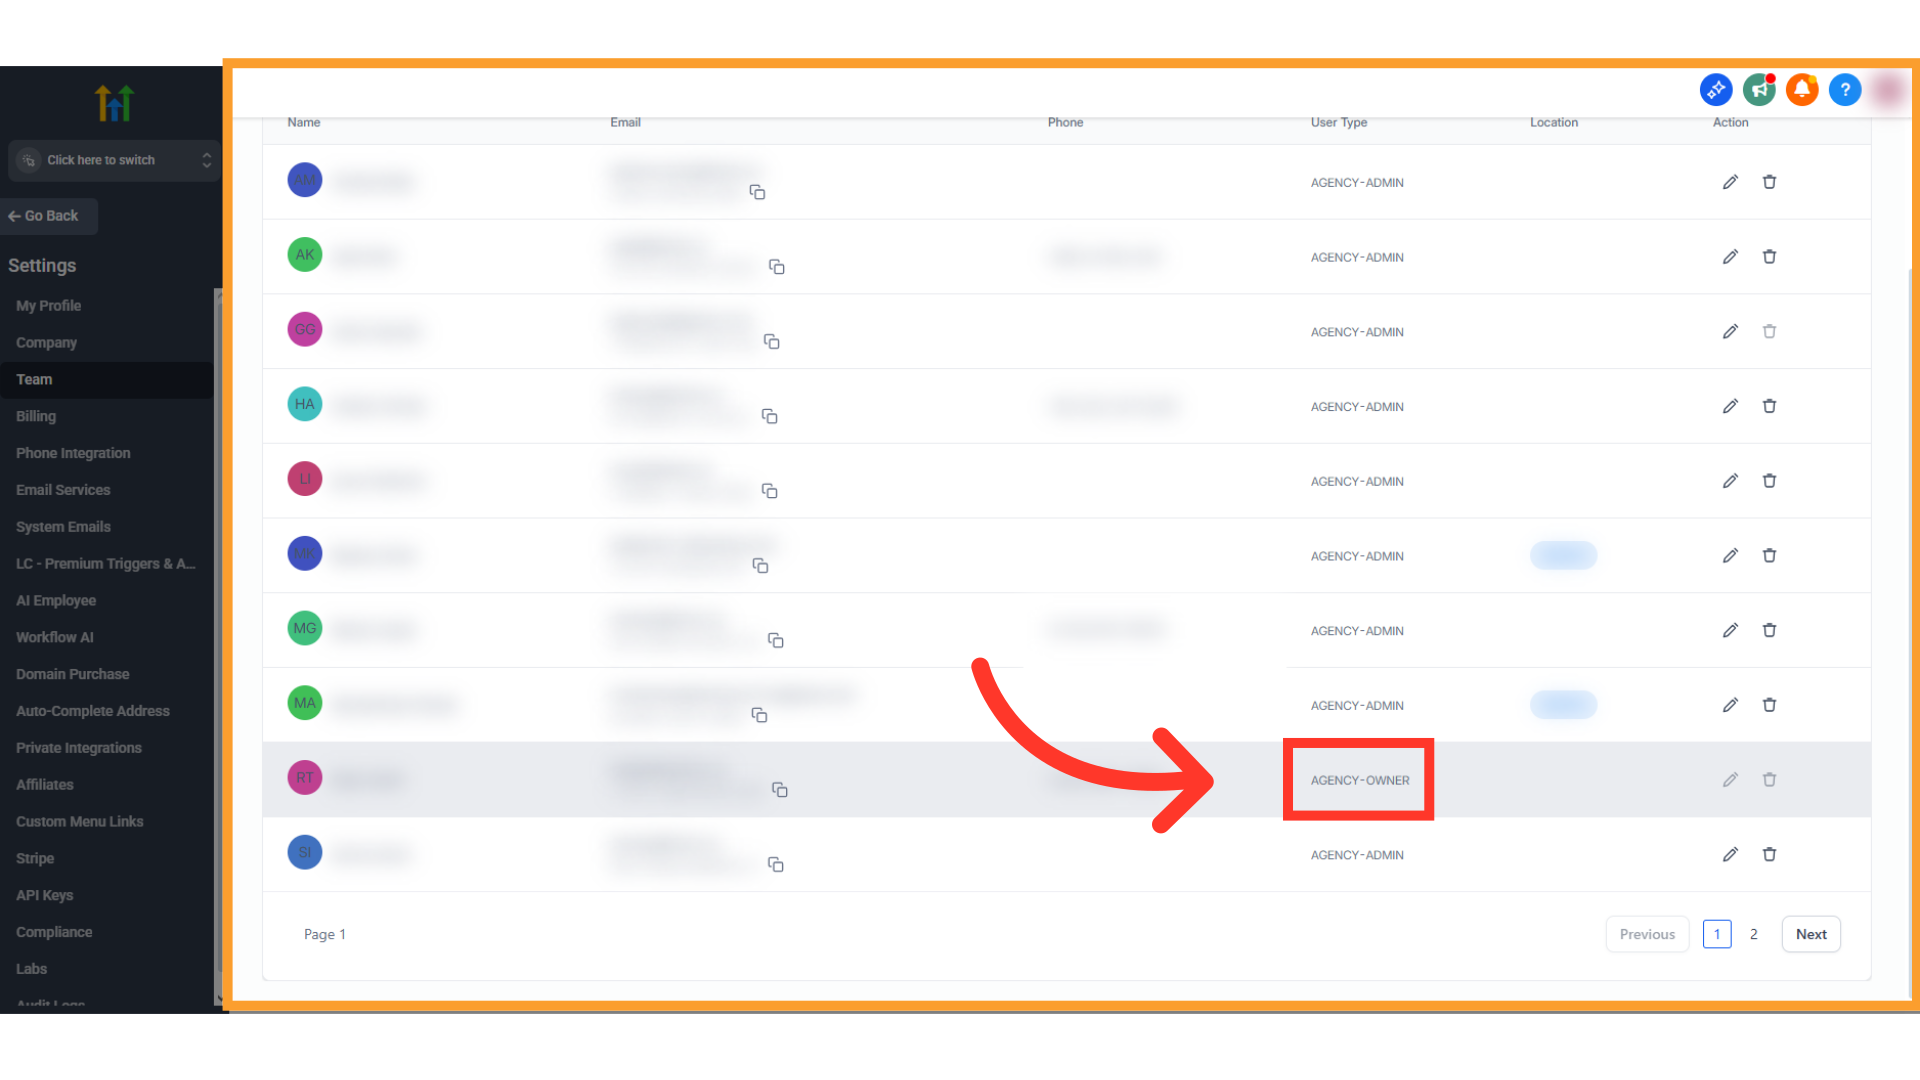
> Navigate to the team list that appears.
>
>
>
>
>
> Navigate to the team list that appears.
>
>  >
>
>
> Look for the entry marked **"AGENCY-OWNER"** — this indicates you are logged into the primary agency account.
>
>
>
>
>
> Look for the entry marked **"AGENCY-OWNER"** — this indicates you are logged into the primary agency account.
>
>  >
>
>
>
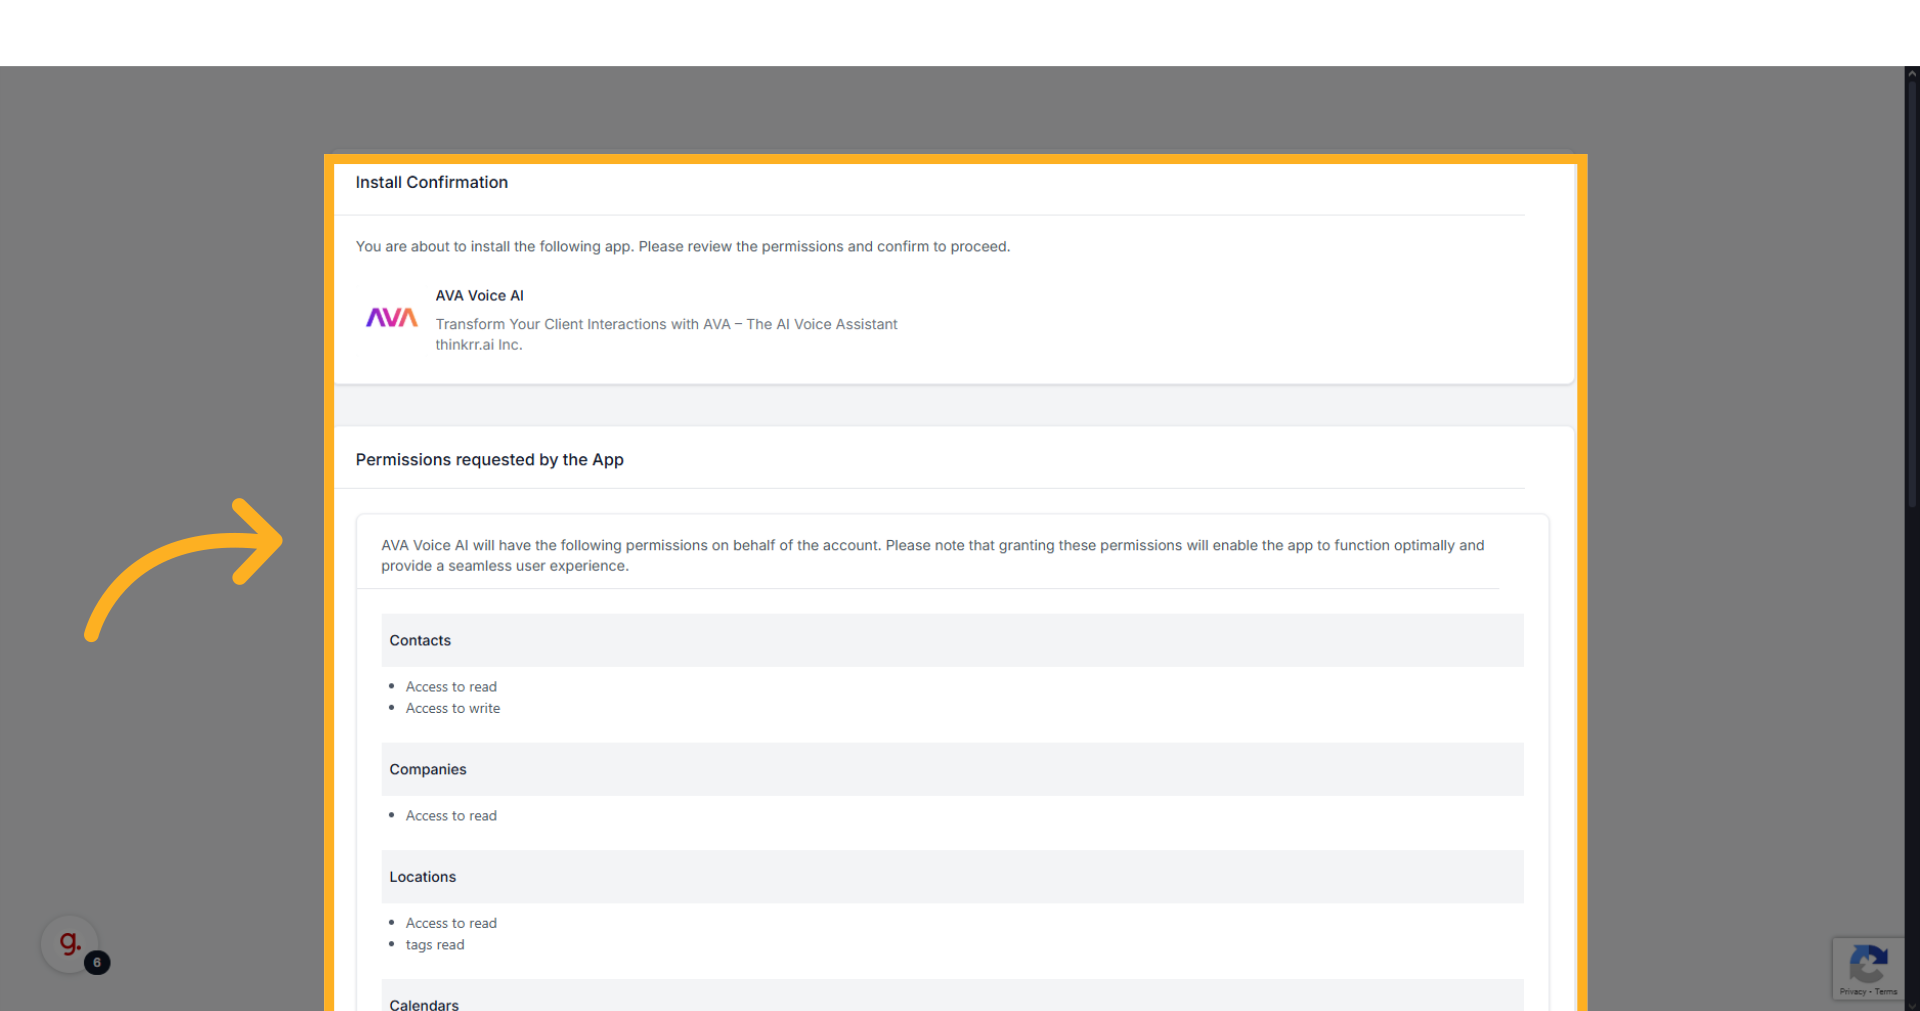
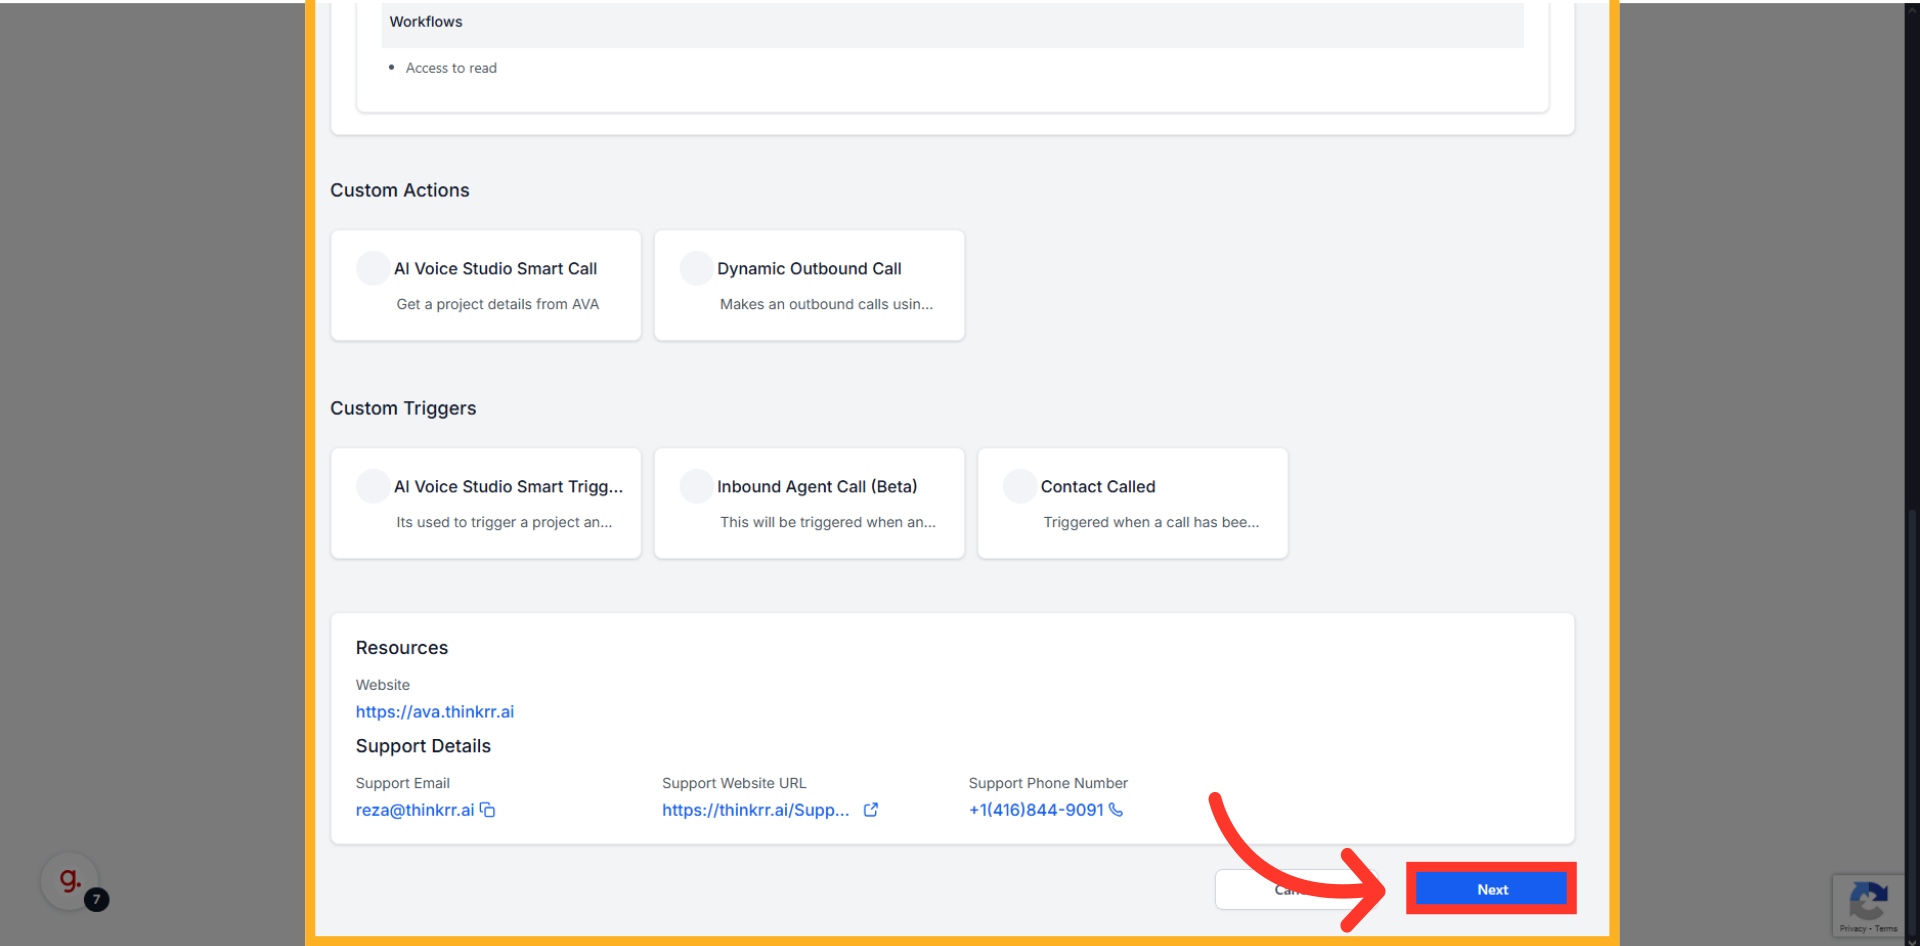 * Approve permissions and install settings
* ✅ Apply settings to all locations
* ✅ Enable automatic updates
* Approve permissions and install settings
* ✅ Apply settings to all locations
* ✅ Enable automatic updates
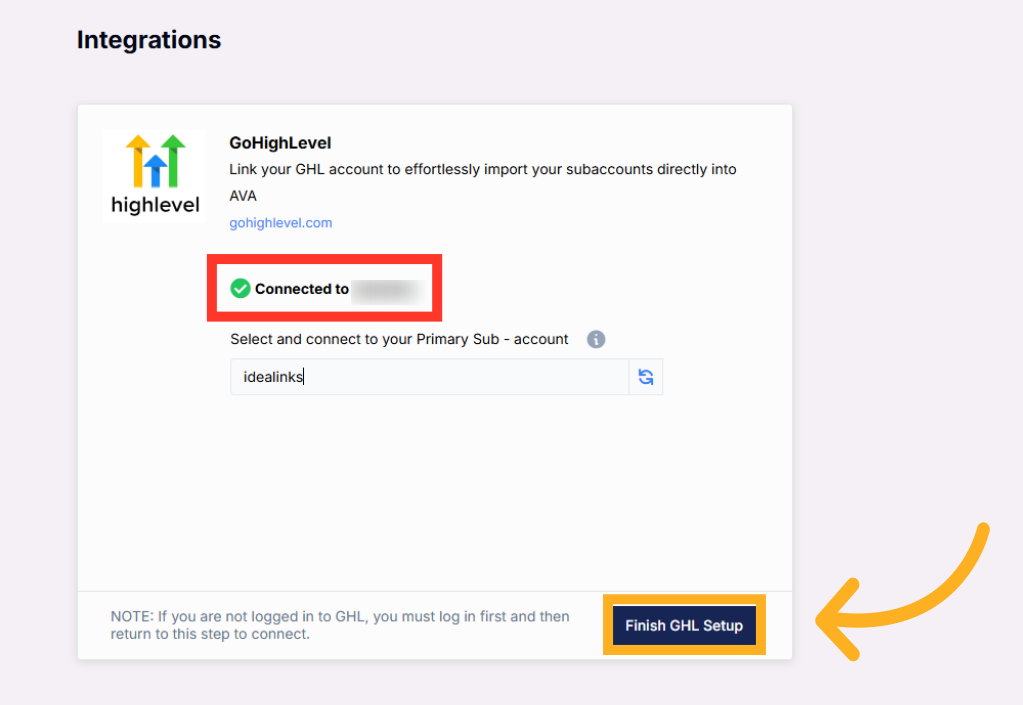
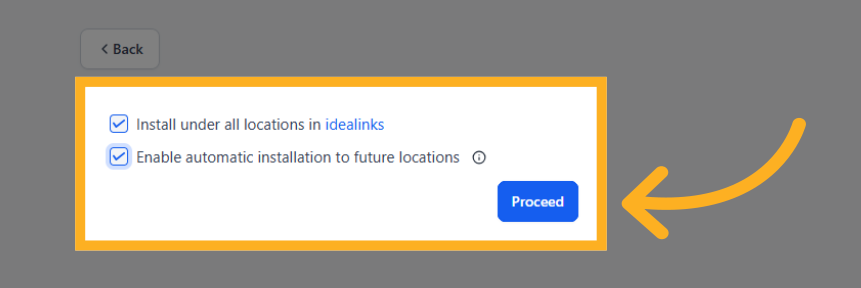 * Click **Finish Setup** once the green checkmark is visible
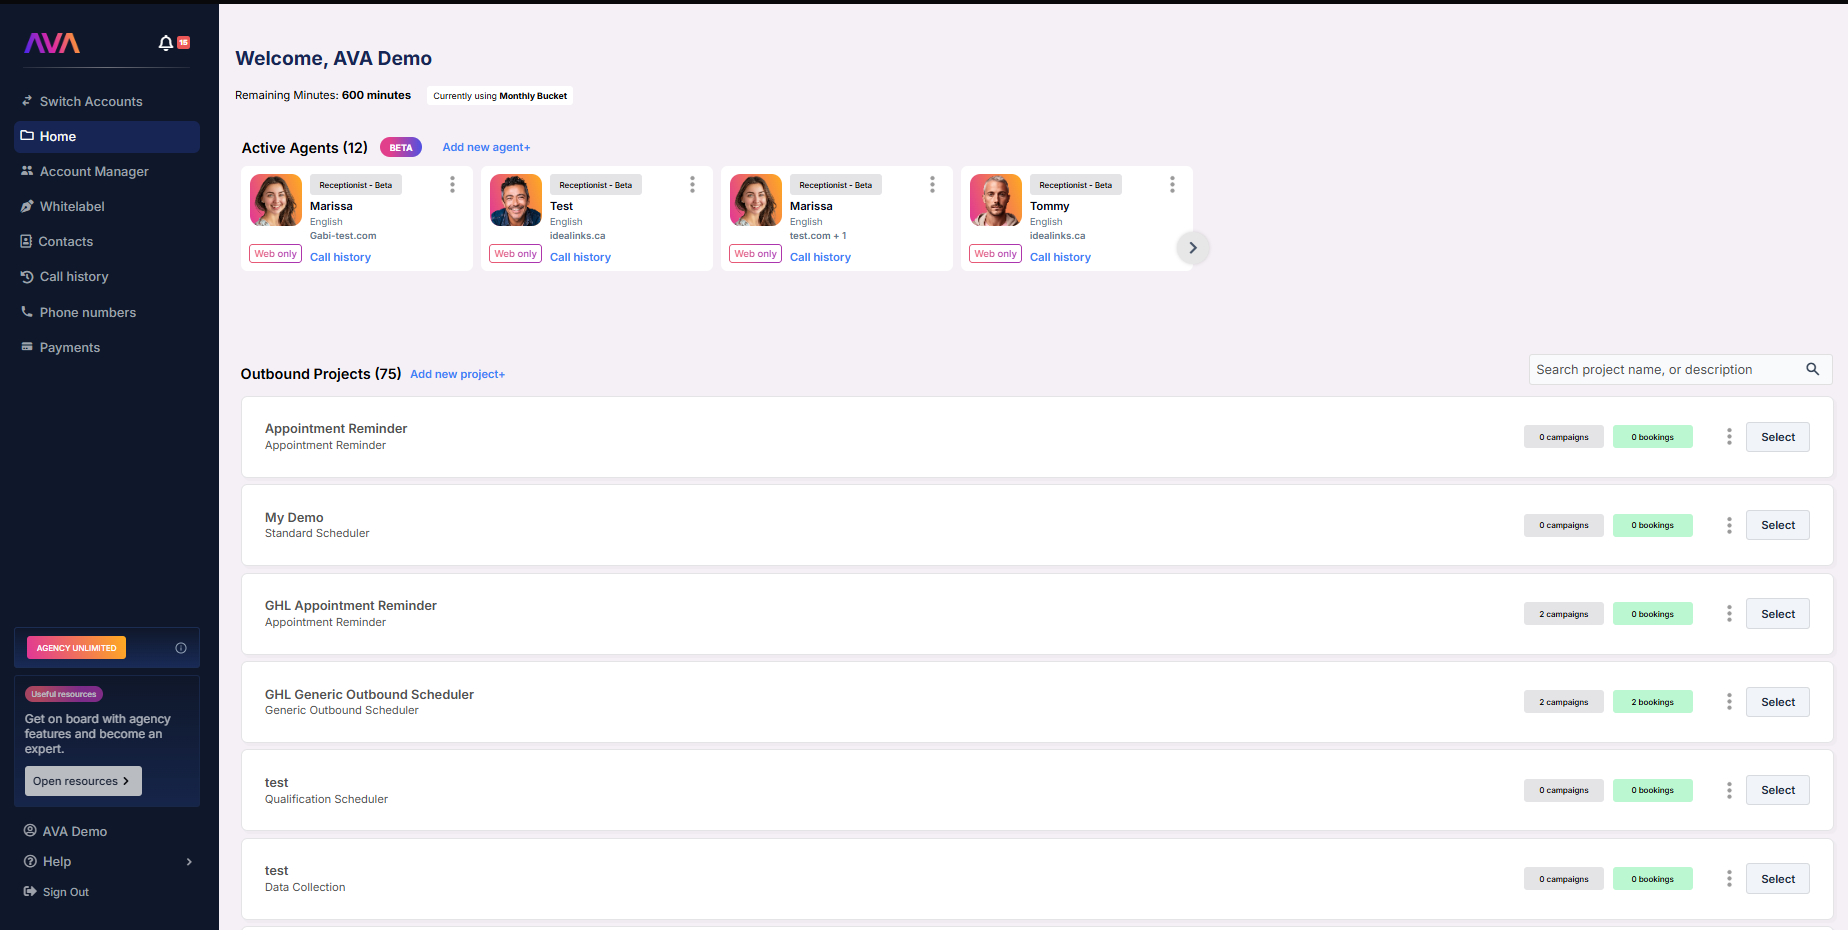 > 💡 **Tip:**
> You should take 10–15 minutes to familiarize yourself with the AVA interface:
>
> * Create and manage Inbound and Outbound agents
> * Track usage and subaccount activity
> * Access branding and pricing controls (Unlimited Plan only)
> * Connect Stripe for billing
***
## How to Create an Inbound Agent
* If it's your very first time in AVA, you will be prompted to create an [**Outbound Project**](/Projects-and-scenarios), or an [**Inbound Agent**](/Creating-an-Inbound-Agent). Select **"Create an Inbound Agent"**.
> 💡 **Tip:**
> You should take 10–15 minutes to familiarize yourself with the AVA interface:
>
> * Create and manage Inbound and Outbound agents
> * Track usage and subaccount activity
> * Access branding and pricing controls (Unlimited Plan only)
> * Connect Stripe for billing
***
## How to Create an Inbound Agent
* If it's your very first time in AVA, you will be prompted to create an [**Outbound Project**](/Projects-and-scenarios), or an [**Inbound Agent**](/Creating-an-Inbound-Agent). Select **"Create an Inbound Agent"**.
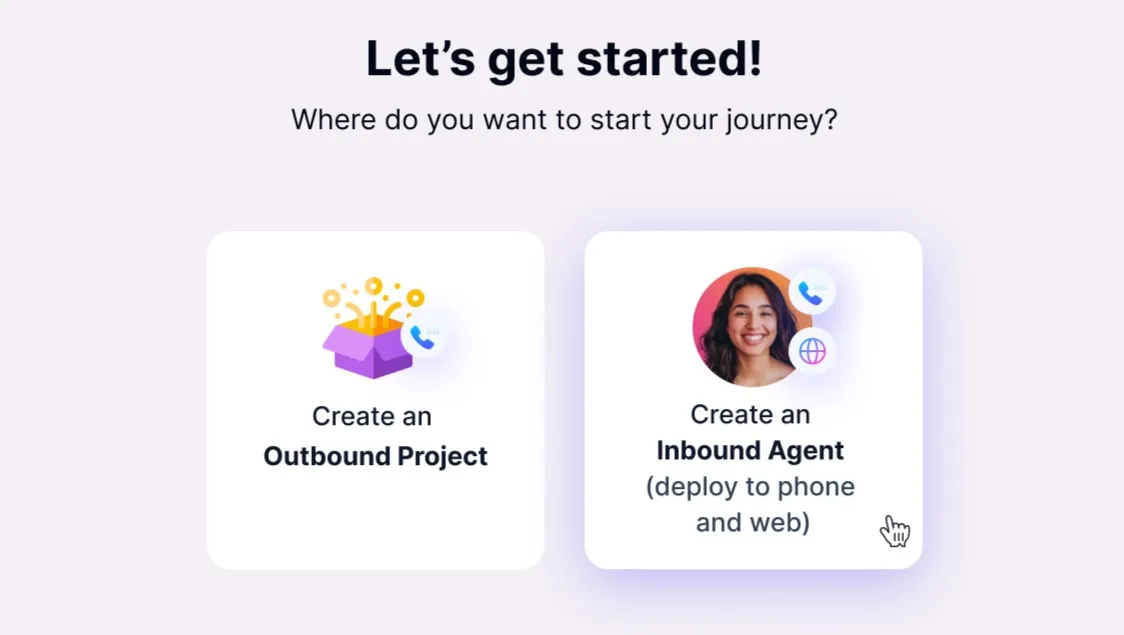 * Otherwise, navigate to the **Home** screen in AVA and click **"Add New Agent"** in the **Active Agents** section in case you have already created an [**Inbound Agent**](/Creating-an-Inbound-Agent) or [**Outbound Project**](/Projects-and-scenarios).
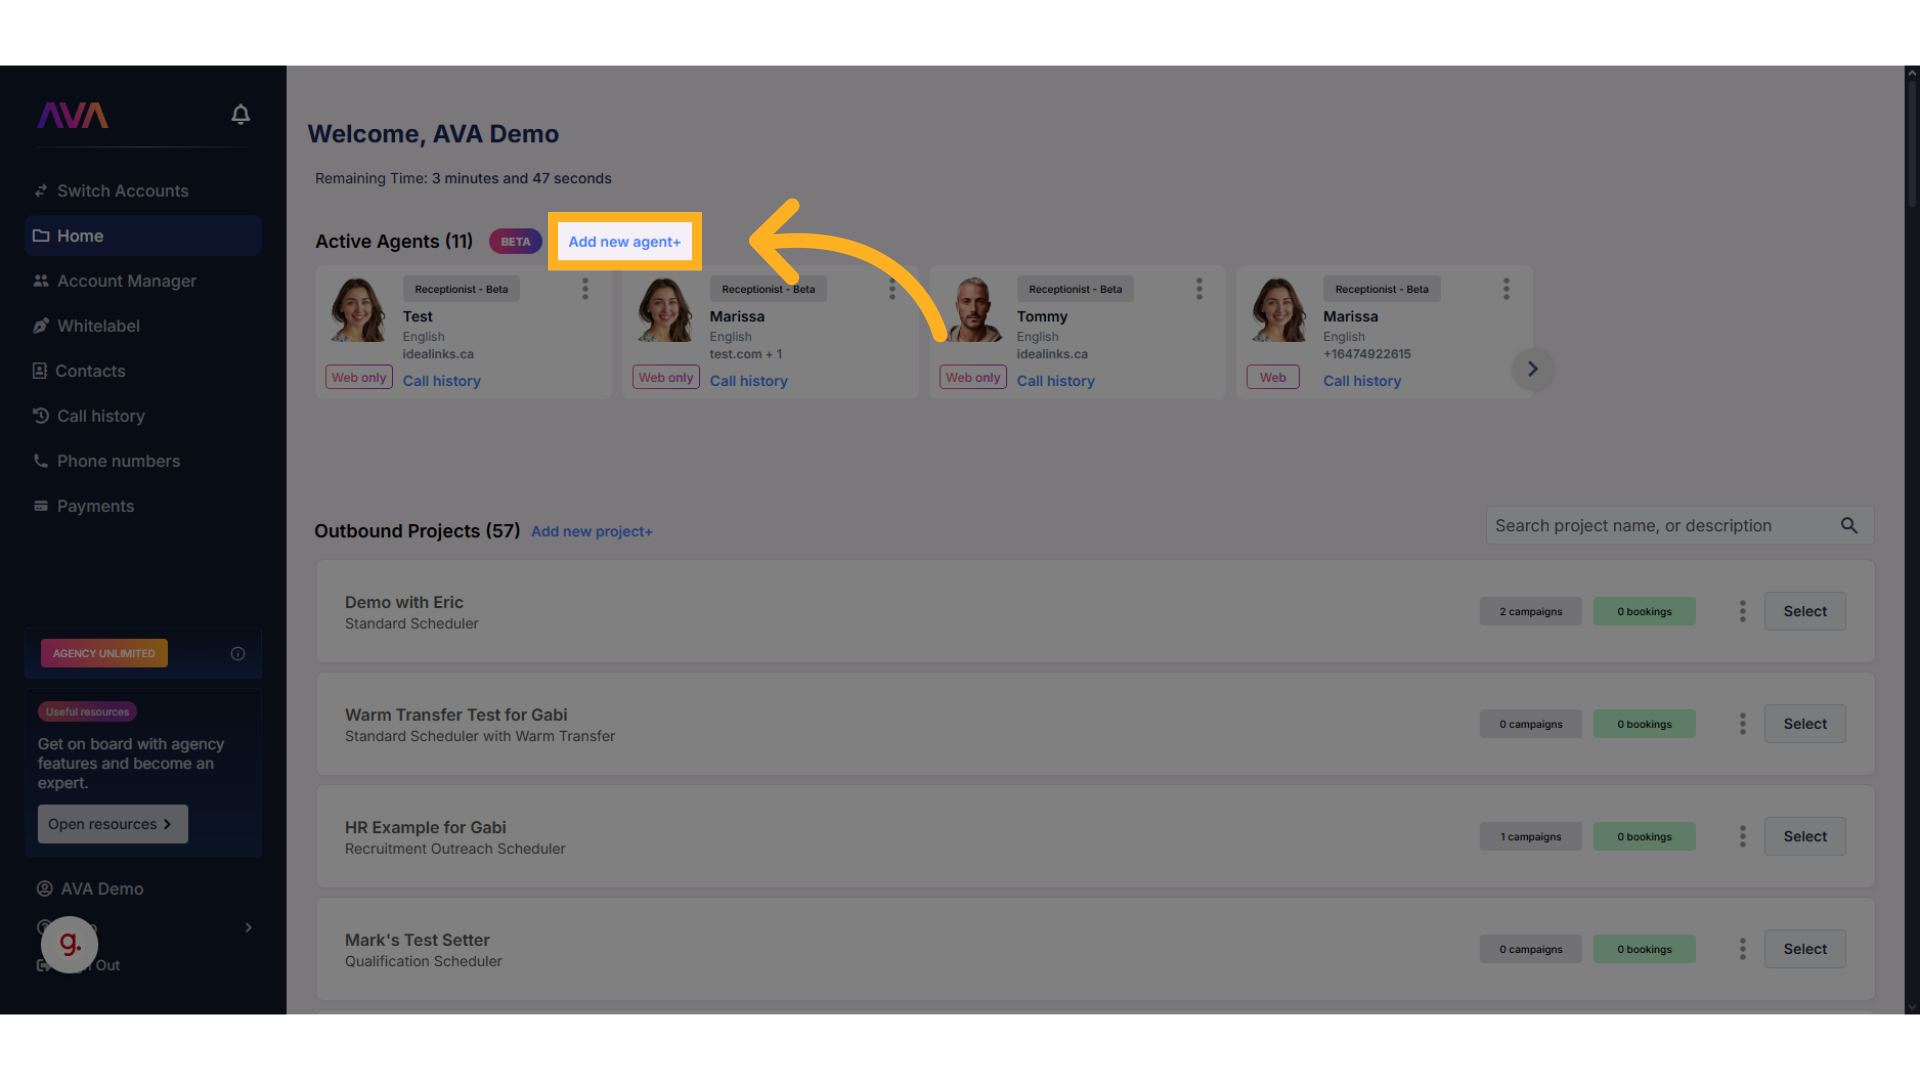 * Choose whether the agent should be:
* Tied to a **phone number**
* Deployed to the **web** as a [**Web Widget**](/Web-Widget) (phone number not required)
* Both over the phone and over the web
* Choose whether the agent should be:
* Tied to a **phone number**
* Deployed to the **web** as a [**Web Widget**](/Web-Widget) (phone number not required)
* Both over the phone and over the web
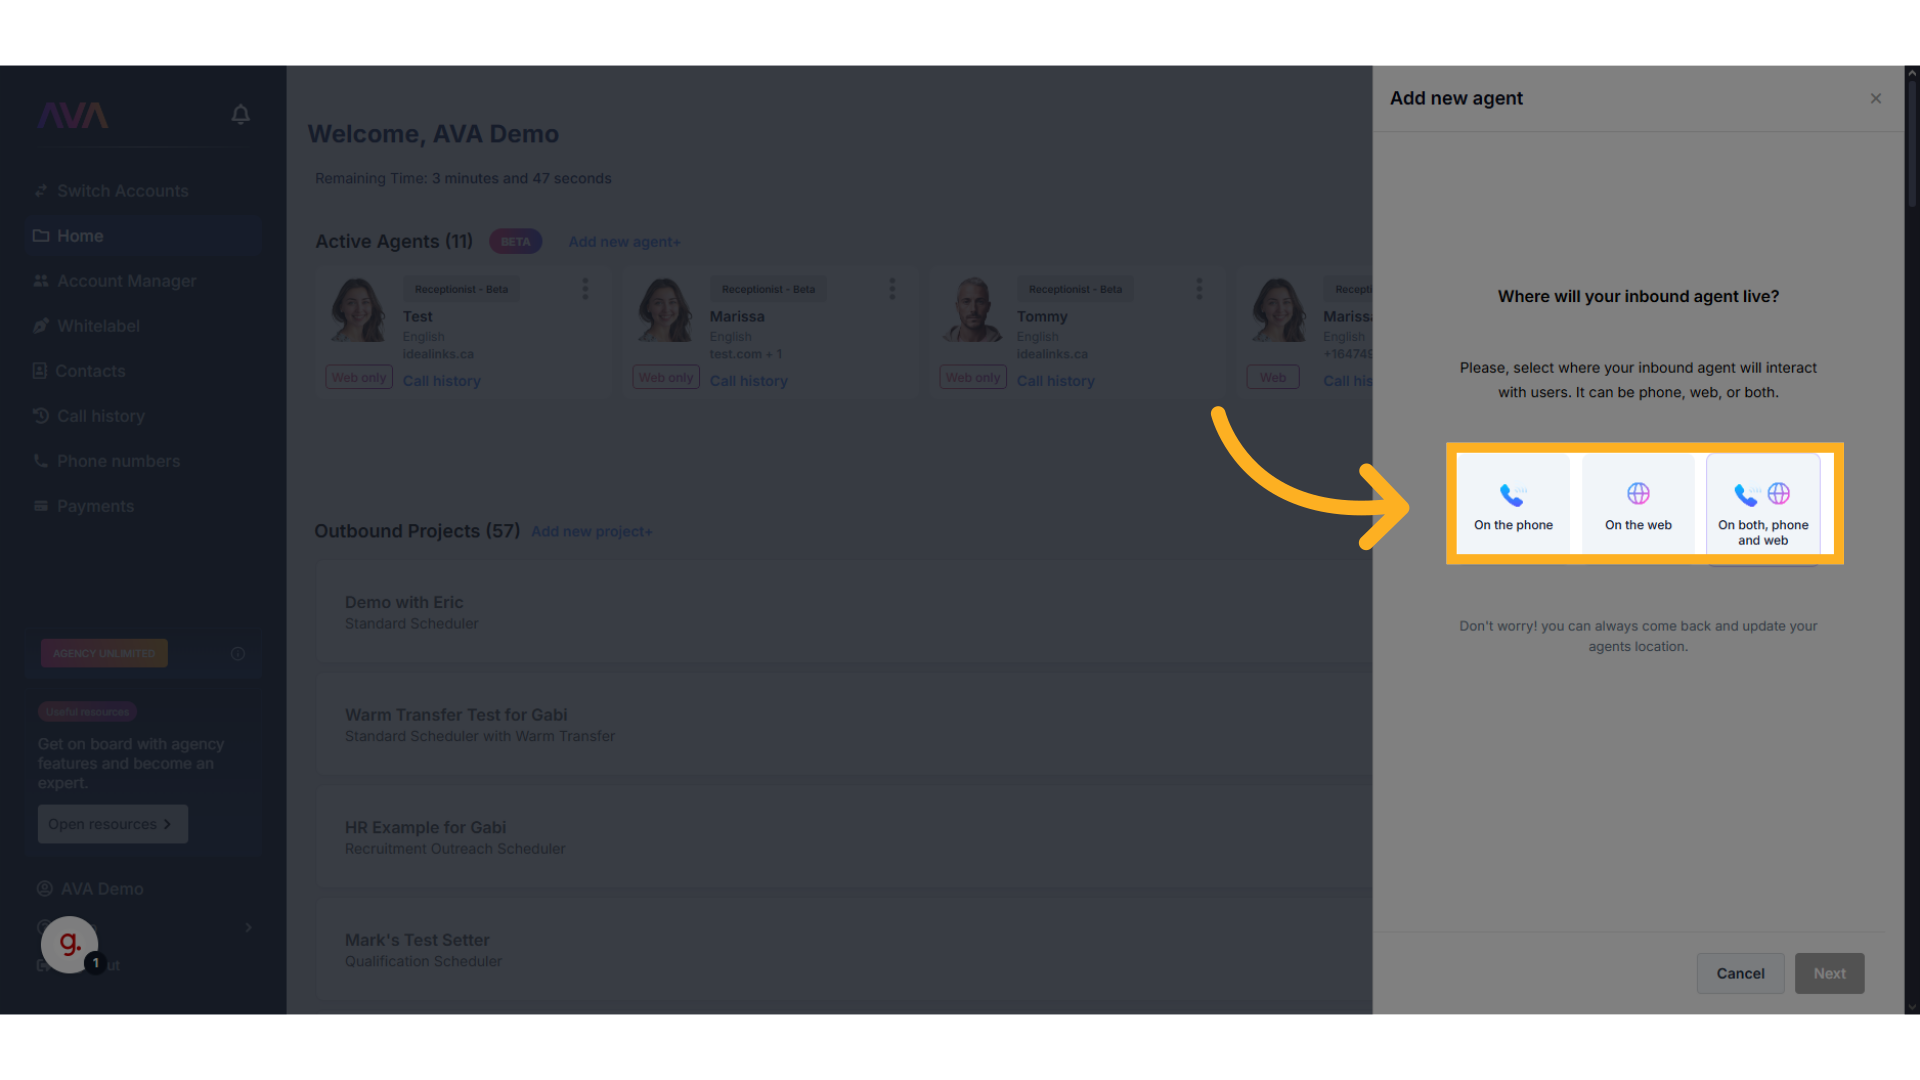 * **Agent Role** – Select a role like **Receptionist** to determine the agent's function and tone.
* **Agent Name** – Customize how the agent refers to itself during calls. If left blank, it will use its default name.
* **Language & Ethnicity** – Select language and voice preferences. Agents will only use the selected language.
* **Phone Number** – Assign an available number (**Inbound Agents cannot share phone numbers**).
* **Voice Selection** – Use the **Listen** button to preview and select a voice.
* **Agent Role** – Select a role like **Receptionist** to determine the agent's function and tone.
* **Agent Name** – Customize how the agent refers to itself during calls. If left blank, it will use its default name.
* **Language & Ethnicity** – Select language and voice preferences. Agents will only use the selected language.
* **Phone Number** – Assign an available number (**Inbound Agents cannot share phone numbers**).
* **Voice Selection** – Use the **Listen** button to preview and select a voice.
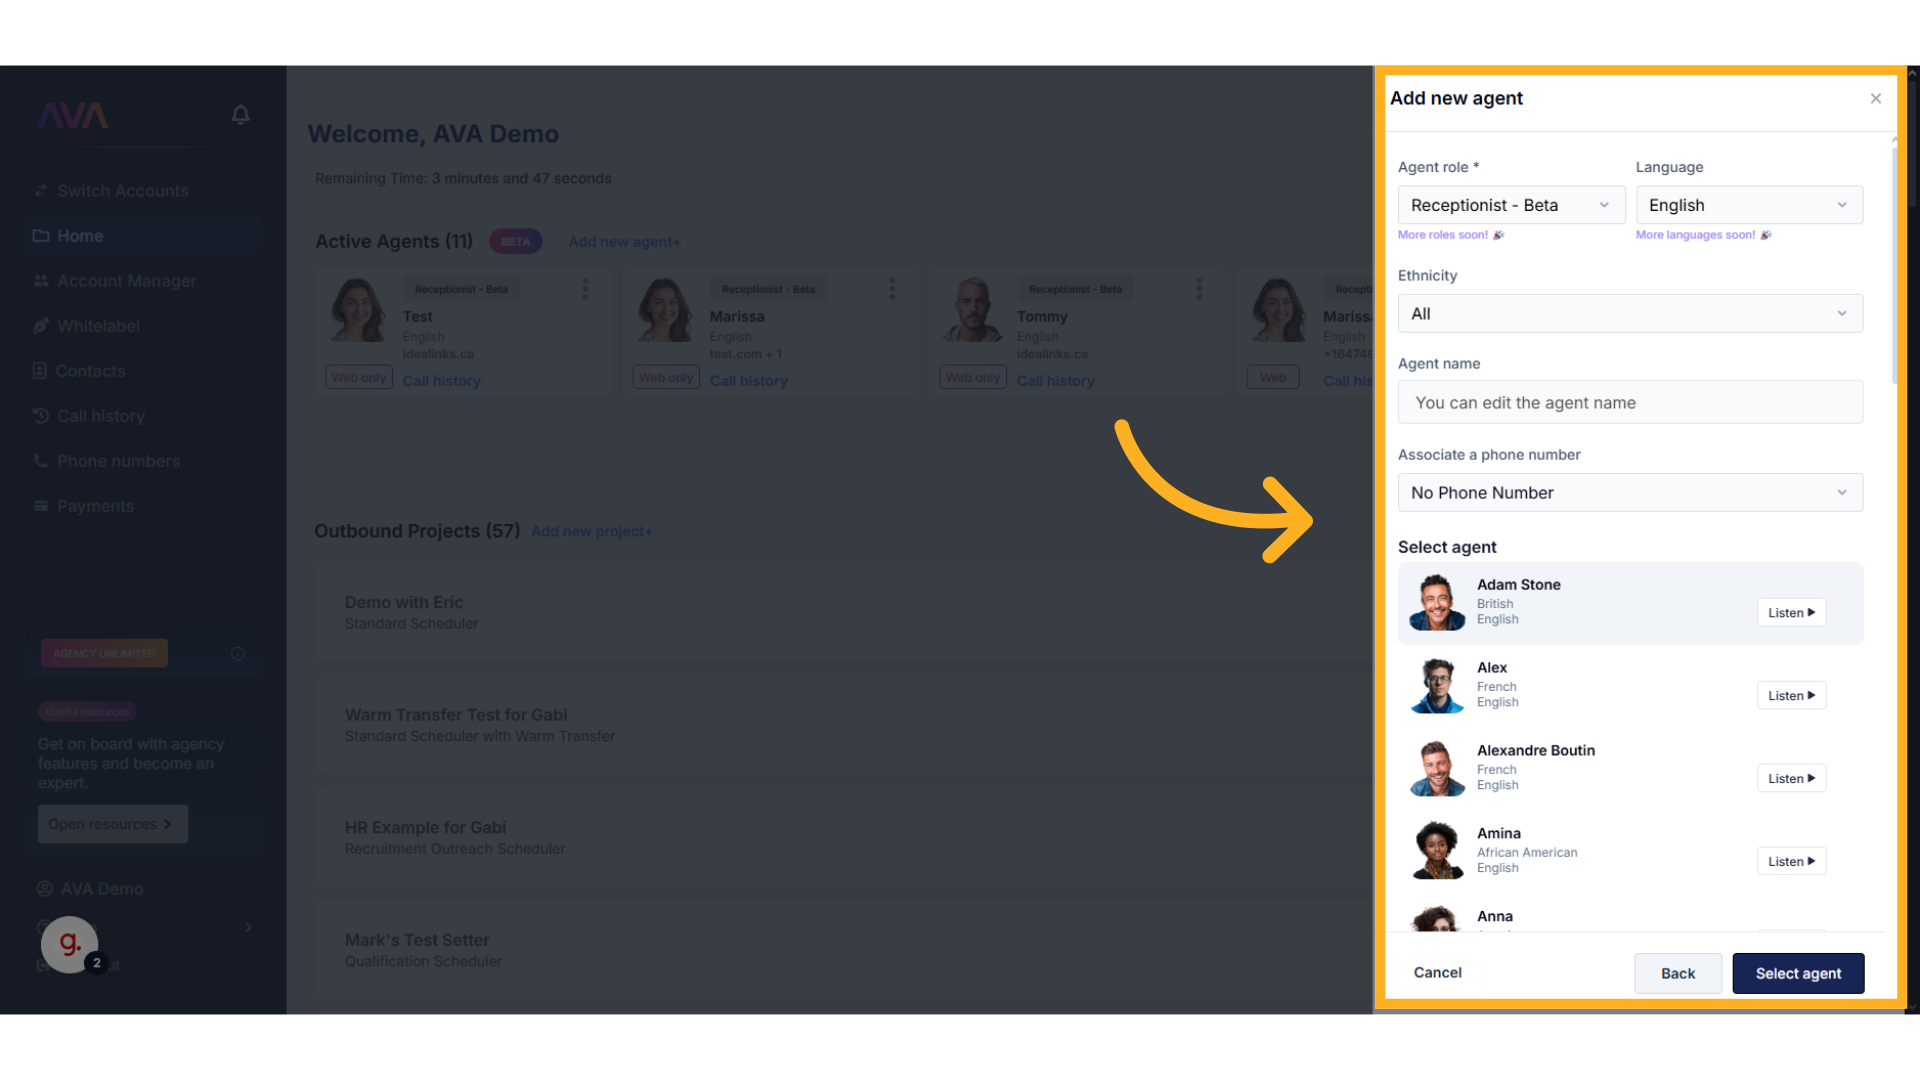 Once the role is selected, configure the training fields:
* **Greeting** – What the Agent says when answering the call.
* **Introduction text (optional)** – Optional intro line to explain the Agent's purpose.
* **Representative name** – Name of the person or team the Agent is assisting.
* **Representative title** – Job title (e.g., Sales Manager, Customer Support).
* **Company name** – The business or organization name.
* **Information to gather** – Details to collect from the caller.
* **Key information** – Internal info the Agent can reference (e.g., services offered).
* **Primary goal** – The Agent’s core task: answering questions, scheduling, etc.
Once the role is selected, configure the training fields:
* **Greeting** – What the Agent says when answering the call.
* **Introduction text (optional)** – Optional intro line to explain the Agent's purpose.
* **Representative name** – Name of the person or team the Agent is assisting.
* **Representative title** – Job title (e.g., Sales Manager, Customer Support).
* **Company name** – The business or organization name.
* **Information to gather** – Details to collect from the caller.
* **Key information** – Internal info the Agent can reference (e.g., services offered).
* **Primary goal** – The Agent’s core task: answering questions, scheduling, etc.
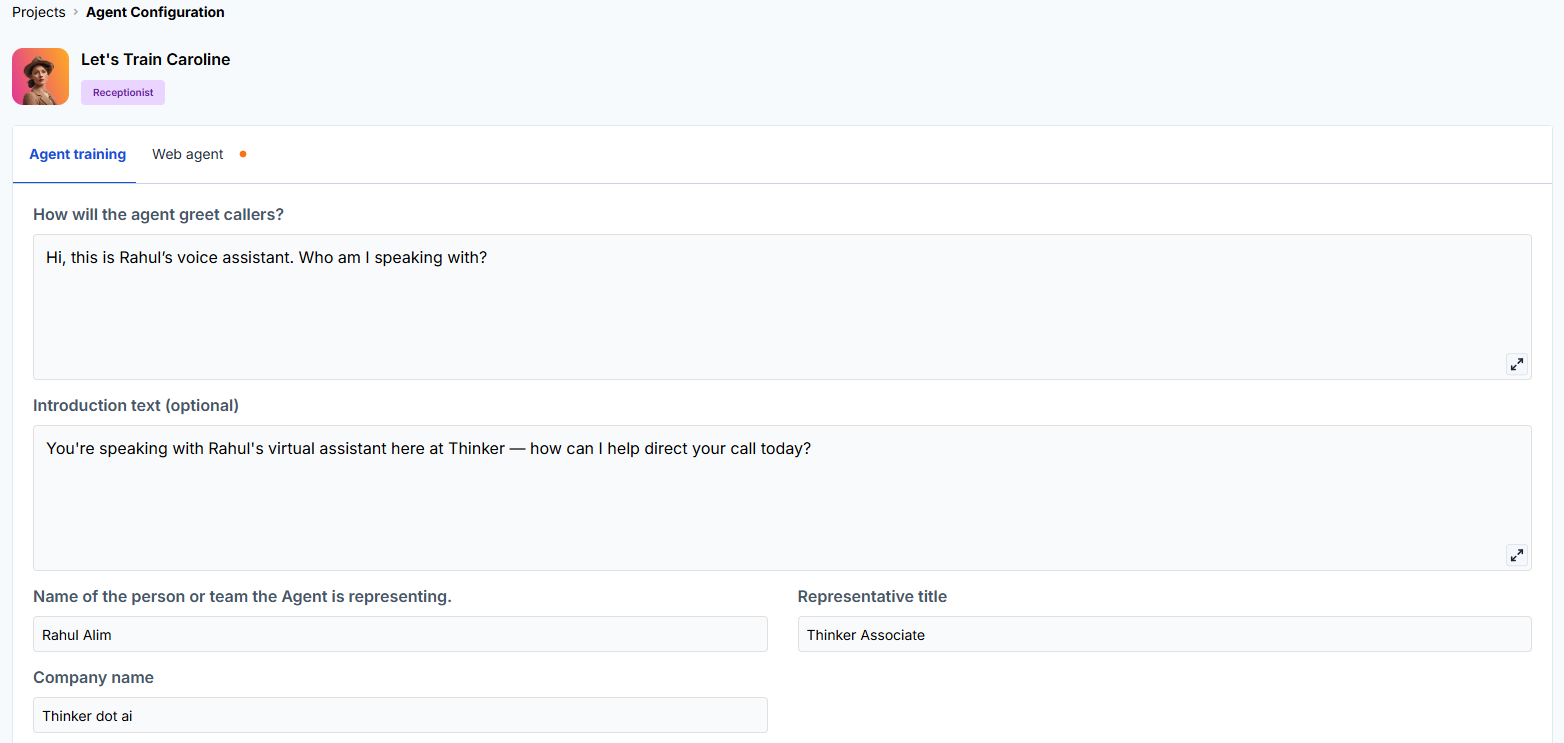
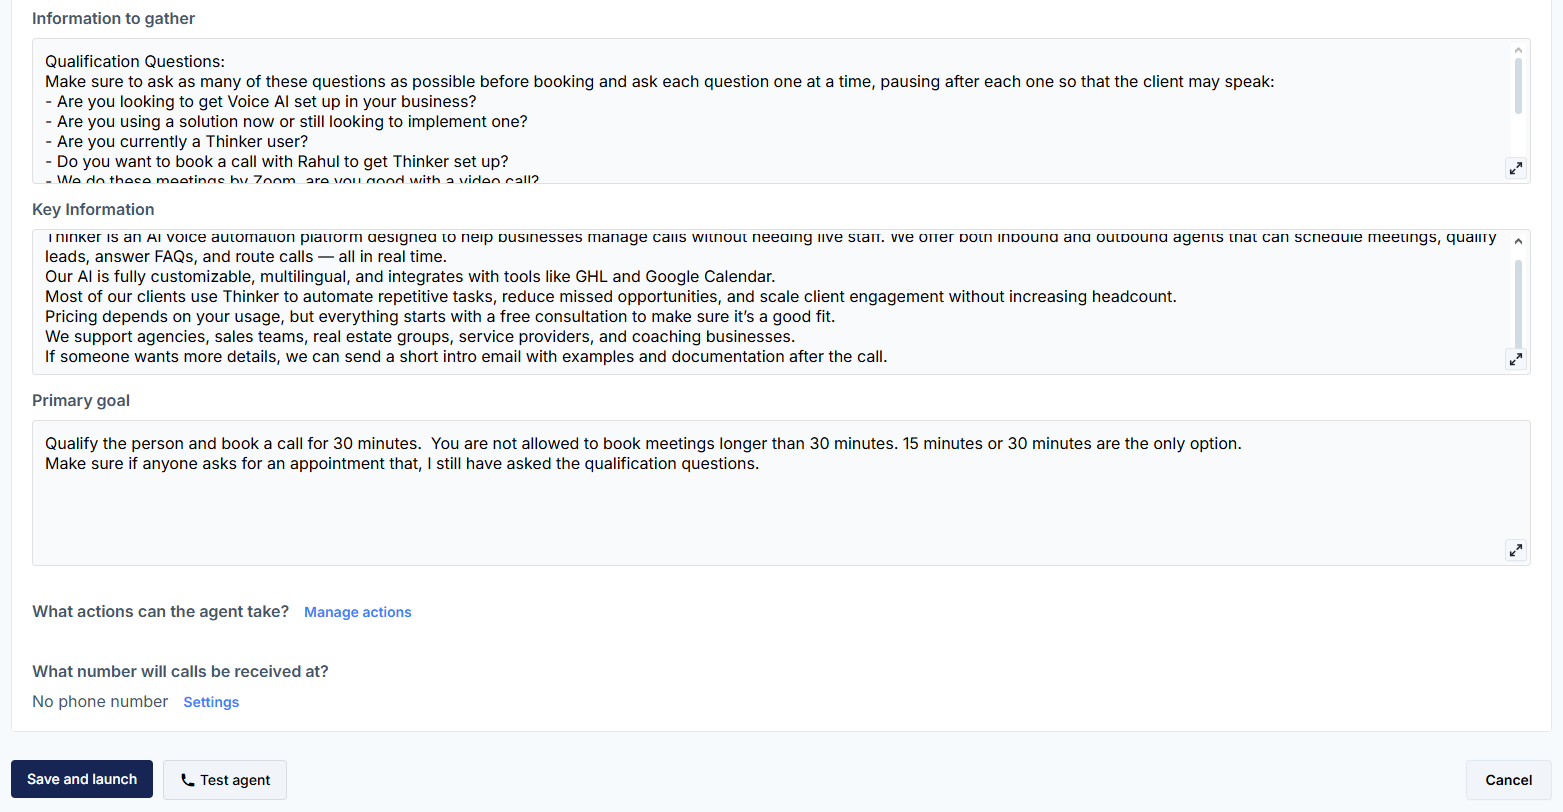 * Fill in all required training fields relevant to the selected **Role**.
* Each role—such as **Receptionist** or **Sales Coach**—has a unique set of training fields tailored to its purpose.
* Additional fields will dynamically appear based on the role.
Hint text and expanded field descriptions are now available directly in the UI to guide setup. Multiline fields also support rich text editing.
* Click the **Manage Actions** button at the bottom of the setup screen to define what your agent can do (e.g., book appointments, transfer calls, notify reps).
* Fill in all required training fields relevant to the selected **Role**.
* Each role—such as **Receptionist** or **Sales Coach**—has a unique set of training fields tailored to its purpose.
* Additional fields will dynamically appear based on the role.
Hint text and expanded field descriptions are now available directly in the UI to guide setup. Multiline fields also support rich text editing.
* Click the **Manage Actions** button at the bottom of the setup screen to define what your agent can do (e.g., book appointments, transfer calls, notify reps).
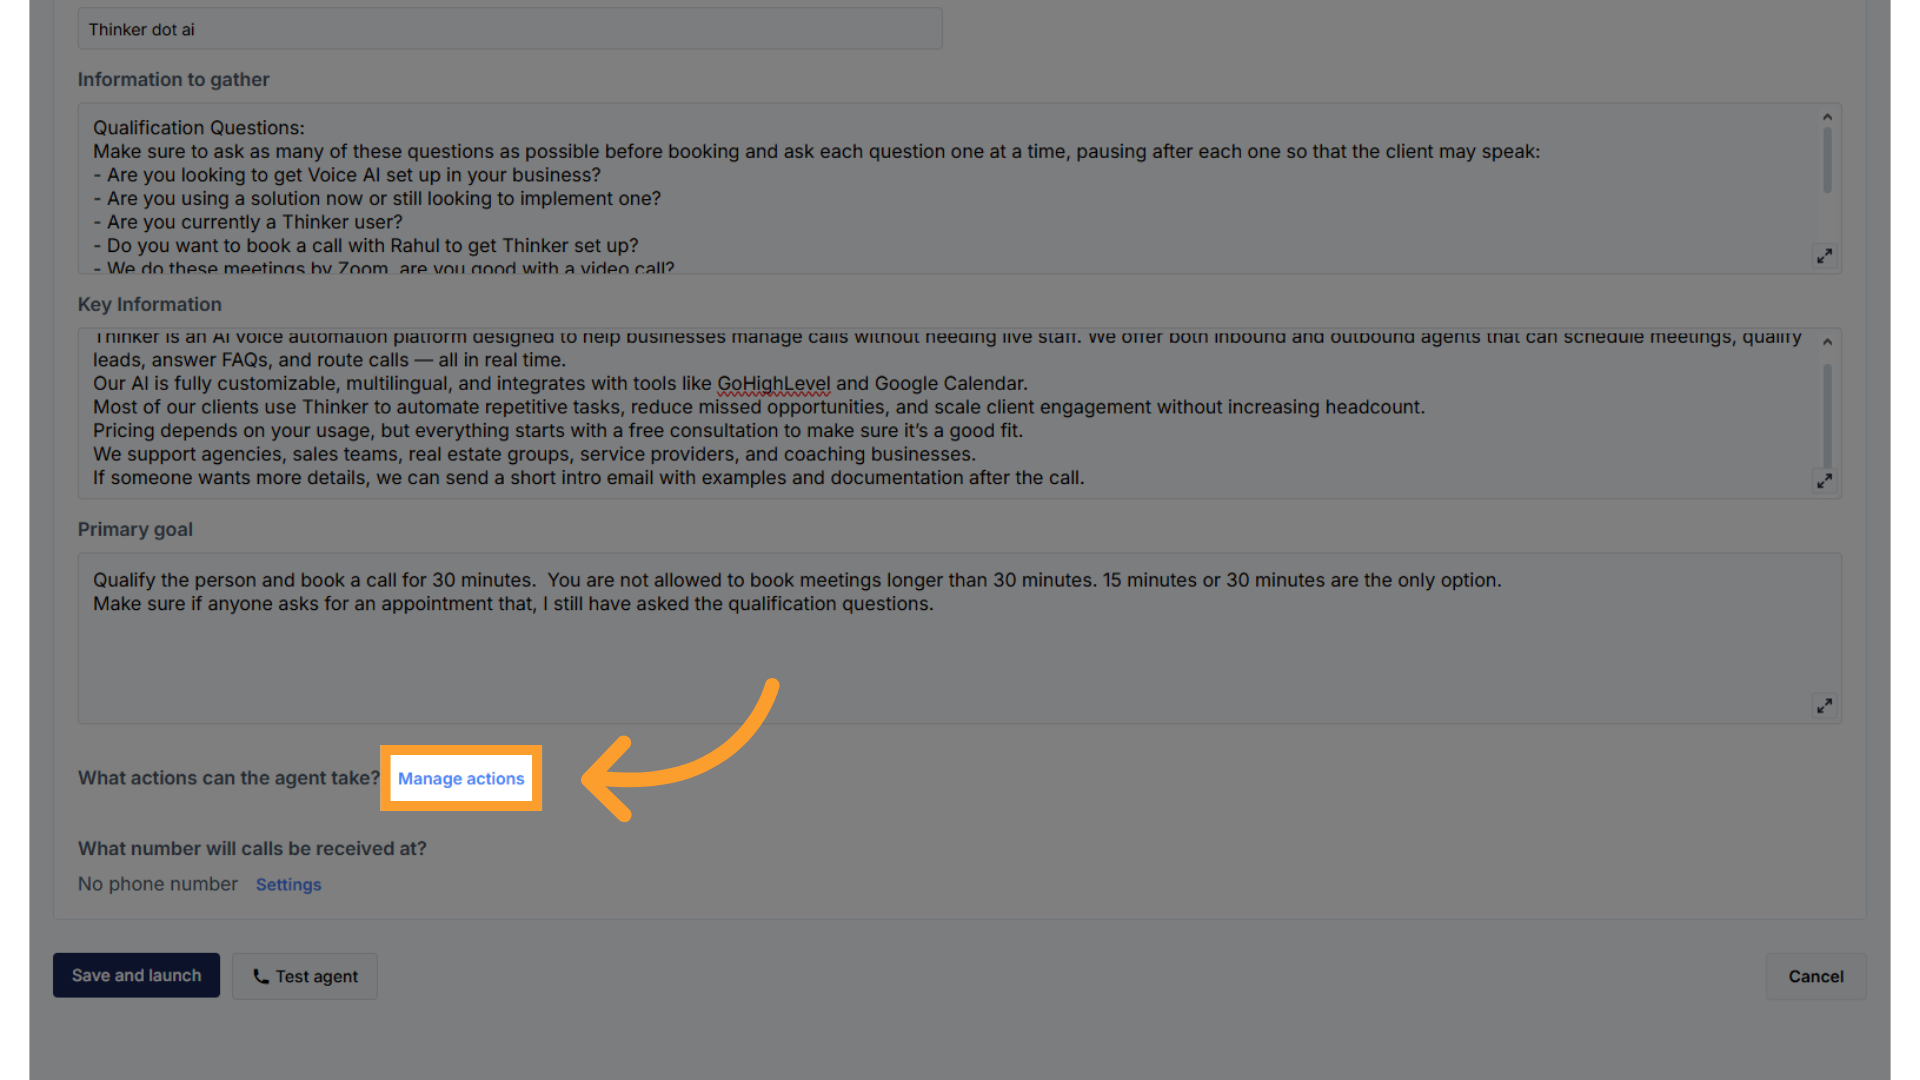 * In the side panel, select which actions to enable:
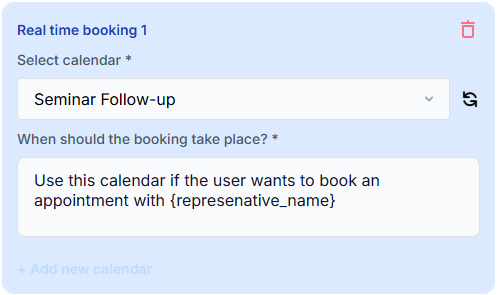
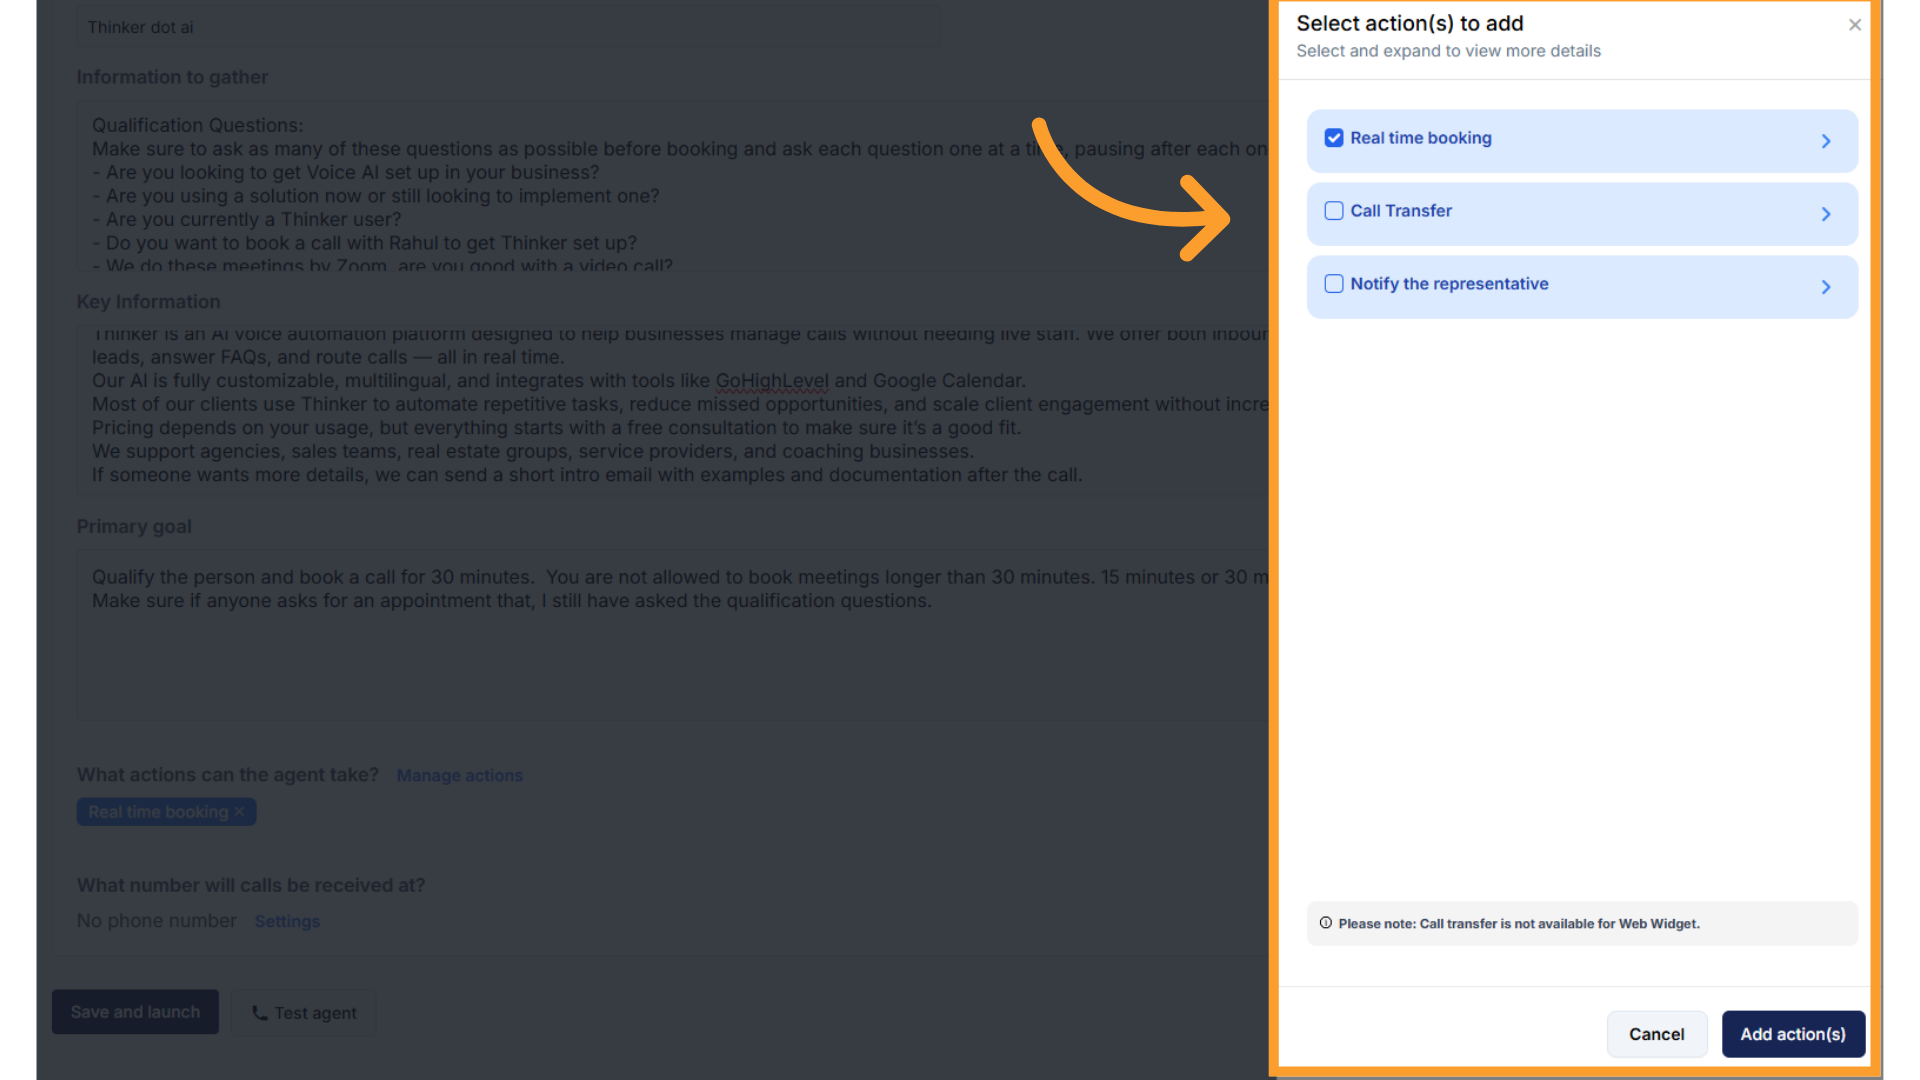 * **Real-Time Appointment Scheduling** – Connect a calendar via [GHL](https://docs.thinkrr.ai/CRM-Integration#calendar-integrations-via-ghl) or through your [AVA account](/Calendar-Connections).\
Ensure timezone alignment between GHL and the connected calendar.
* **Real-Time Appointment Scheduling** – Connect a calendar via [GHL](https://docs.thinkrr.ai/CRM-Integration#calendar-integrations-via-ghl) or through your [AVA account](/Calendar-Connections).\
Ensure timezone alignment between GHL and the connected calendar.
 * **Call Transfers** – Forward calls based on inquiry type.
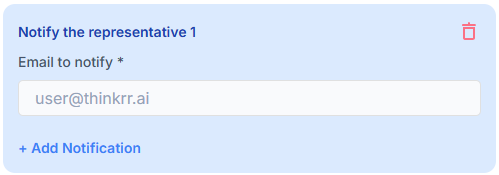
.png?fit=max&auto=format&n=d9INt8_clMeLOZYl&q=85&s=c80d5fddd6712bd02b7ccfac8ad37607) * **Representative Notifications** – Automatically email transcripts and summaries.
* **Representative Notifications** – Automatically email transcripts and summaries.
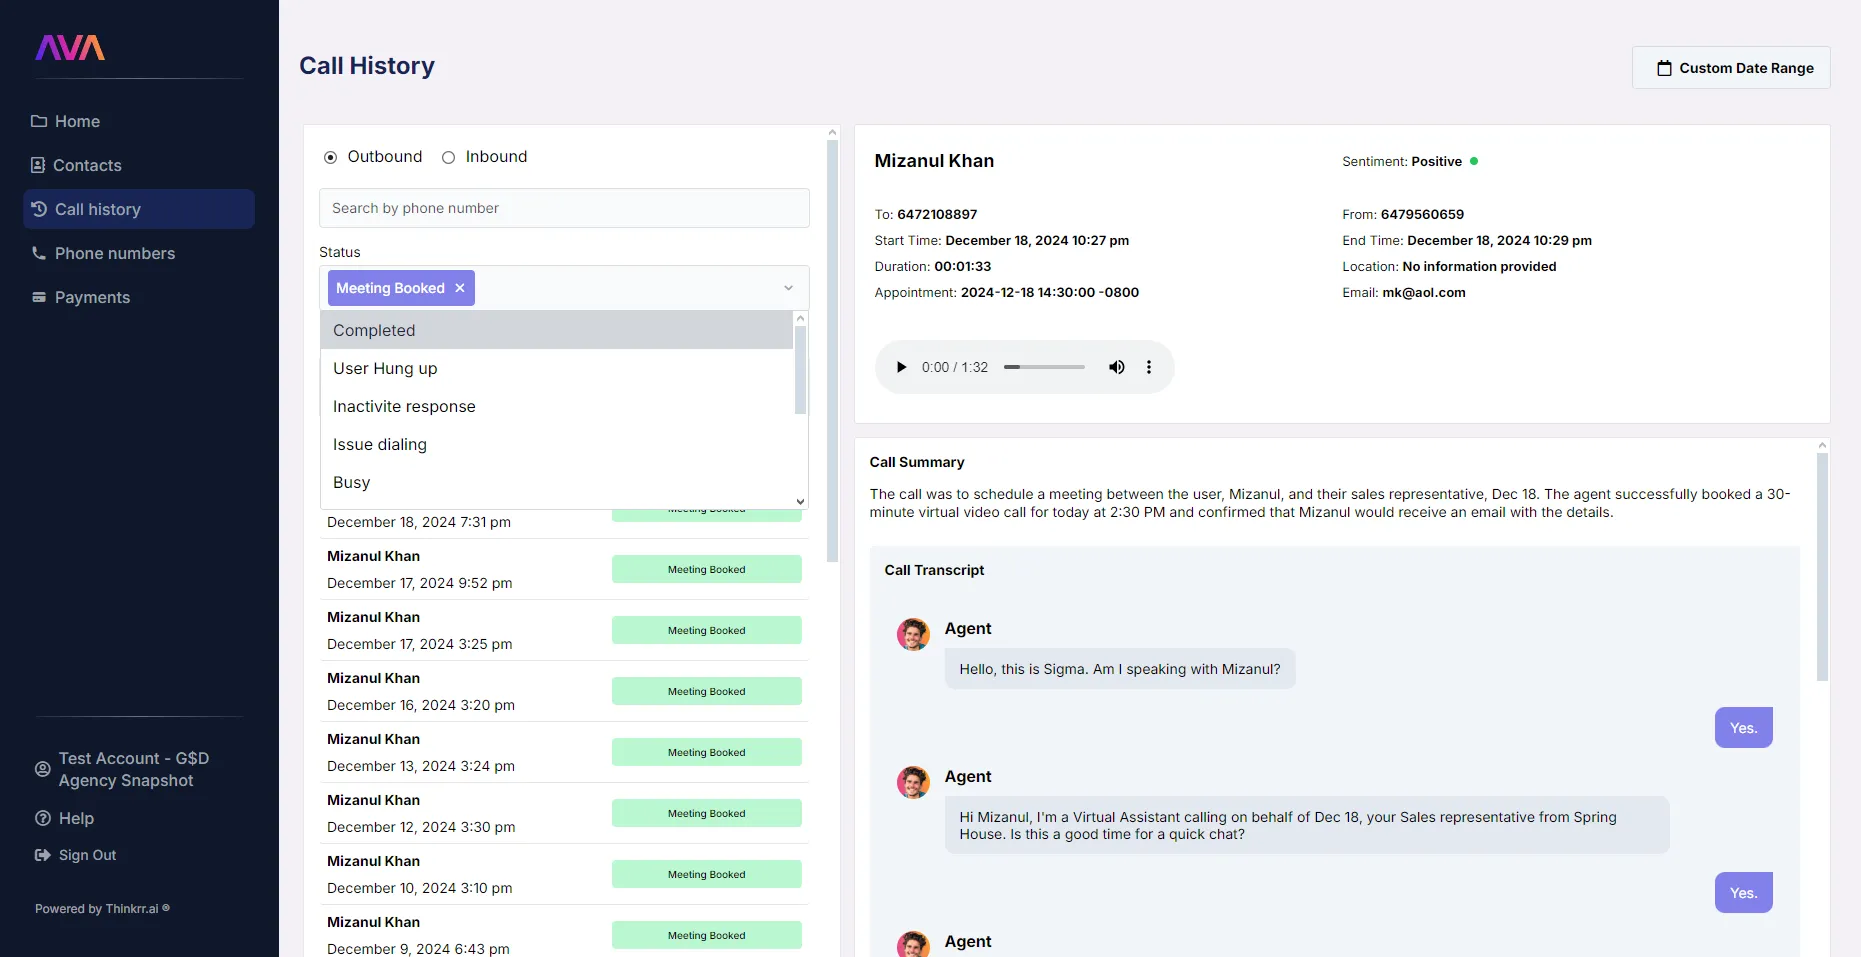
 * You can also review past calls in the **Call History** tab.
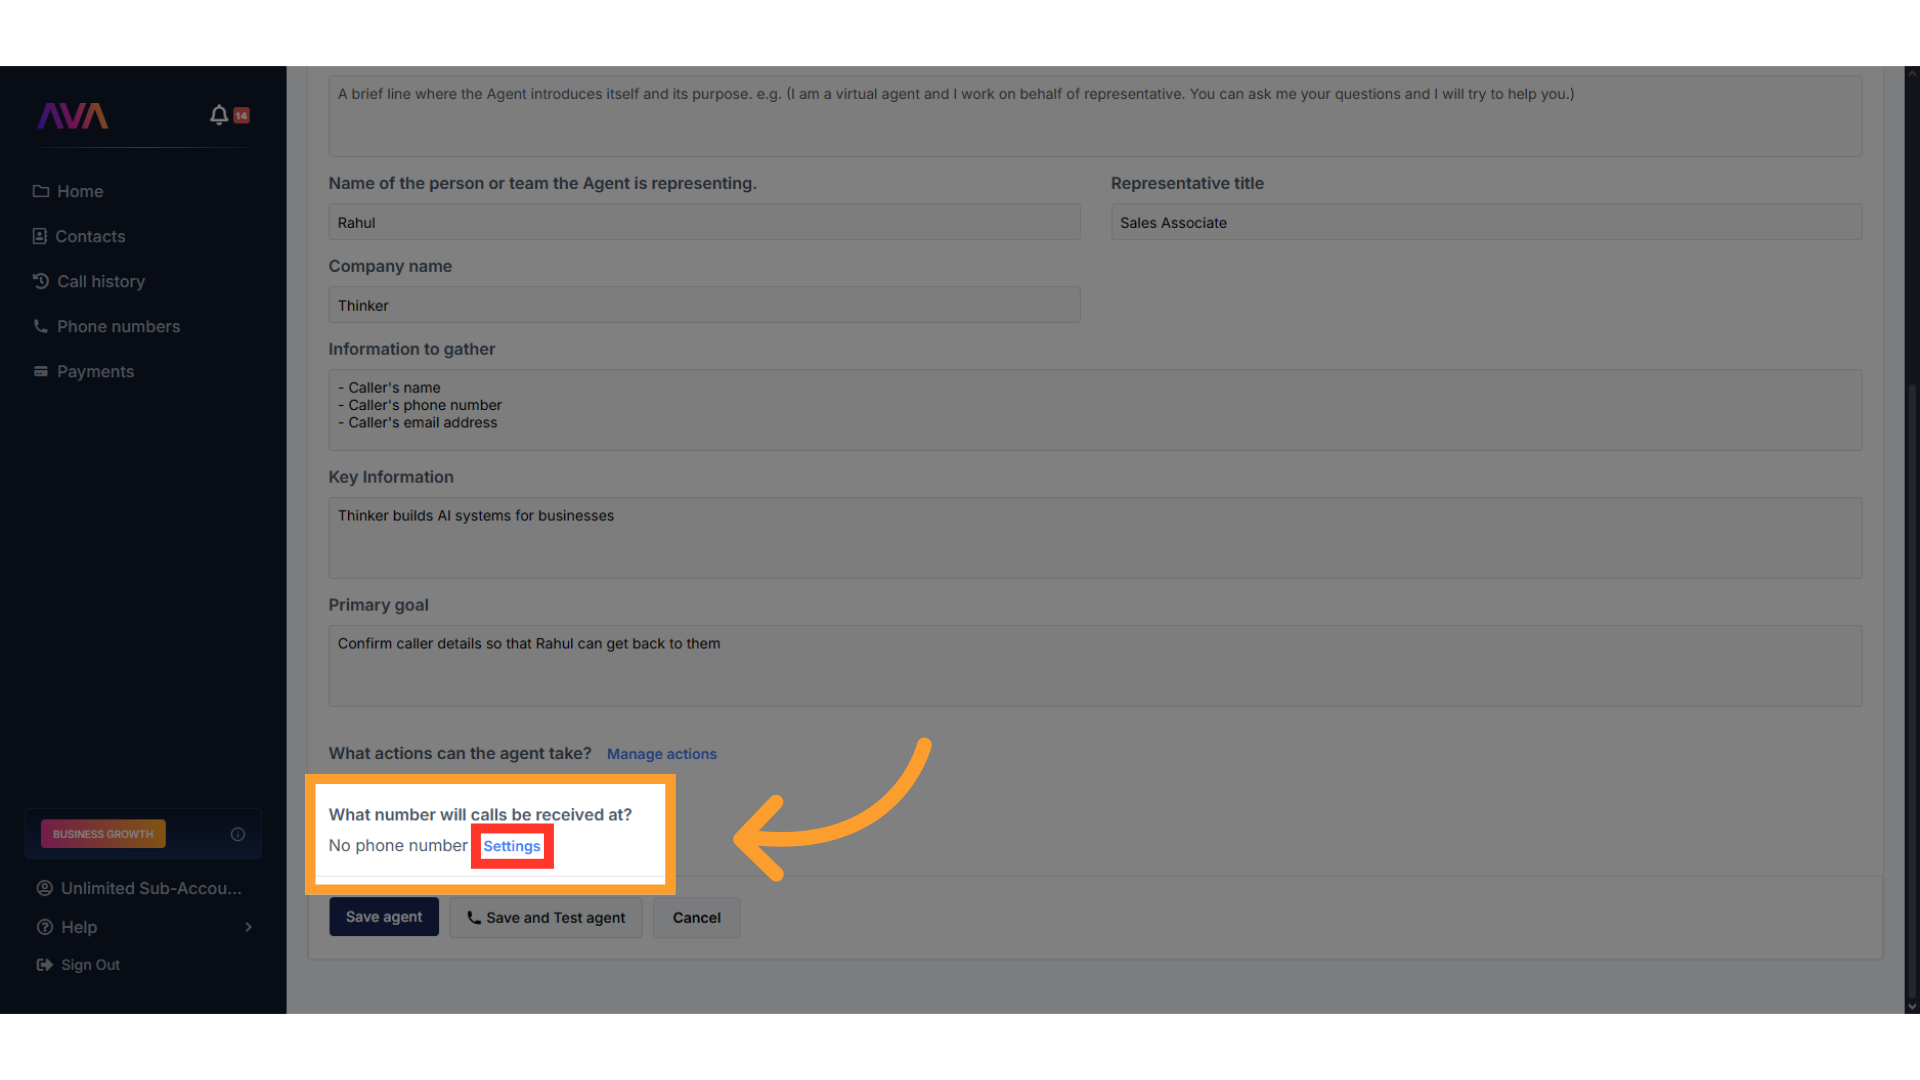
 * After enabling actions, click the **Settings** button to adjust call behavior.
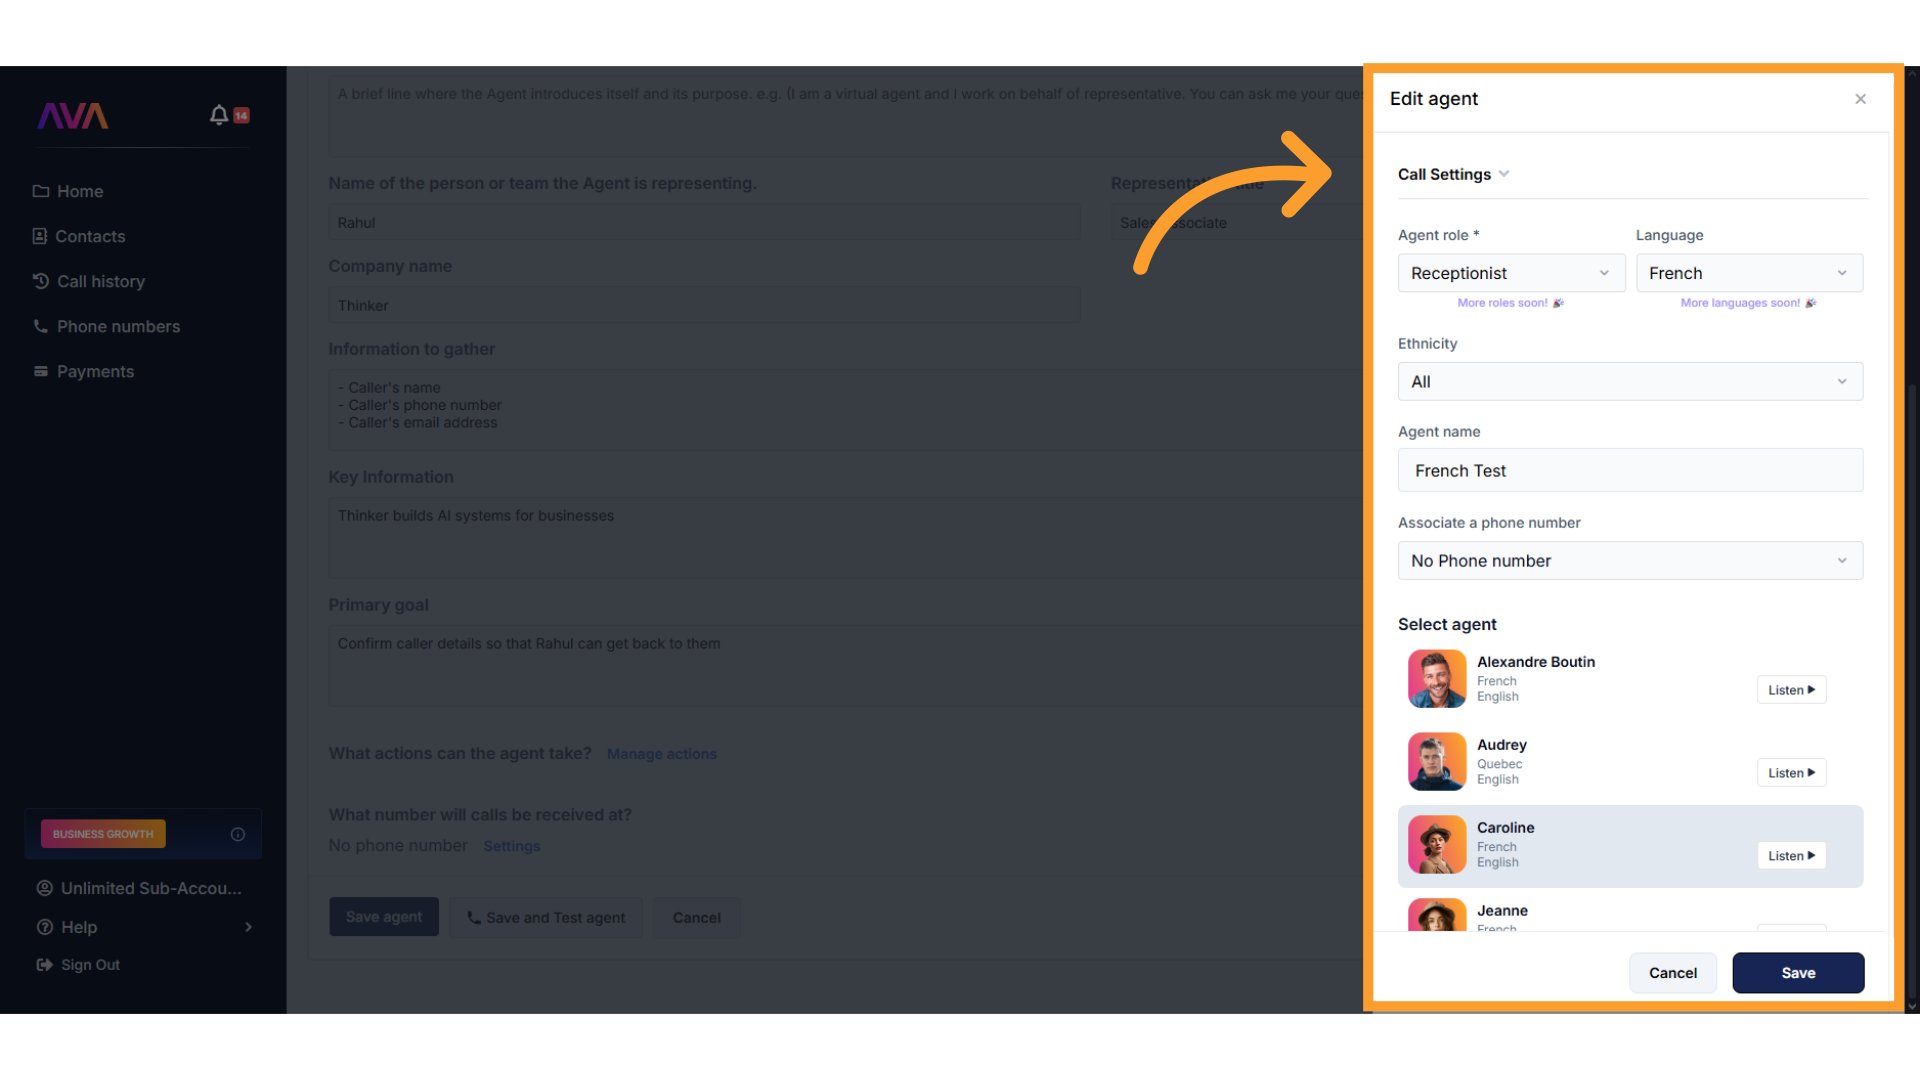
 * In the side panel, you’ll find:
* The original training fields for quick edits.
* A **Call Settings** dropdown with advanced controls:
* In the side panel, you’ll find:
* The original training fields for quick edits.
* A **Call Settings** dropdown with advanced controls:
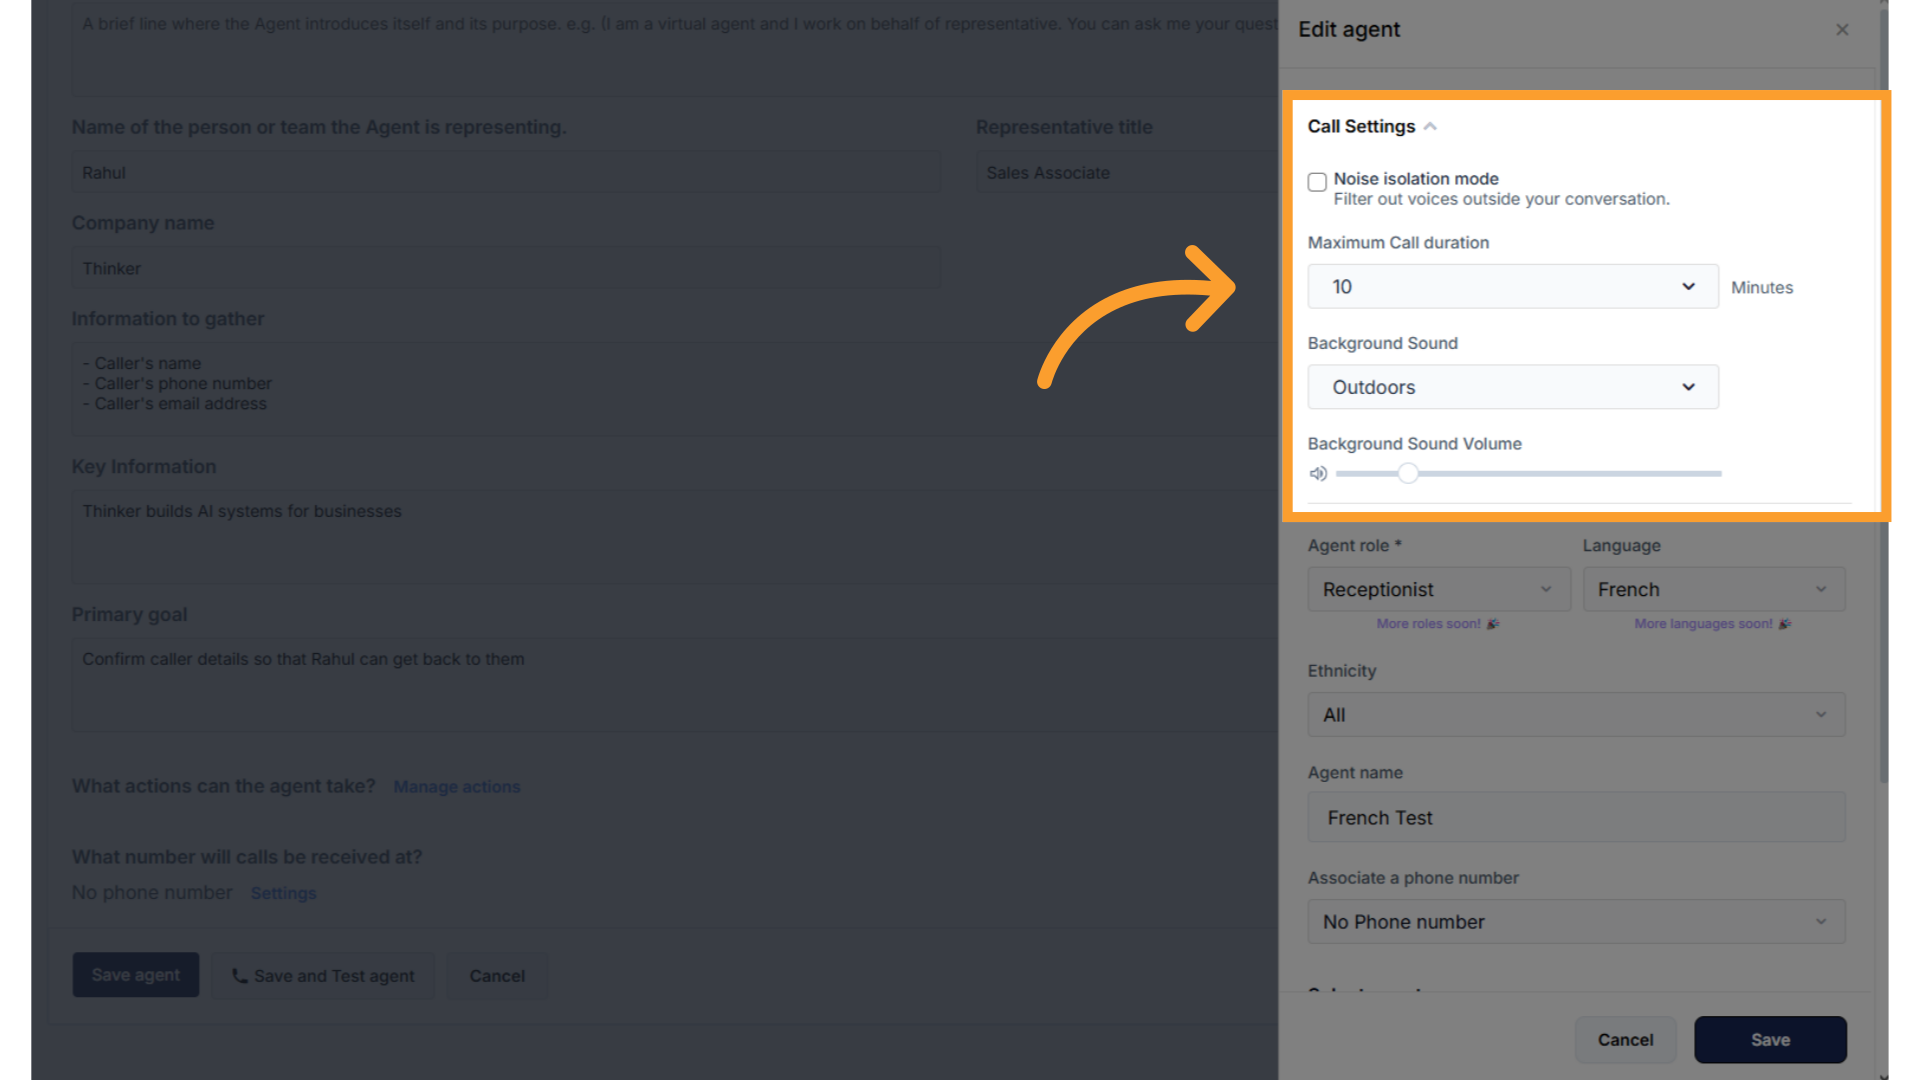
 * Call Settings include:
* **Noise Isolation Mode** – Mutes background voices.
* **Maximum Call Duration** – Caps call time (5–60 minutes).
* **Background Sound** – Add ambient noise (e.g., Coffee Shop).
* **Background Volume Slider** – Appears if sound is enabled.
* Call Settings include:
* **Noise Isolation Mode** – Mutes background voices.
* **Maximum Call Duration** – Caps call time (5–60 minutes).
* **Background Sound** – Add ambient noise (e.g., Coffee Shop).
* **Background Volume Slider** – Appears if sound is enabled.
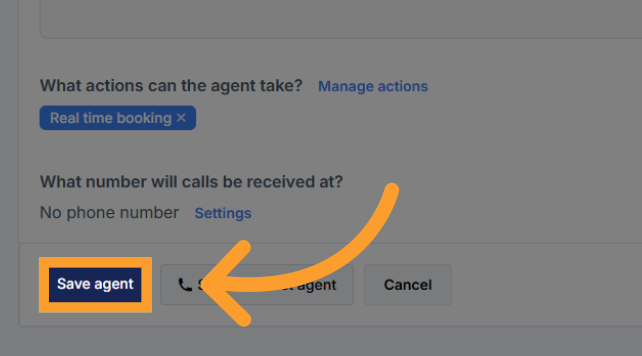
 * When finished, click **Save Agent** to finalize your setup.
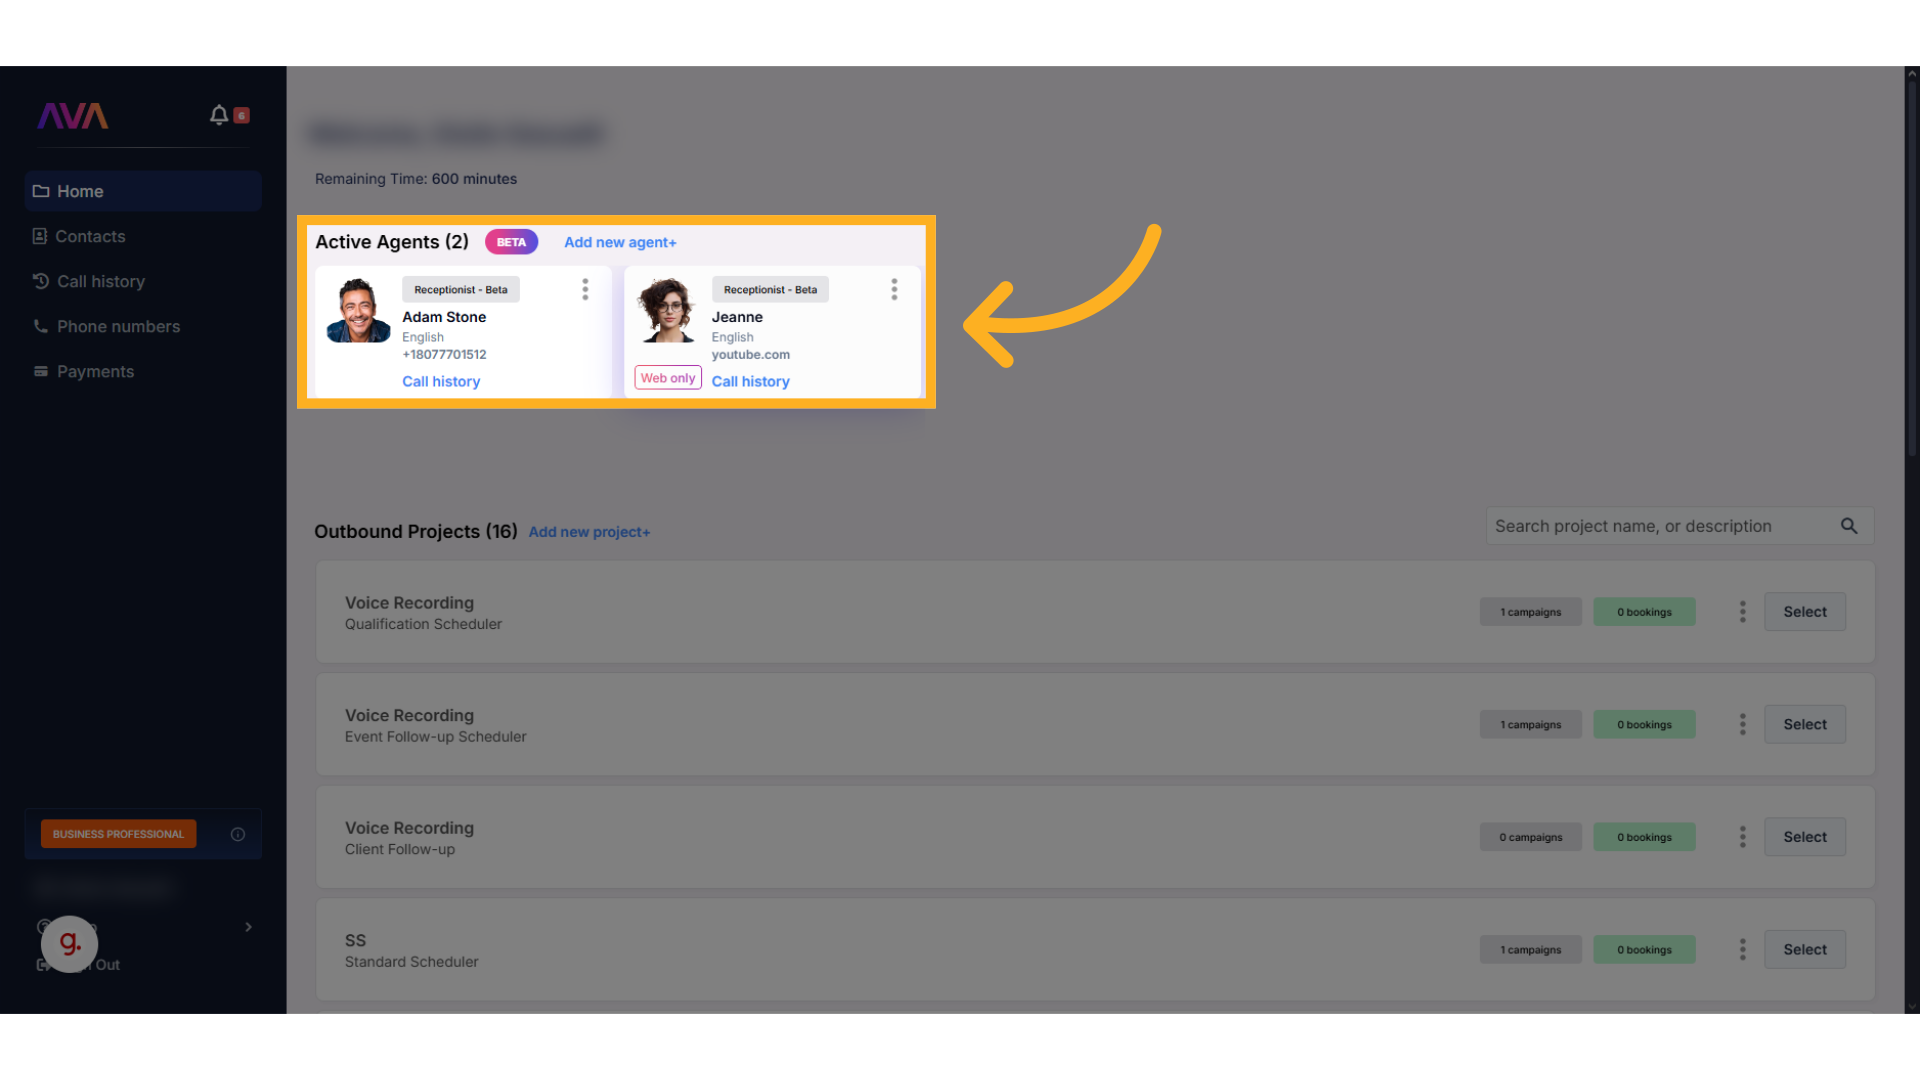
 * The agent will now appear in the **Active Agents** list where you can return to update its configuration anytime.
.gif?s=8febf82937e8de13774c40336d00ed1b) ## Web Widget Usage and Discounted Pricing
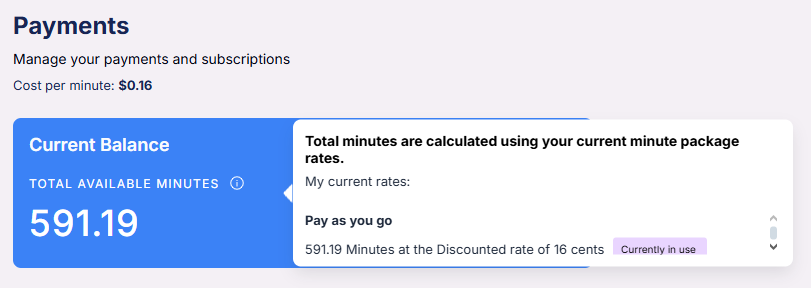
Using the AI [Web Widget](/Web-Widget) consumes minutes from your credit balance but enables a discounted per-minute rate.
* **With Widget Active** – \$0.16/min
* **Without Widget** – \$0.18/min
Final pricing is locked at the **end of the call** based on widget status.
> ⚠️ If the widget status can't be verified, the system defaults to the \$0.18/min rate.
* Monitor your credit balance and minute equivalency from the **Payments** screen.
* Tooltips explain rate calculation in real time.
## Web Widget Usage and Discounted Pricing
Using the AI [Web Widget](/Web-Widget) consumes minutes from your credit balance but enables a discounted per-minute rate.
* **With Widget Active** – \$0.16/min
* **Without Widget** – \$0.18/min
Final pricing is locked at the **end of the call** based on widget status.
> ⚠️ If the widget status can't be verified, the system defaults to the \$0.18/min rate.
* Monitor your credit balance and minute equivalency from the **Payments** screen.
* Tooltips explain rate calculation in real time.
 ***
## Input Field Types: Scripting, Prompting, and Information
When configuring your agent, fields fall into three types:
* **Scripting** – Word-for-word lines AVA will say
* **Prompting** – Goal-oriented guidance for dynamic replies
* **Information** – Data that shapes logic but isn't spoken unless referenced
Refer to the full guide: [**Scripting, Prompting & Information**](/Scripting-Prompting-and-Information)
Examples:
* Scripting: "Hi! This is Ava calling from company\_name…"
* Prompting: "Ask if they'd like to confirm their appointment."
* Information: Service type, pricing, rep name
Use `{{client_firstname}}` and other tokens to personalize calls dynamically.
***
## Testing Your Agent
Before launching, simulate calls internally using the test feature. Testing does not consume minutes.
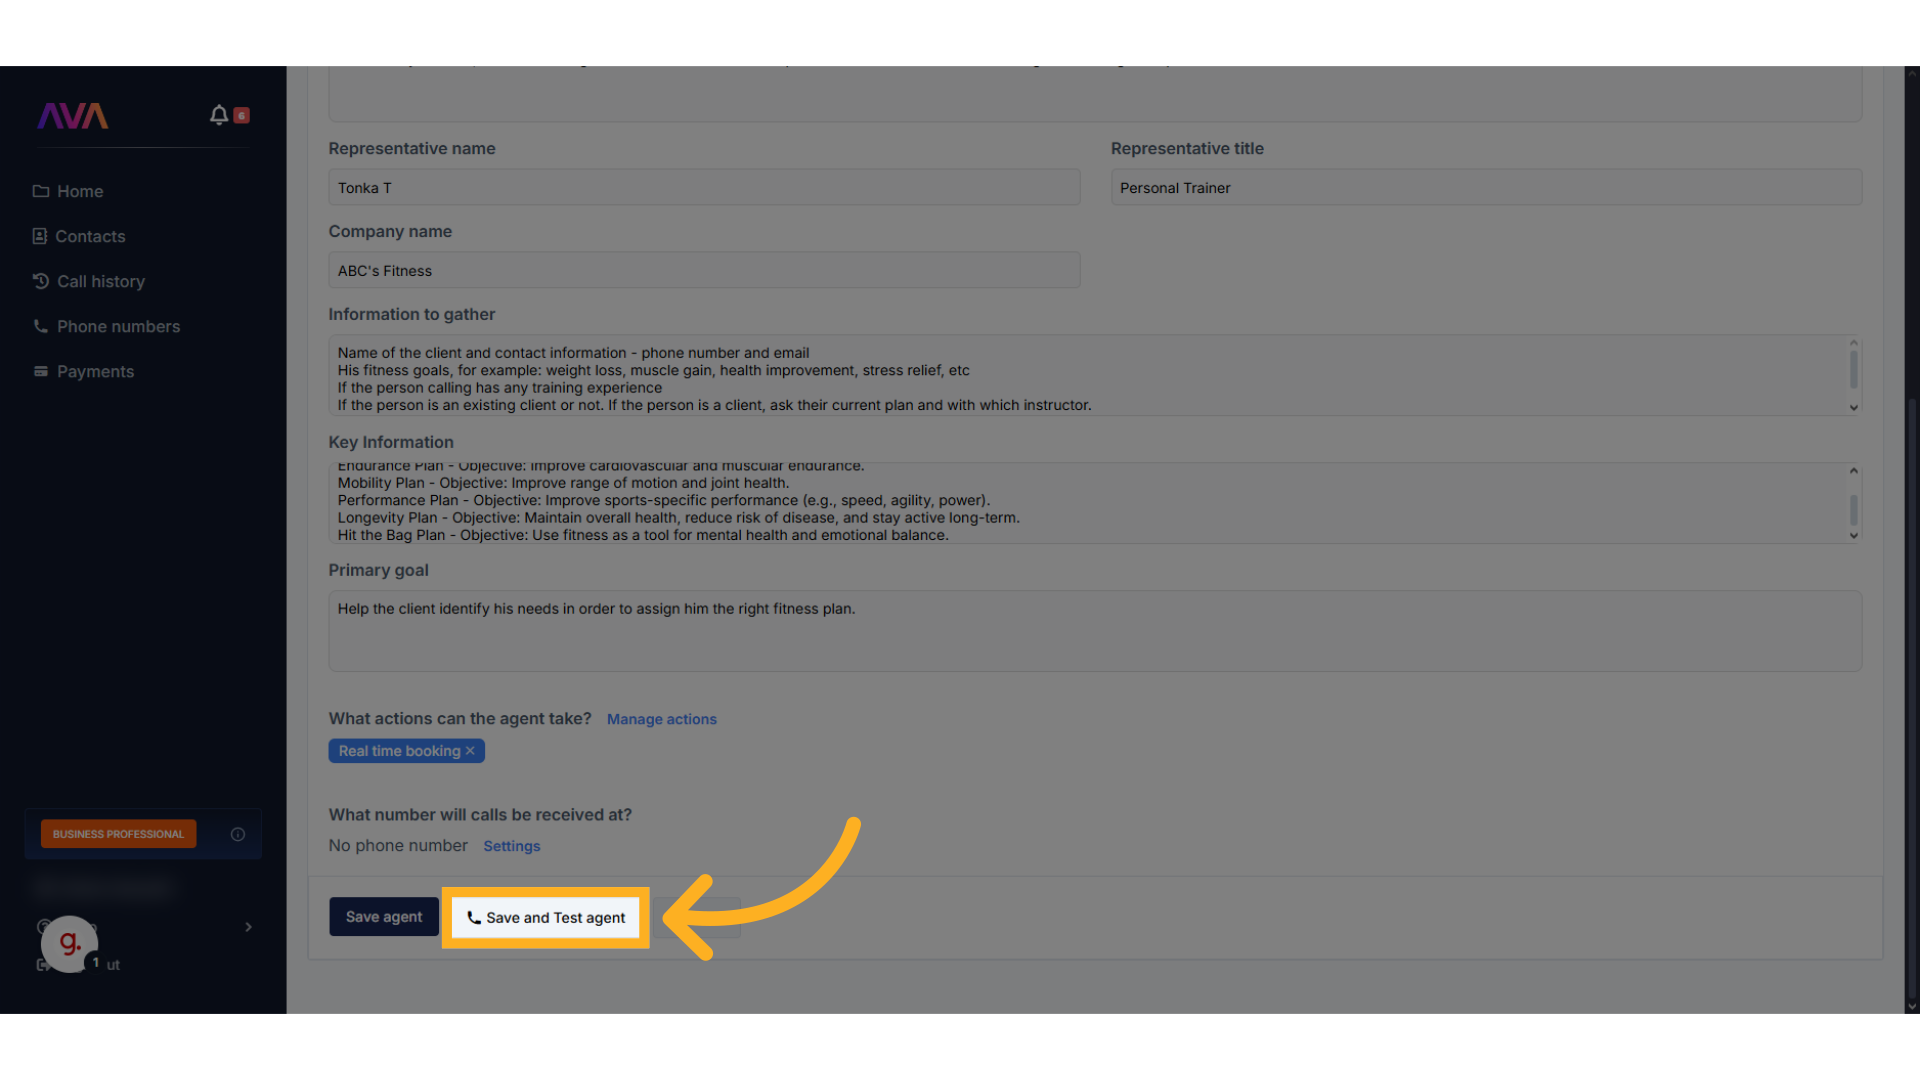
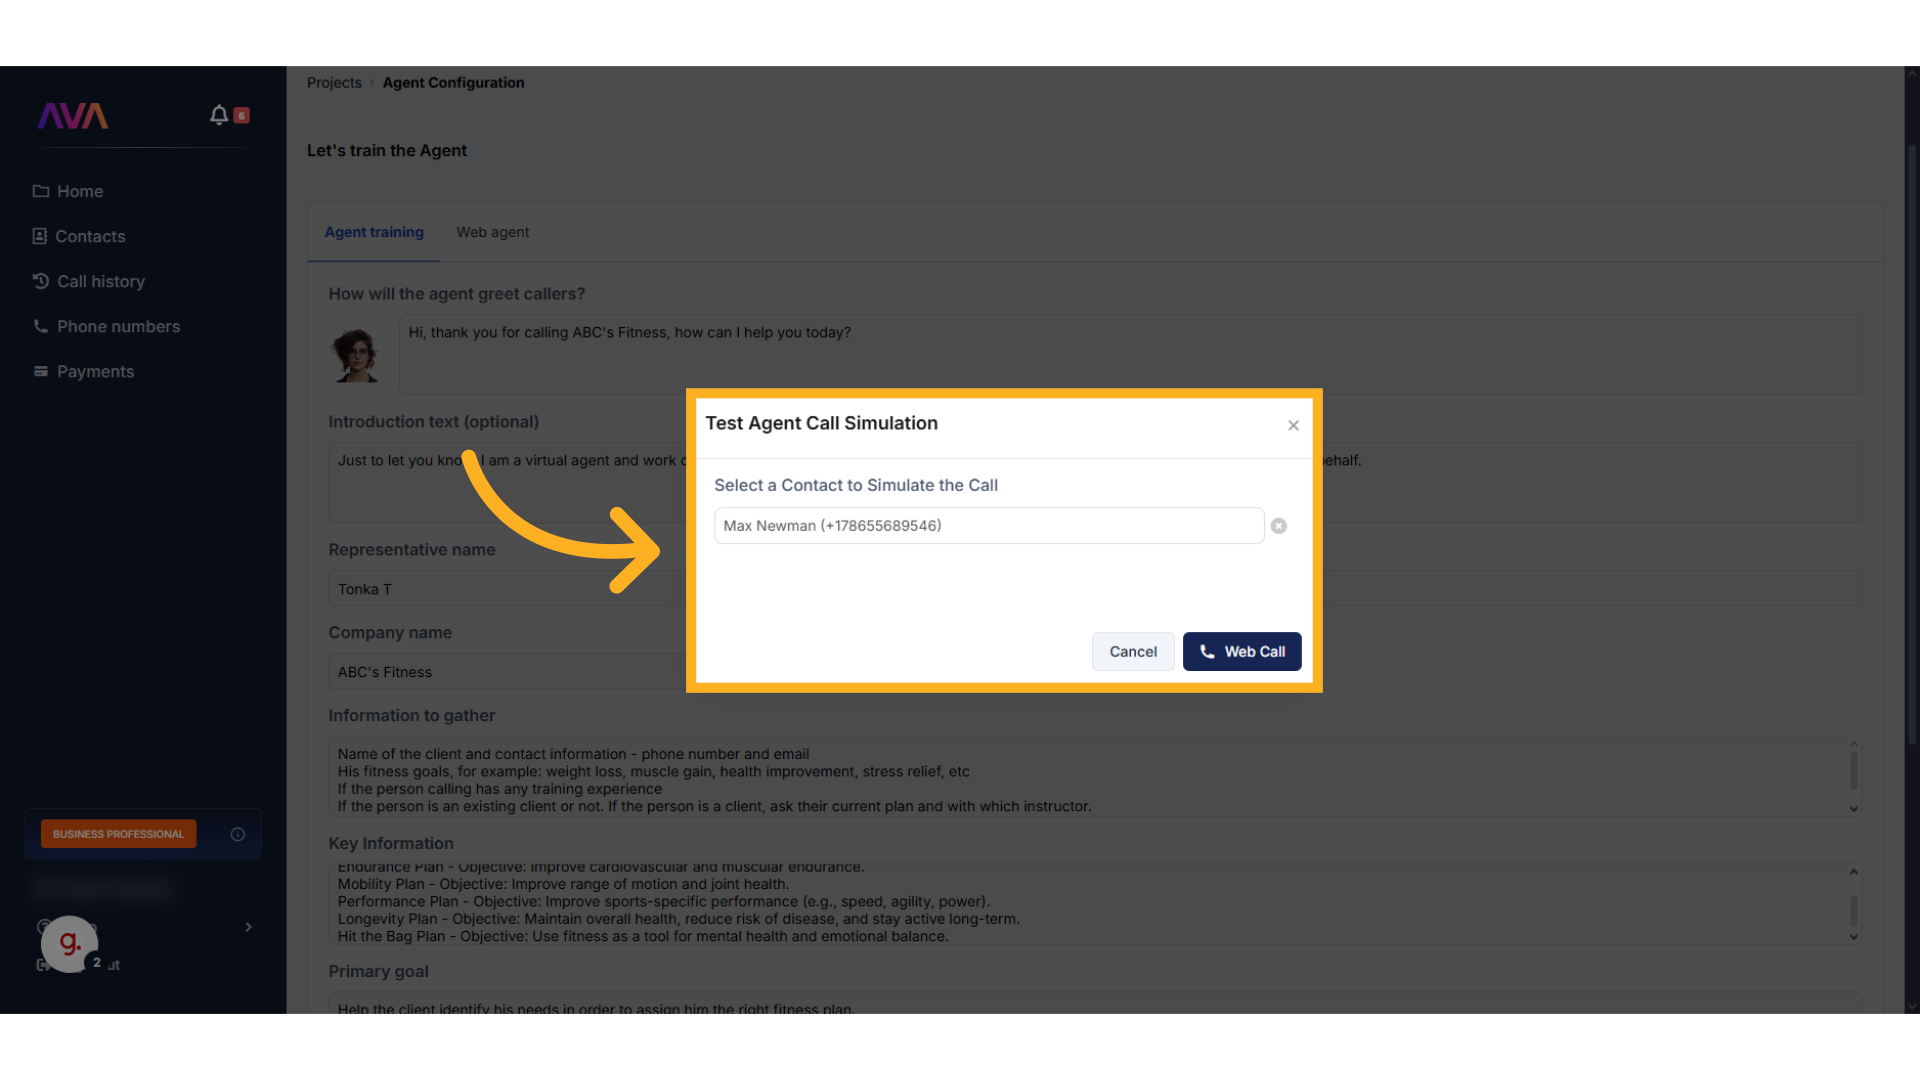
* Click **"Save and Test Agent"**
* Select a test number and run a mock call
***
## Input Field Types: Scripting, Prompting, and Information
When configuring your agent, fields fall into three types:
* **Scripting** – Word-for-word lines AVA will say
* **Prompting** – Goal-oriented guidance for dynamic replies
* **Information** – Data that shapes logic but isn't spoken unless referenced
Refer to the full guide: [**Scripting, Prompting & Information**](/Scripting-Prompting-and-Information)
Examples:
* Scripting: "Hi! This is Ava calling from company\_name…"
* Prompting: "Ask if they'd like to confirm their appointment."
* Information: Service type, pricing, rep name
Use `{{client_firstname}}` and other tokens to personalize calls dynamically.
***
## Testing Your Agent
Before launching, simulate calls internally using the test feature. Testing does not consume minutes.
* Click **"Save and Test Agent"**
* Select a test number and run a mock call
 Review agent responses, logic, and timing. For a deep dive, see [**Testing Procedure**](/Testing-Procedure)
***
## Final Tips for Configuration
* Use **short, clear scripts**
* Prompt only for actions — don't hardcode phrases
* Store pricing, services, or names in **Key Information** for better logic
* Always test using a **test number**
* Avoid names like "John" or "Sarah" — use custom values like `{{client_firstname}}`
***
## FAQs & Troubleshooting
### General Questions
Yes, you can create multiple Inbound Agents for different tasks, services, or departments.
No. Each Inbound Agent must have a unique phone number, though the same number can be reused for outbound campaigns.
Yes, an Inbound Agent can operate as both a phone receptionist and a web-based assistant via the Web Widget.
### Configuration
During setup, use the voice selection and greeting fields to define the tone, gender, and personality of your AI agent.
Use placeholders like `{{client_firstname}}`, `{{company_name}}`, and `{{representative_name}}` inside scripting or prompting fields. AVA will replace these in real time during calls.
Check your scripting, prompting, and key information fields. The AI speaks based only on what's been configured.
### Usage and Results
When the Web Widget is enabled during a call, your usage is billed at a discounted rate of \$0.16 instead of the base \$0.18/min.
Yes. Use the built-in "Save and Test Agent" or "Test Campaign" features to simulate interactions and evaluate performance. Testing does not consume minutes.
Yes. AVA generates transcripts and logs that can be accessed in the dashboard in the **Call History** section after each test or live call.
***
For additional questions or guidance, try using our [**Virtual Support Agent**](/Thinkrr-Support-Agent)! Available 24/7 to help resolve most issues quickly at [thinkrr.ai/support](https://thinkrr.ai/support).
If you still need assistance, visit our support site at [help.thinkrr.ai](http://help.thinkrr.ai) and submit a [Ticket](/Support-Ticket-System) or contact our team directly at [hello@thinkrr.ai](mailto:hello@thinkrr.ai).
Review agent responses, logic, and timing. For a deep dive, see [**Testing Procedure**](/Testing-Procedure)
***
## Final Tips for Configuration
* Use **short, clear scripts**
* Prompt only for actions — don't hardcode phrases
* Store pricing, services, or names in **Key Information** for better logic
* Always test using a **test number**
* Avoid names like "John" or "Sarah" — use custom values like `{{client_firstname}}`
***
## FAQs & Troubleshooting
### General Questions
Yes, you can create multiple Inbound Agents for different tasks, services, or departments.
No. Each Inbound Agent must have a unique phone number, though the same number can be reused for outbound campaigns.
Yes, an Inbound Agent can operate as both a phone receptionist and a web-based assistant via the Web Widget.
### Configuration
During setup, use the voice selection and greeting fields to define the tone, gender, and personality of your AI agent.
Use placeholders like `{{client_firstname}}`, `{{company_name}}`, and `{{representative_name}}` inside scripting or prompting fields. AVA will replace these in real time during calls.
Check your scripting, prompting, and key information fields. The AI speaks based only on what's been configured.
### Usage and Results
When the Web Widget is enabled during a call, your usage is billed at a discounted rate of \$0.16 instead of the base \$0.18/min.
Yes. Use the built-in "Save and Test Agent" or "Test Campaign" features to simulate interactions and evaluate performance. Testing does not consume minutes.
Yes. AVA generates transcripts and logs that can be accessed in the dashboard in the **Call History** section after each test or live call.
***
For additional questions or guidance, try using our [**Virtual Support Agent**](/Thinkrr-Support-Agent)! Available 24/7 to help resolve most issues quickly at [thinkrr.ai/support](https://thinkrr.ai/support).
If you still need assistance, visit our support site at [help.thinkrr.ai](http://help.thinkrr.ai) and submit a [Ticket](/Support-Ticket-System) or contact our team directly at [hello@thinkrr.ai](mailto:hello@thinkrr.ai).