Details
Expedite your contact management through the use of mass import and export features on thinkrr and GHL.Managing Contacts
thinkrr
thinkrr
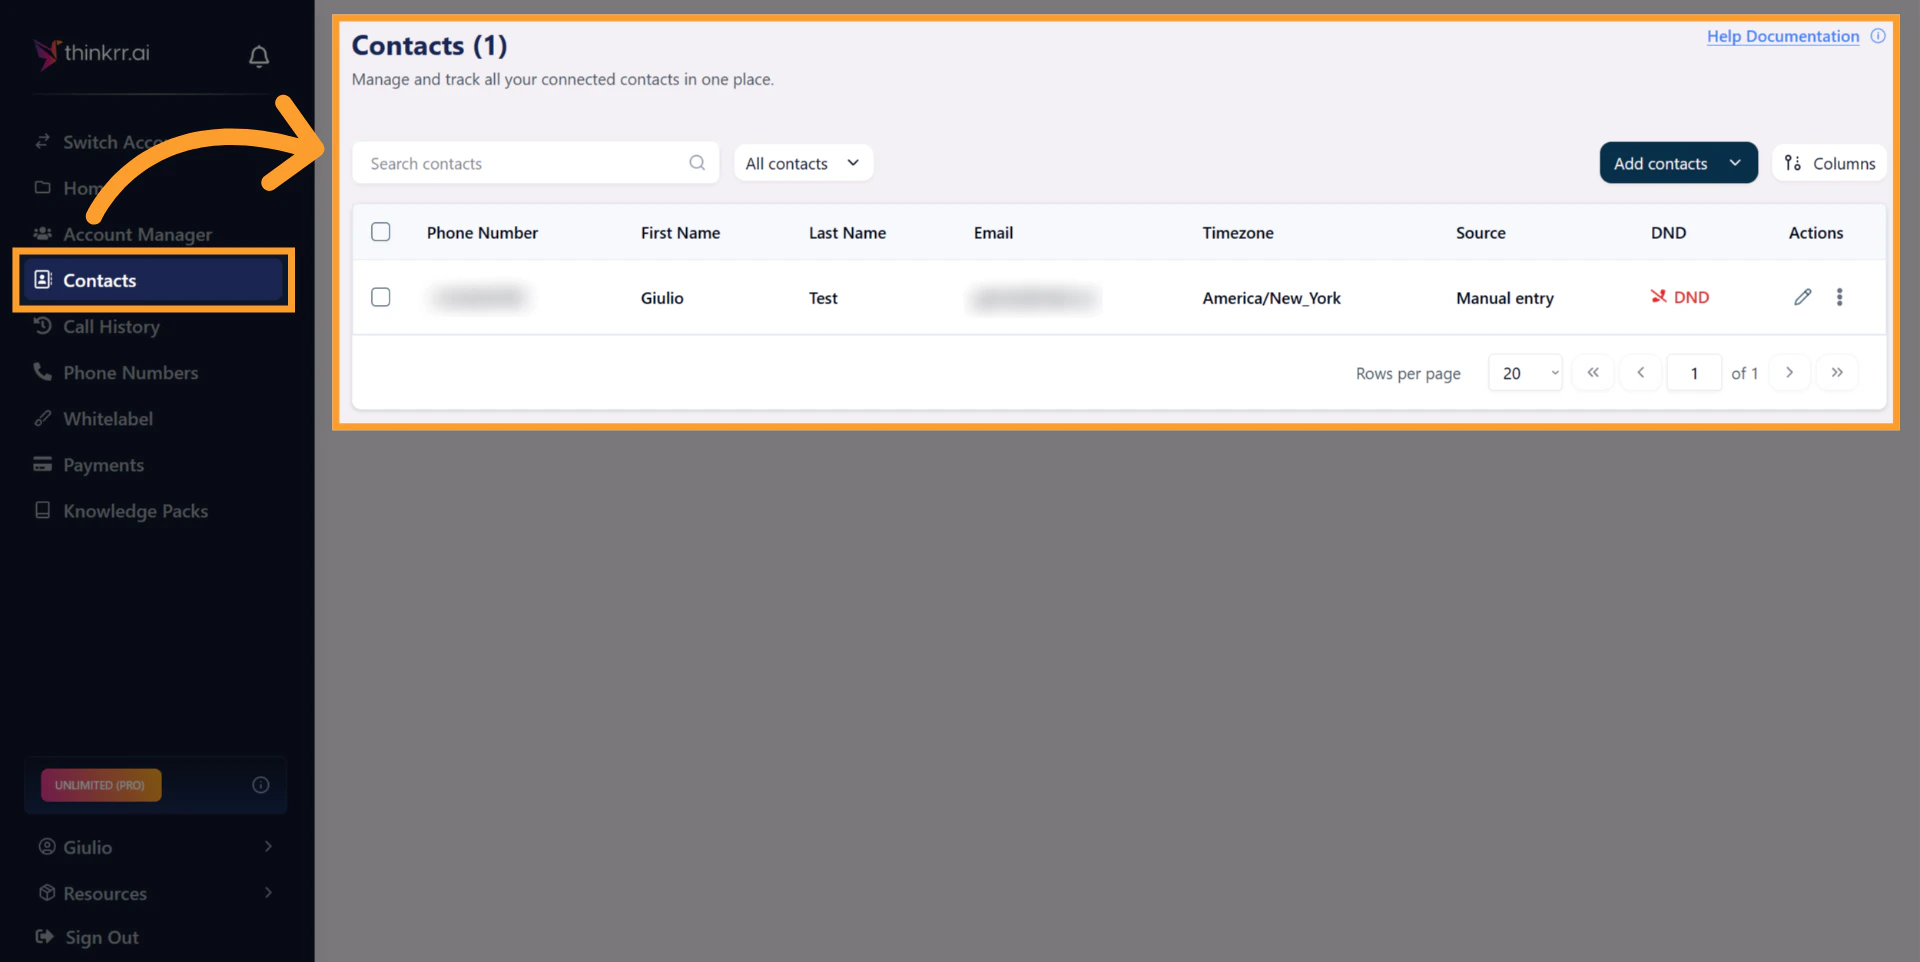
Open the Contacts Page
- From your dashboard, click Contacts in the sidebar.
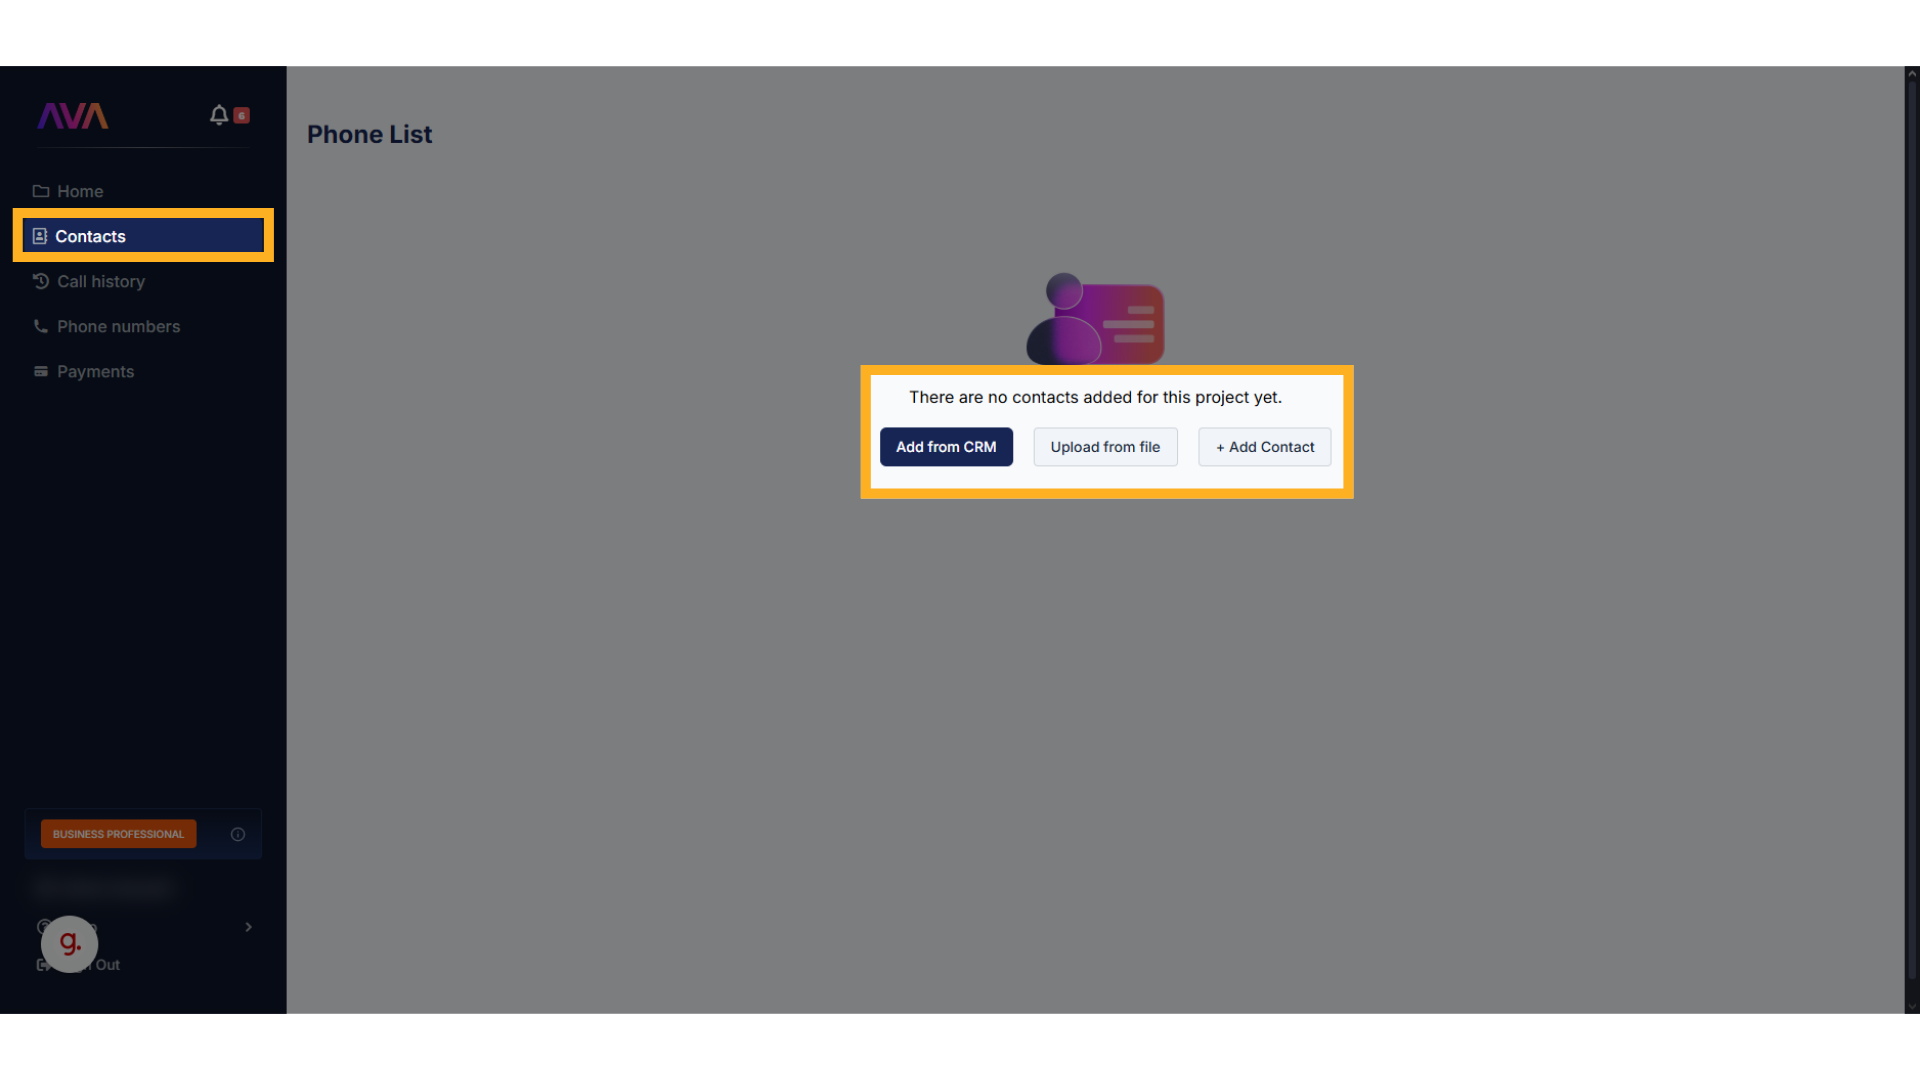
- On this page you’ll see three options for adding contacts:
- Add from CRM (pulls data from your connected GoHighLevel account)
- Upload from file (bulk import via XLSX or CSV)
- Add contact (manual entry for a single record)
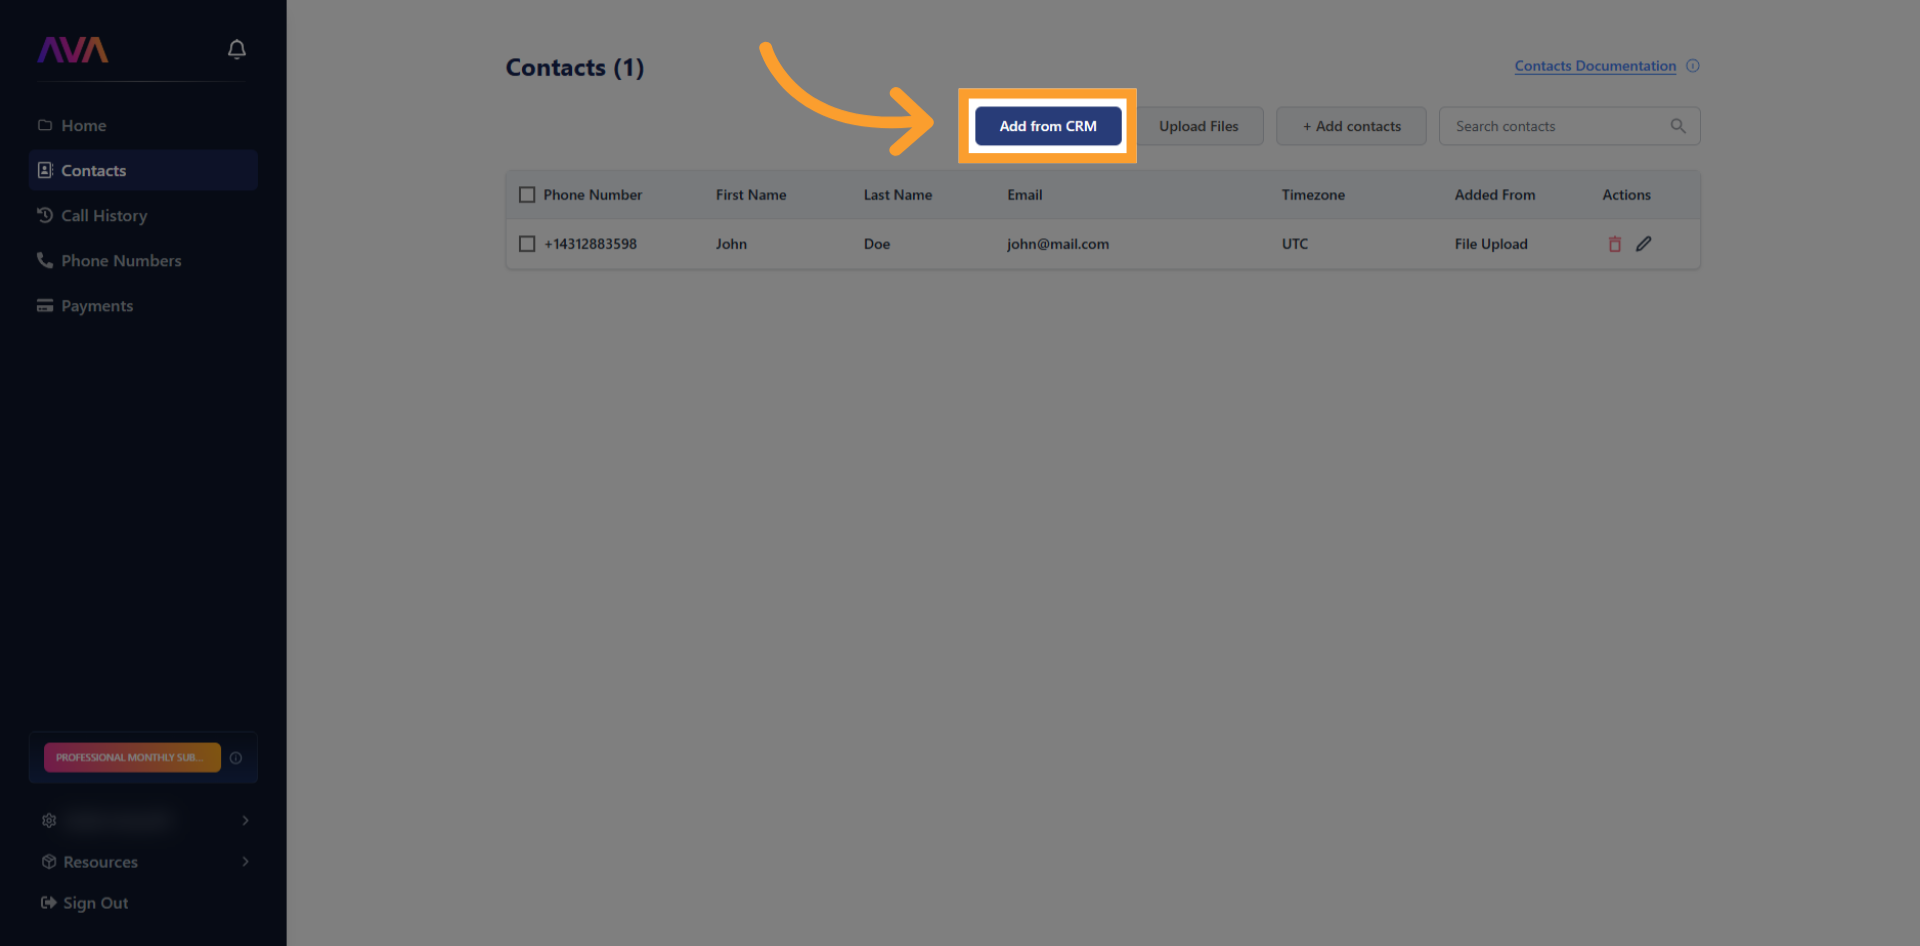
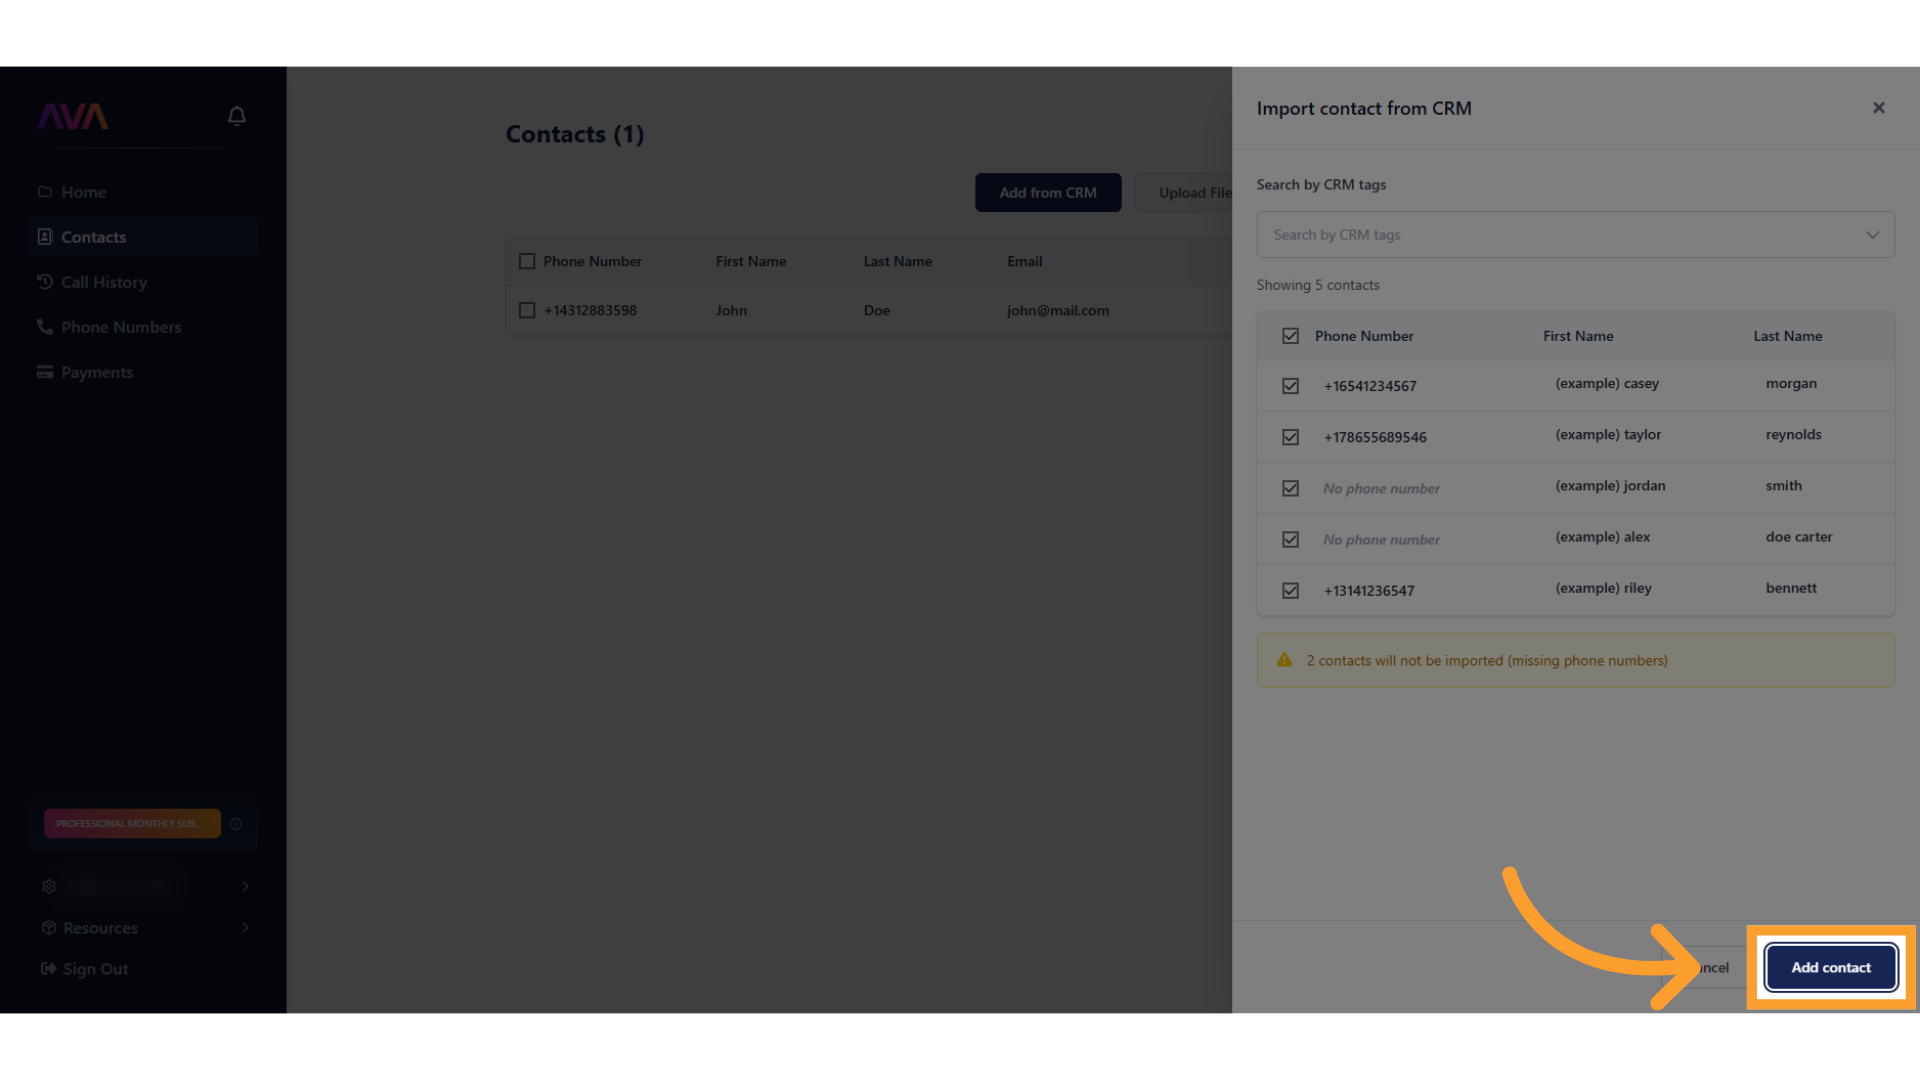
Add from CRM
- Make sure your GoHighLevel agency account is connected first.
- Click Add from CRM to open a side panel with available contacts.
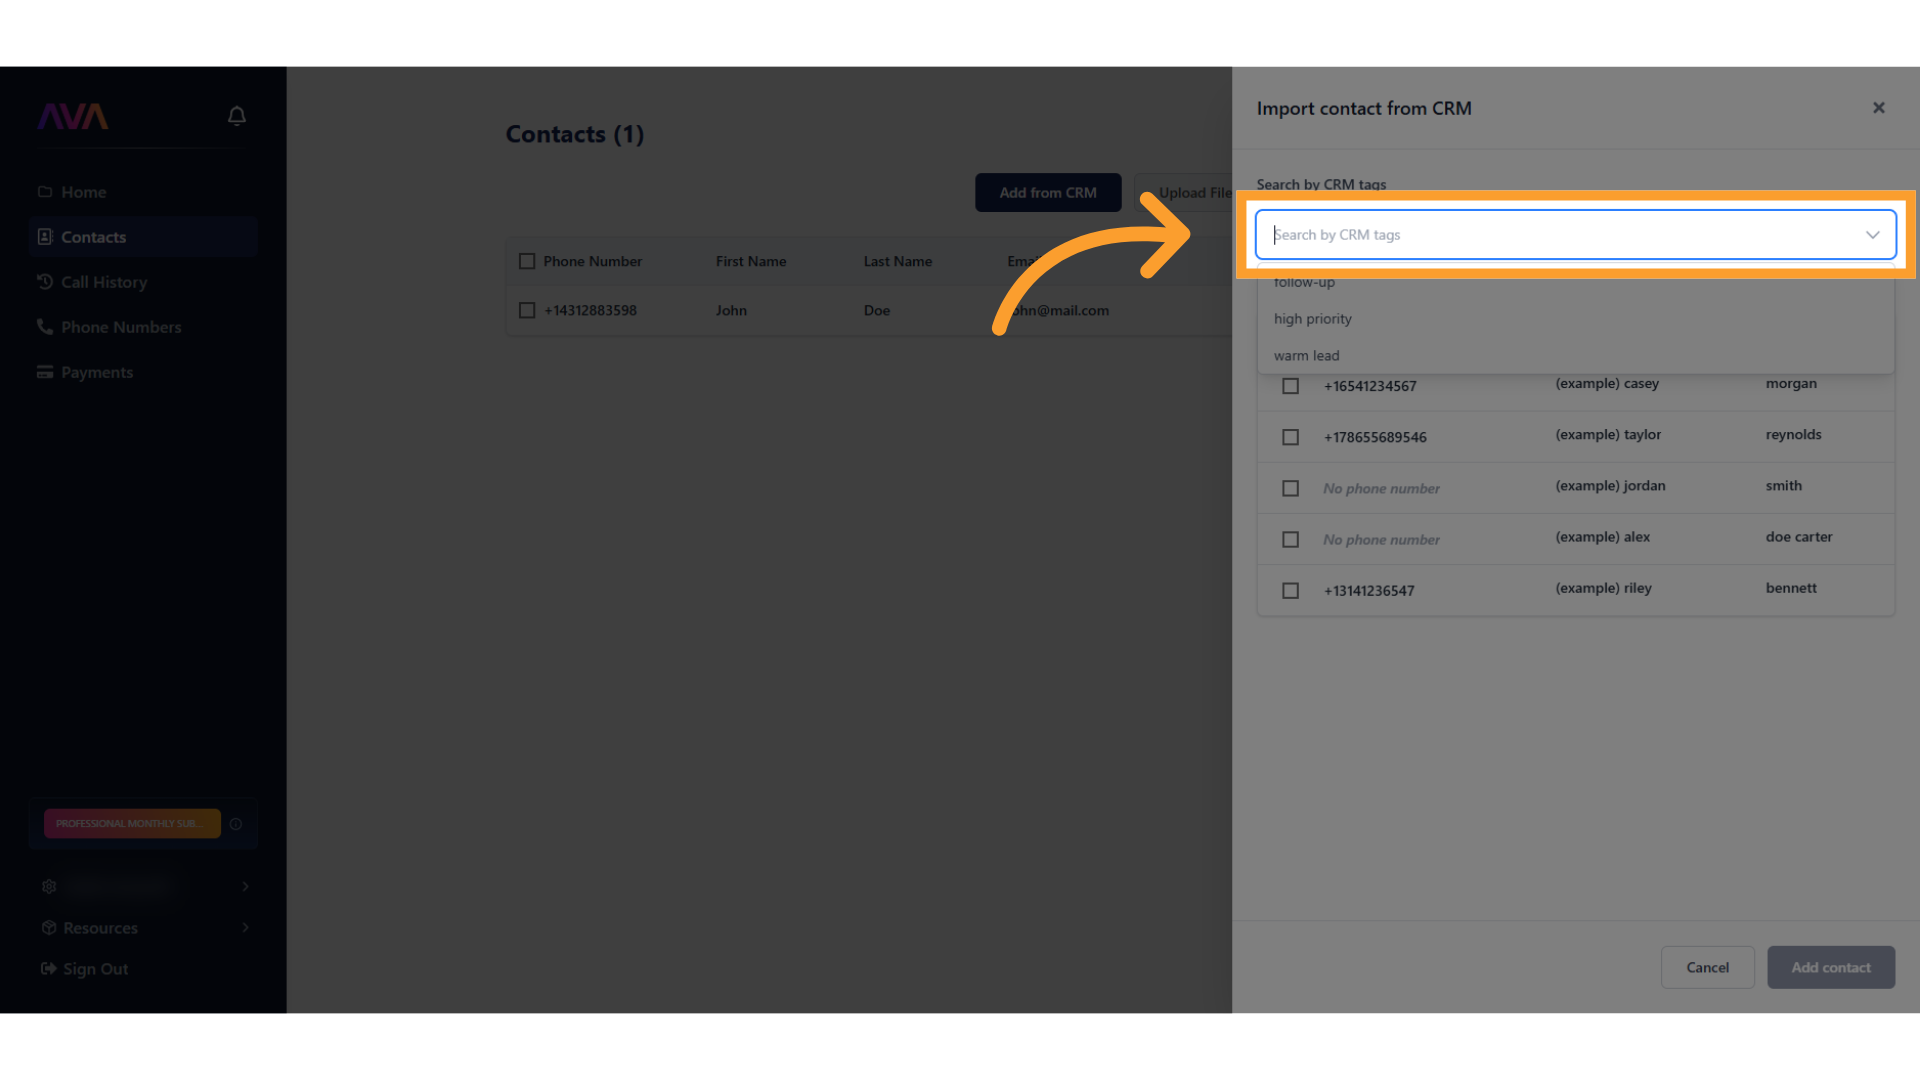
- Use the filter at the top of the panel to narrow results by tag if you have many contacts.
- Contacts missing required data (like a phone number) will display a warning and won’t import.
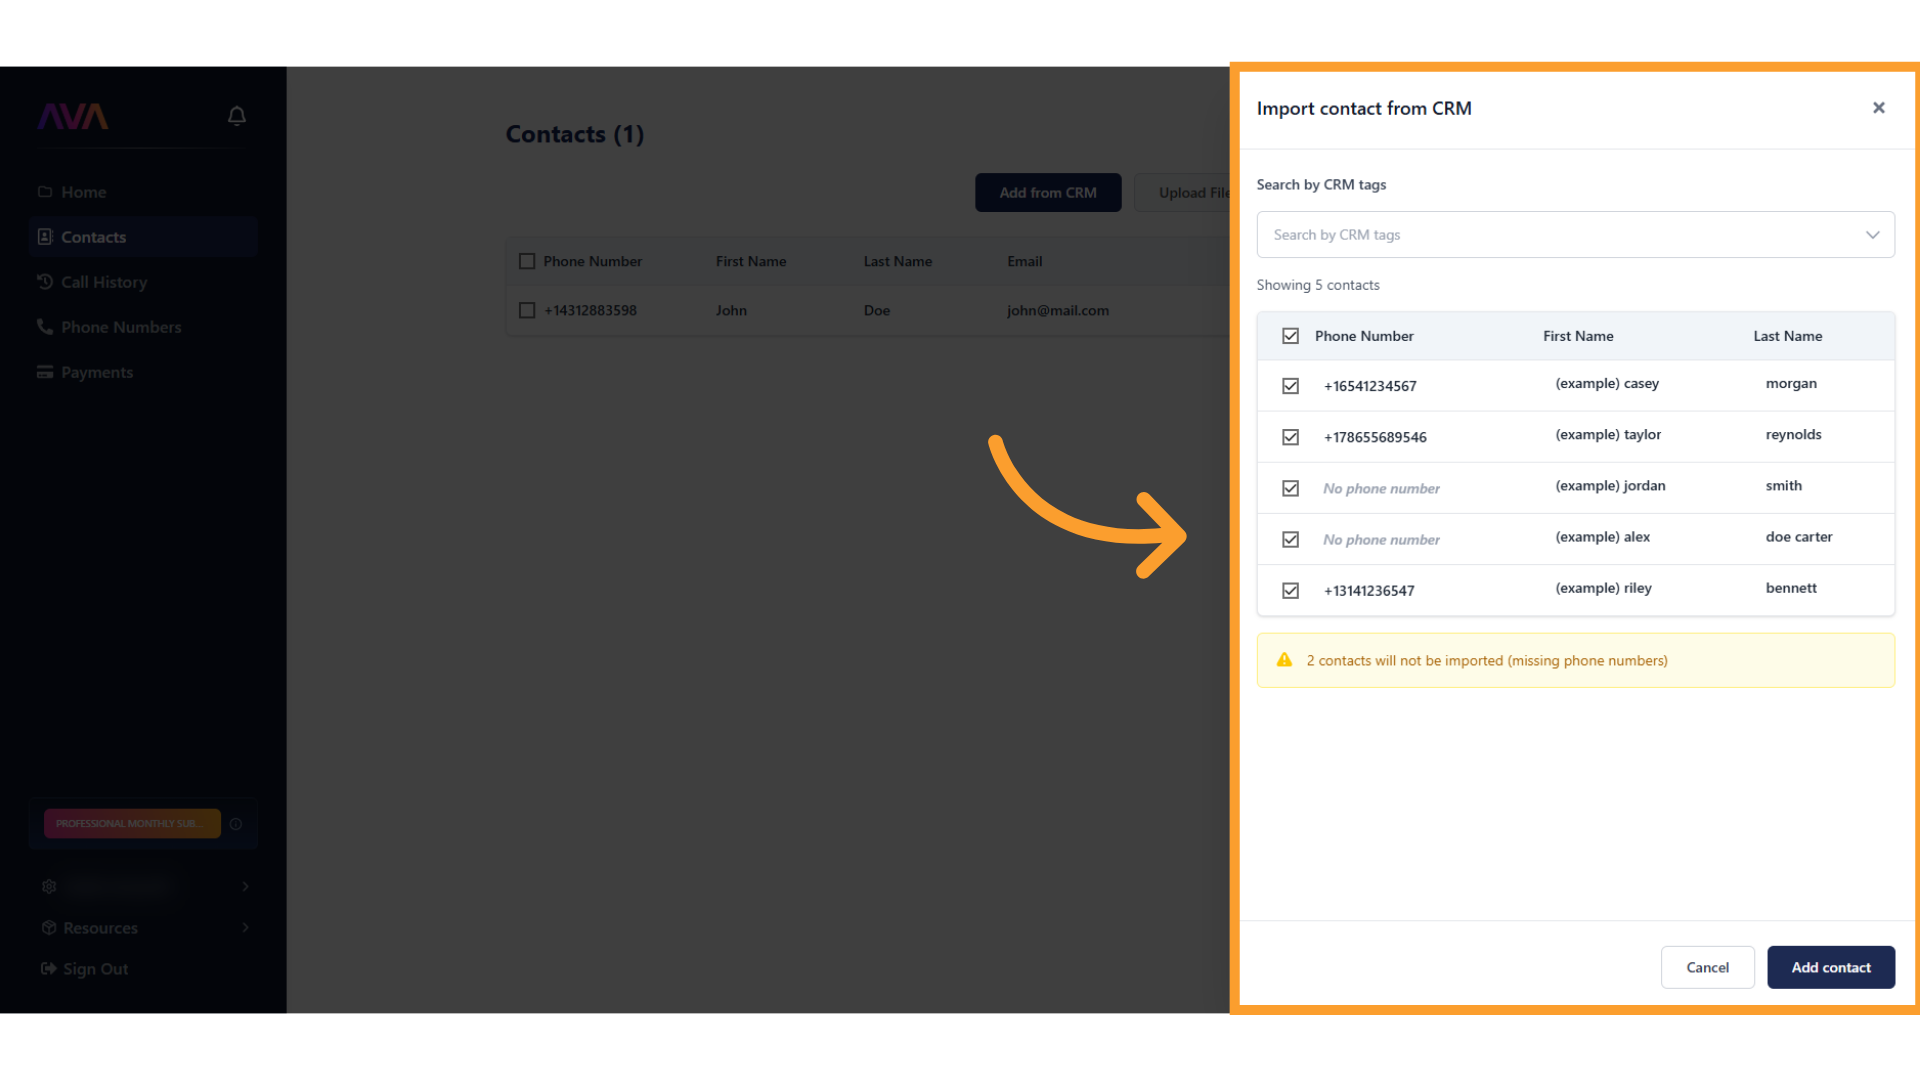
- When ready, click Add Contact at the bottom of the panel to complete the import.
Upload from File
- Click Upload files.

- In the interface that opens, click Browse File, then drag-and-drop or select your files.
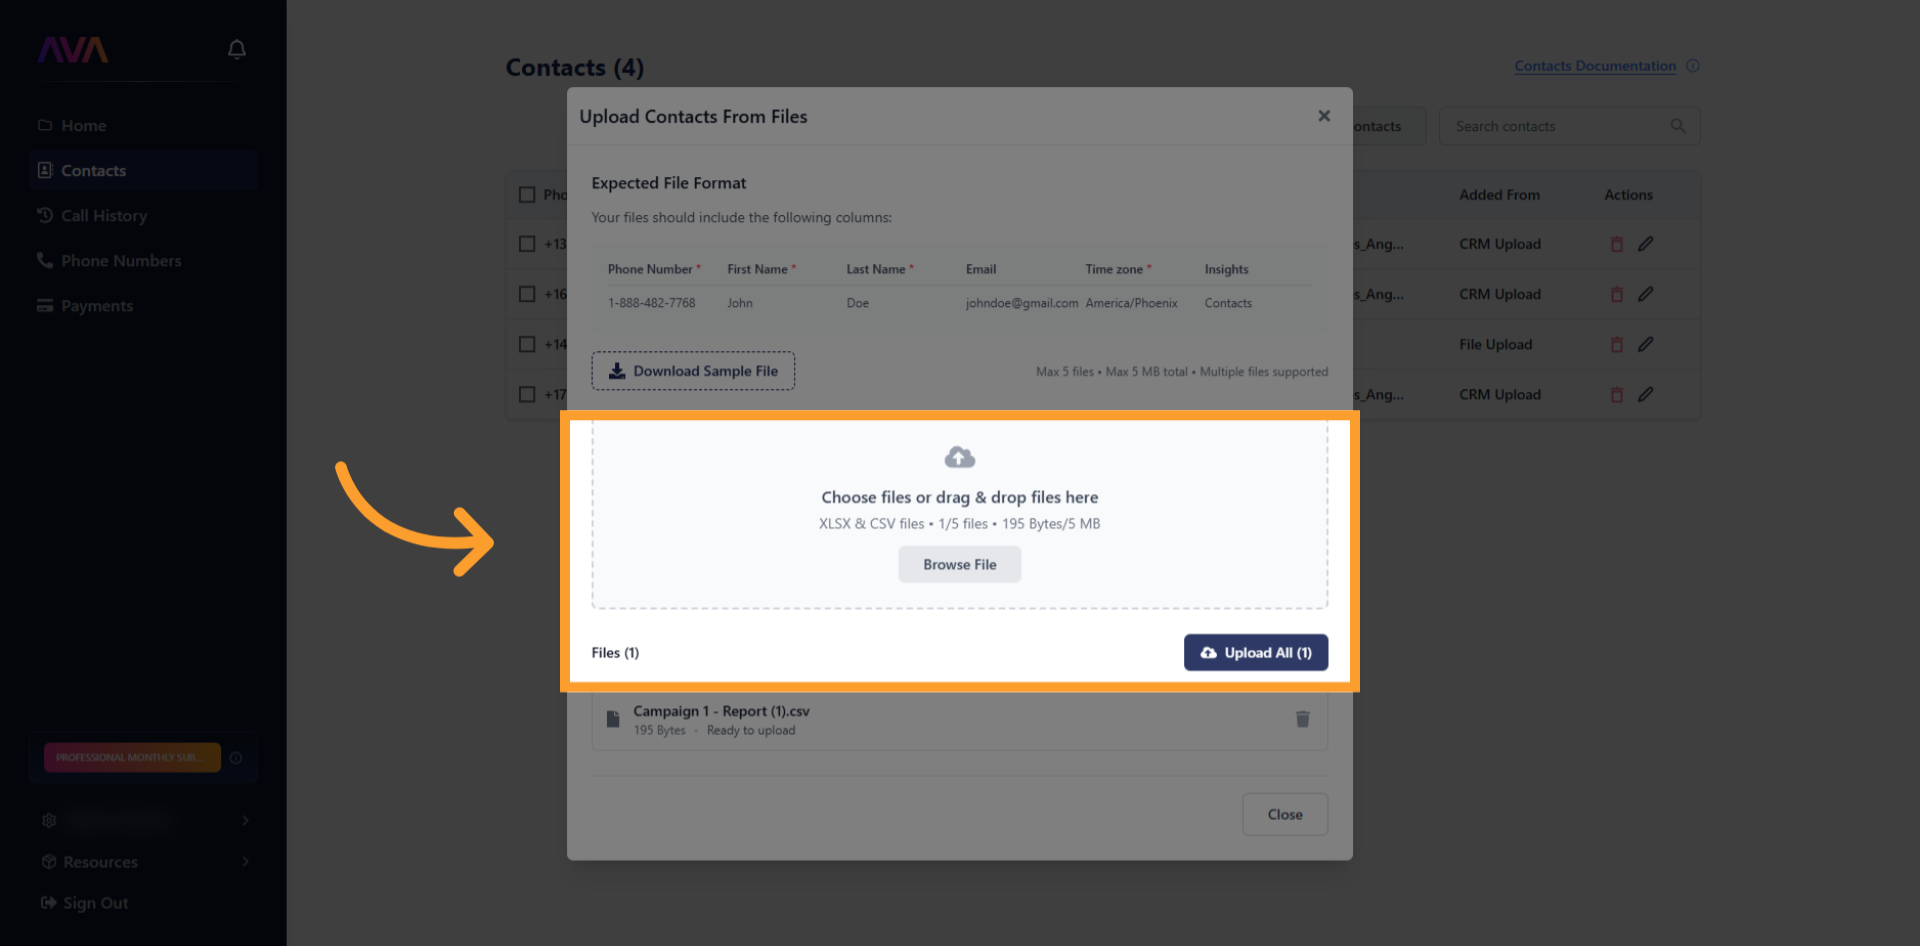
- Requirements:
- Formats: .xlsx and .csv
- Maximum file size: 5 MB each
- Up to five files at a time
- After selecting, click Upload all to begin processing.
- The status section will display:
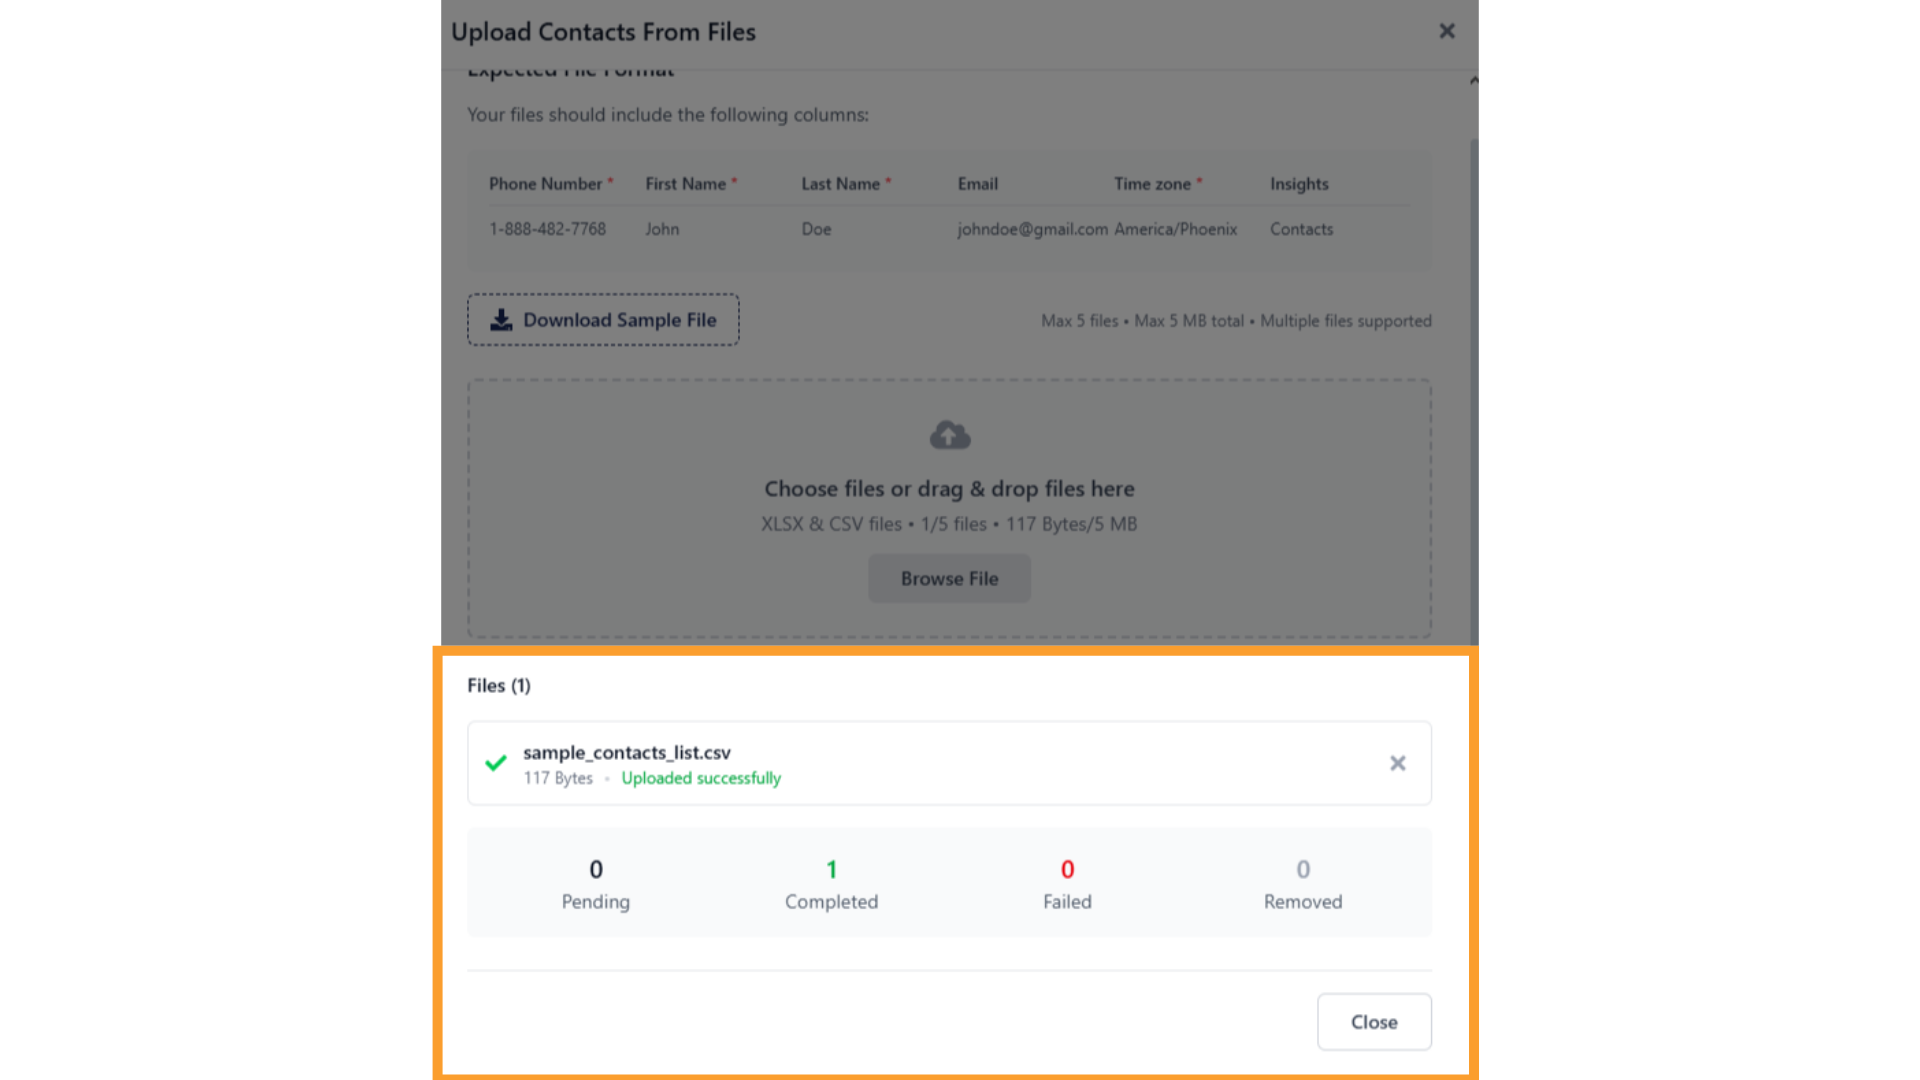
- Pending: contacts waiting to be processed
- Completed: successfully imported records
- Failed: records rejected due to missing data or formatting errors
- Removed: records taken out if you delete a file from the batch
- Tip: Use the Download Sample File button to see the correct headers and required fields if uploads fail.

Manual Contact Entry
- Click Add contact to enter details one at a time.
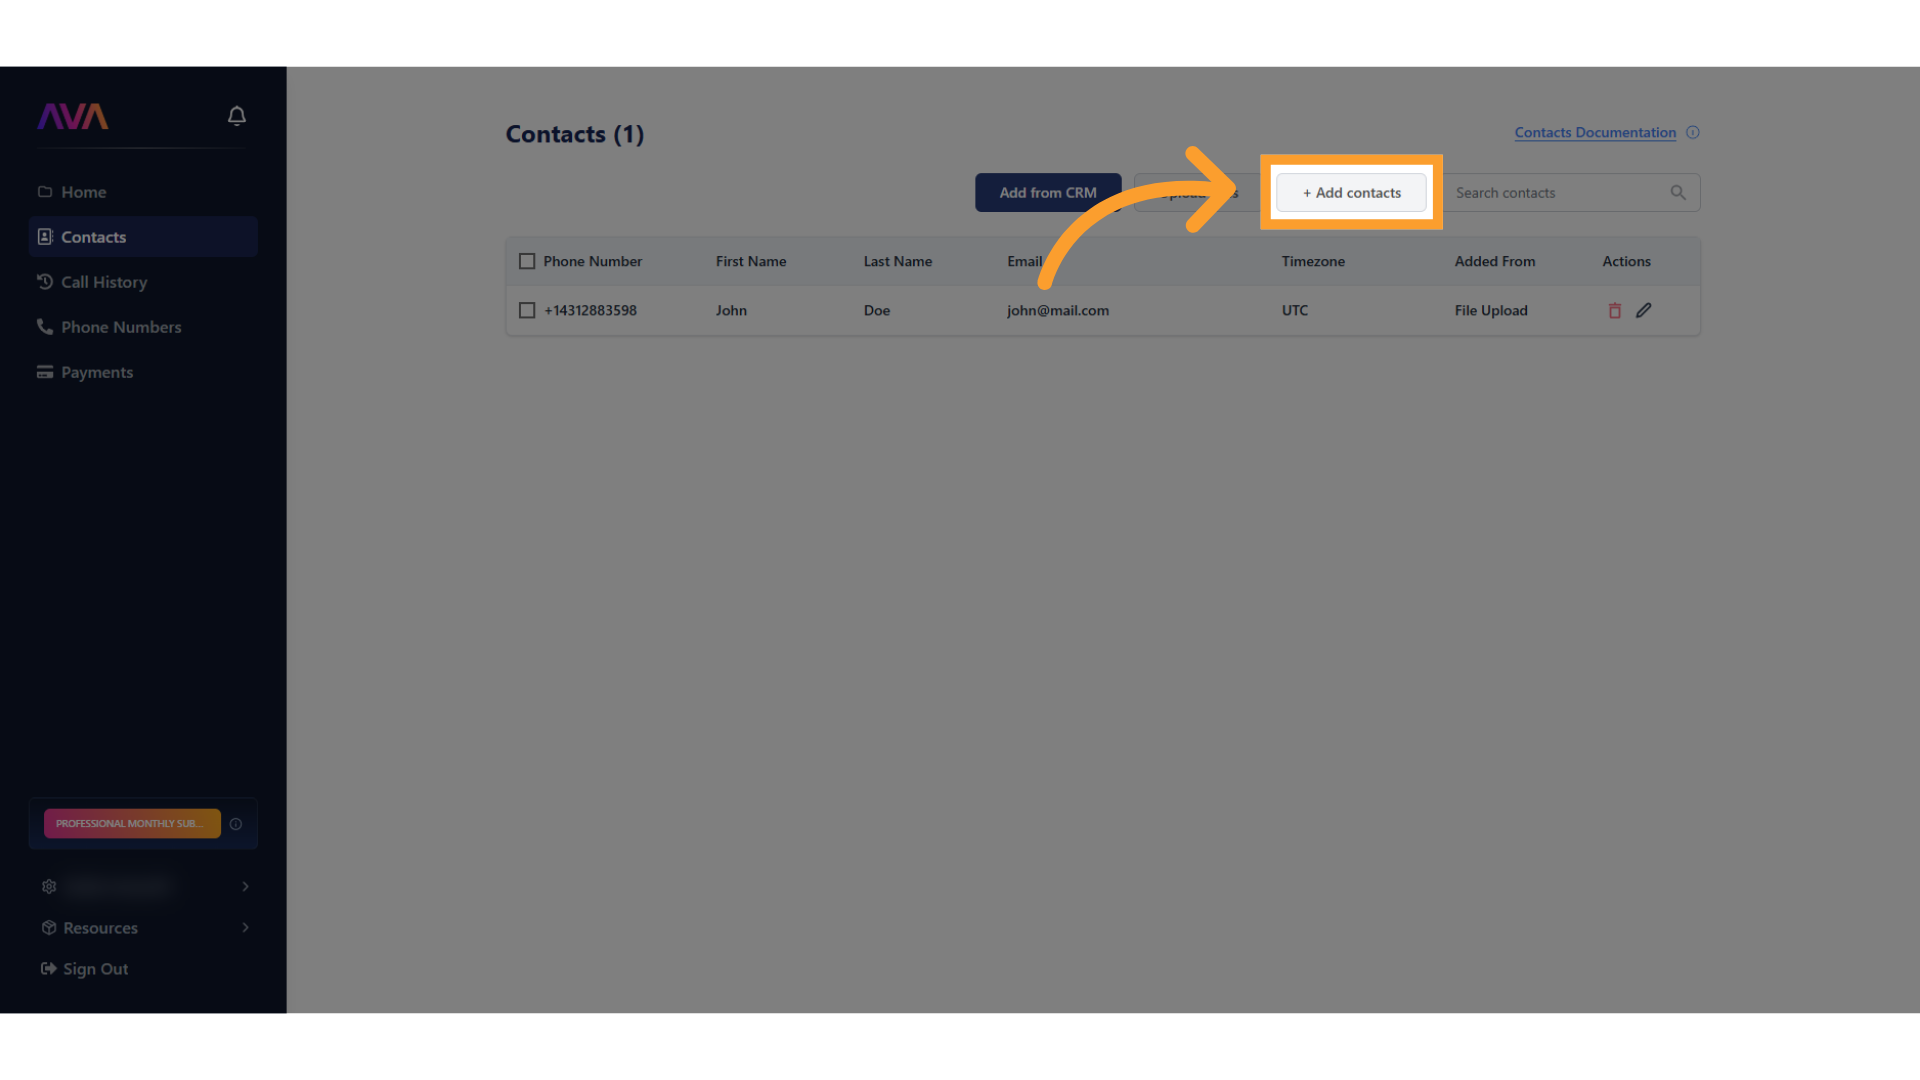
- Fill in:
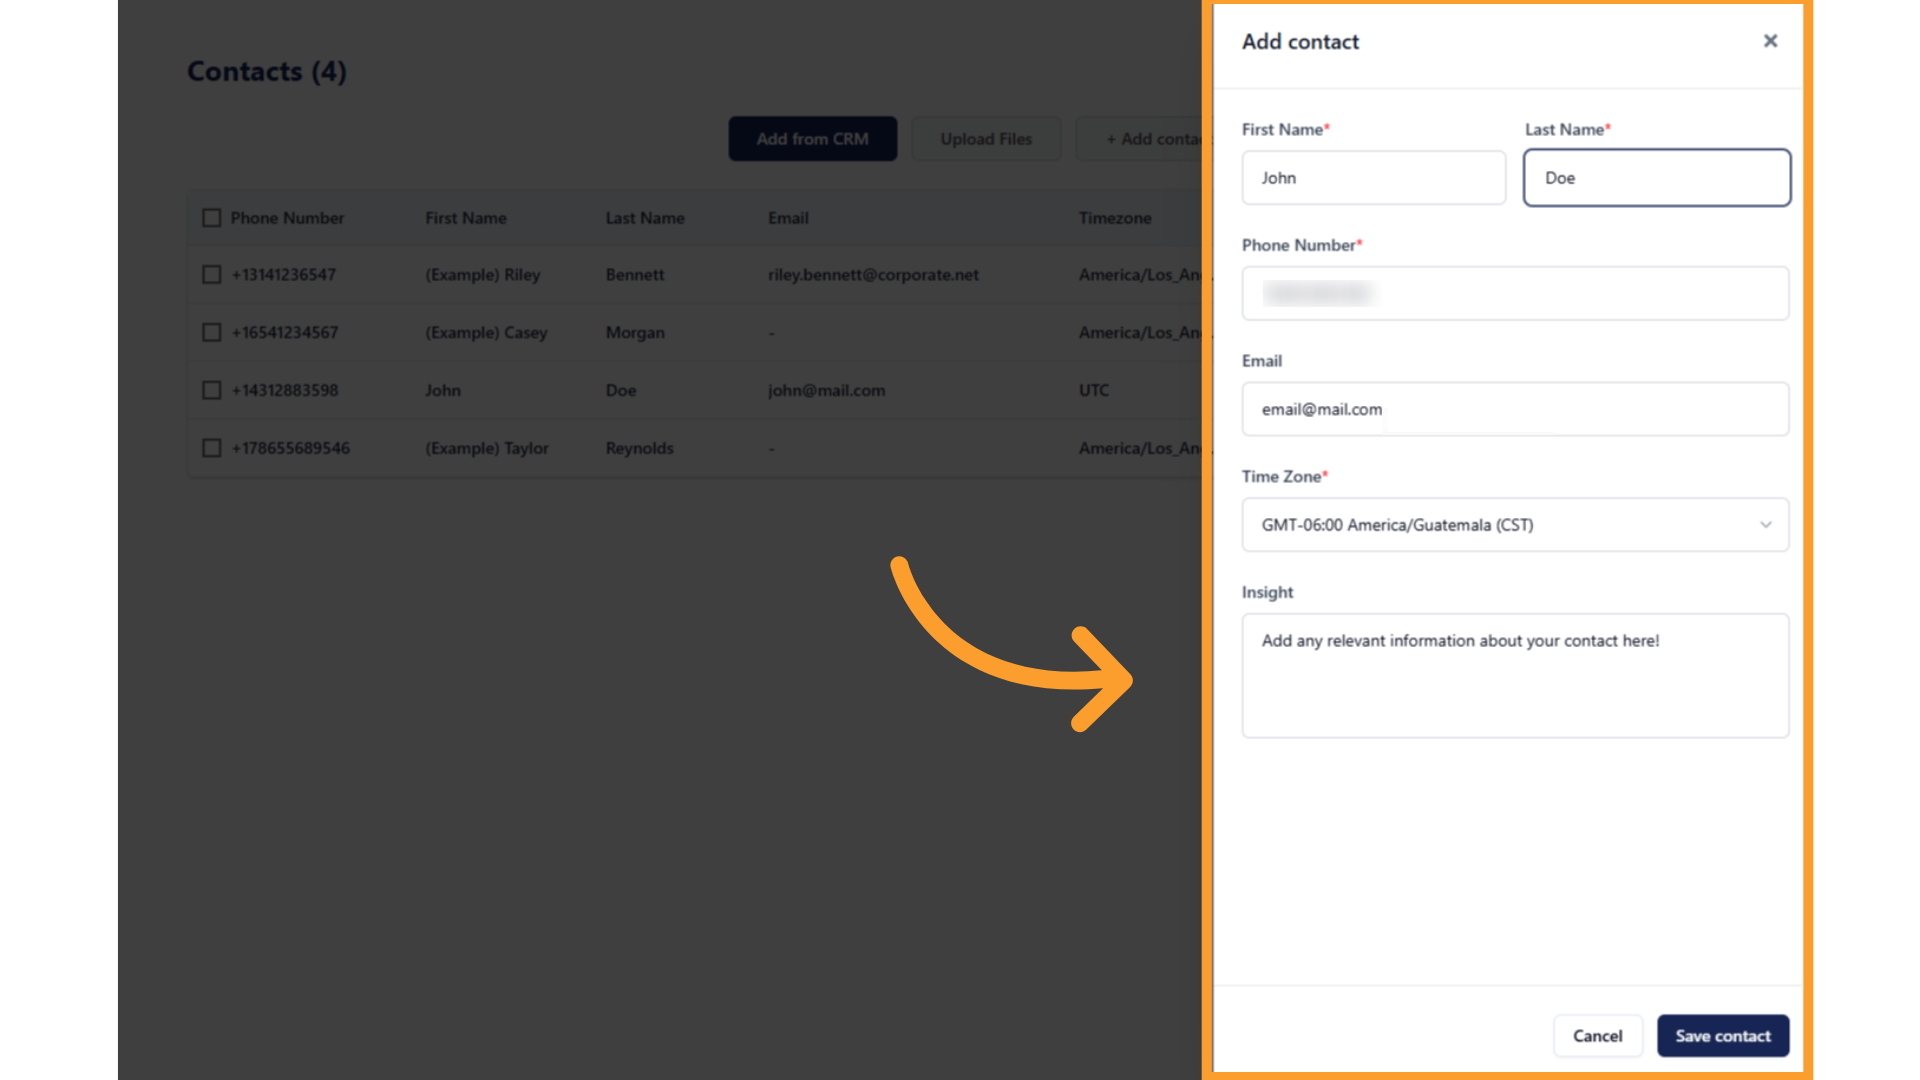
- First Name
- Last Name
- Phone number
- Email (optional, must be valid if provided)
- Time zone
- Any additional fields you’d like thinkrr’s agents to use
- Click Save contact to add it to your list.
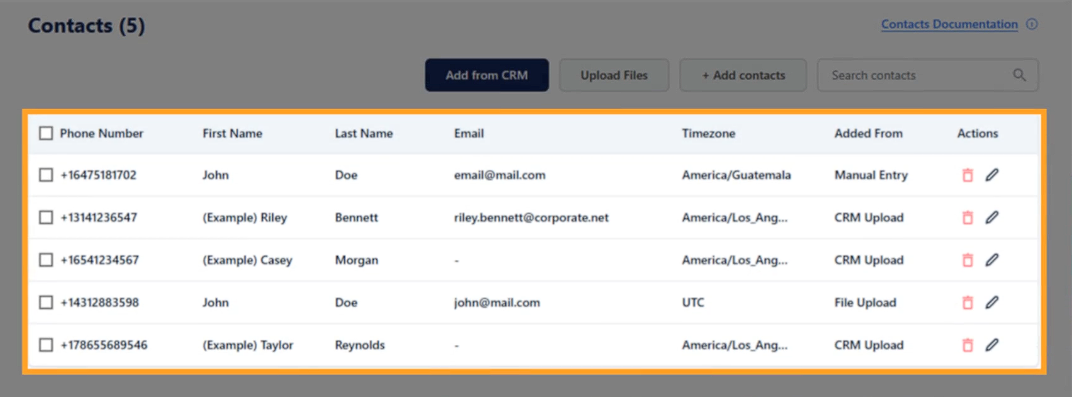
Review Contacts & Import History
- After importing, all records appear on the Contacts page with their source (CRM, File, or Manual).
- To see details of an upload, go to the Import History tab inside a campaign:
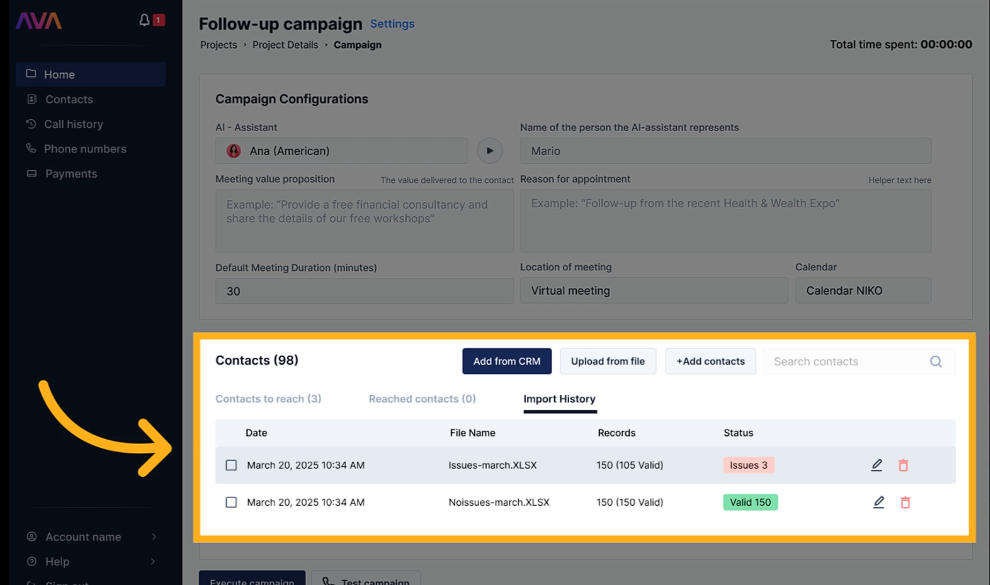
- Shows upload date, file name, total records processed, and current status.
- Records are flagged as invalid if they:
- Are duplicates of existing contacts
- Have invalid email or time zone
- Have missing required fields (First Name, Last Name, Phone, Time zone)
- Supported phone number formats:
1-XXX-XXX-XXXX1 (XXX) XXX-XXXX
GHL
GHL
Importing Contacts
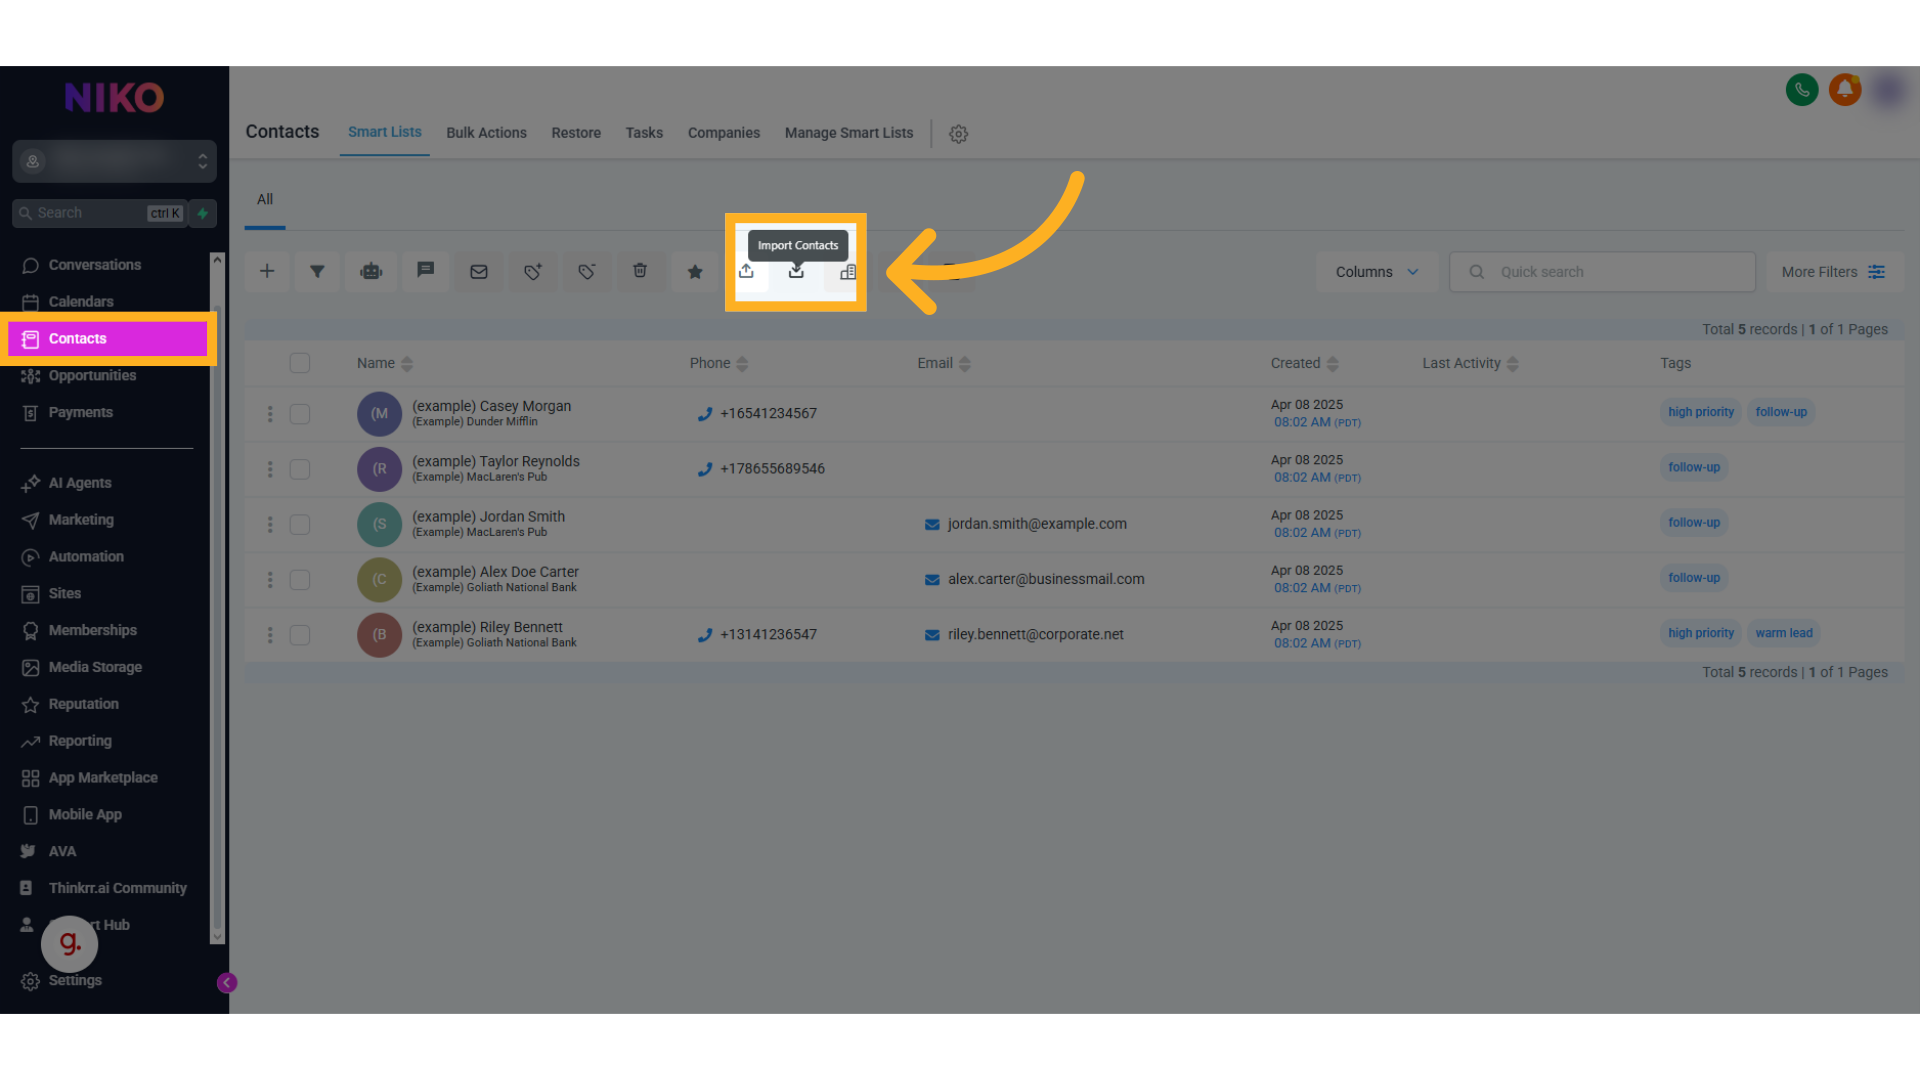
Navigate to Contacts
- In your GHL dashboard, click Contacts.
-
At the top of the contacts page, you’ll see two icons:
- Import (arrow pointing inward).
- Export (arrow pointing outward).
-
Click on the Import icon.
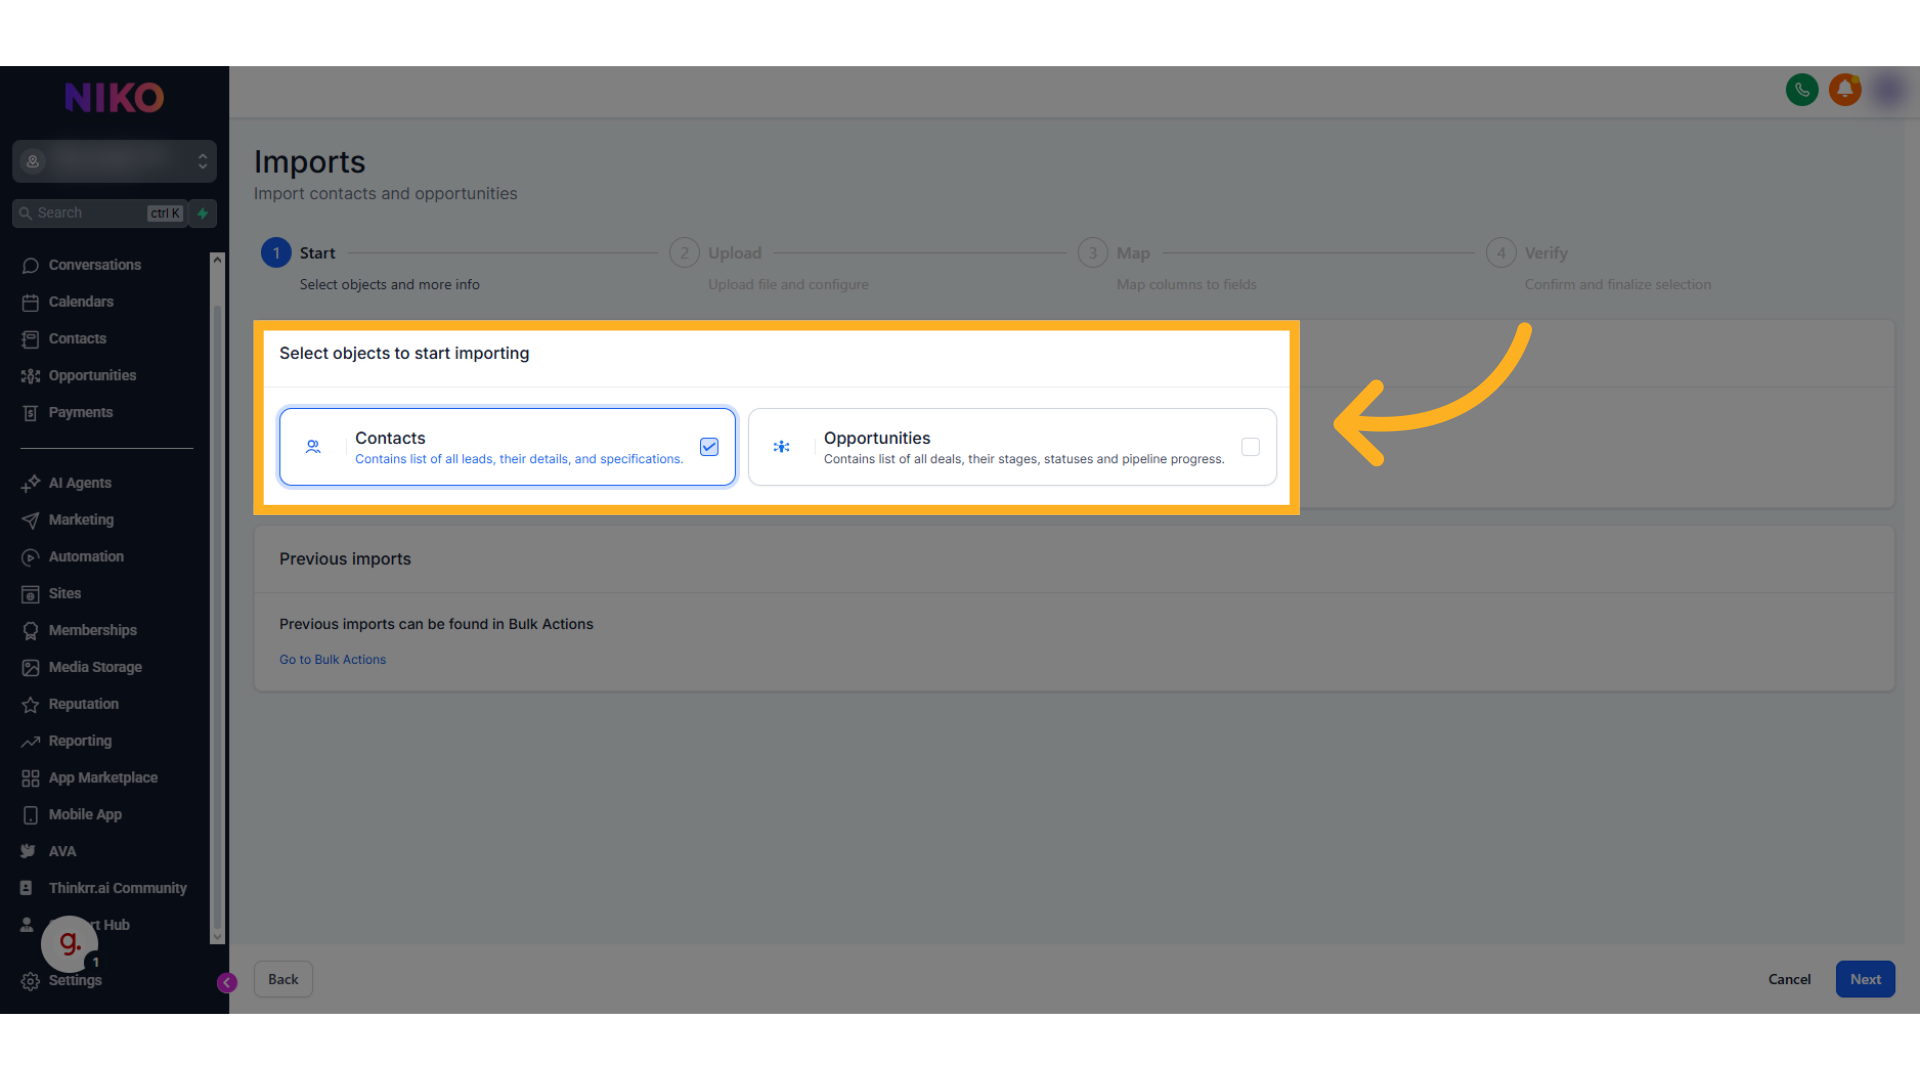
Choose Contacts or Opportunities
- Select whether you are importing Contacts or Opportunities.
-
This choice determines the available actions and the required fields for mapping.
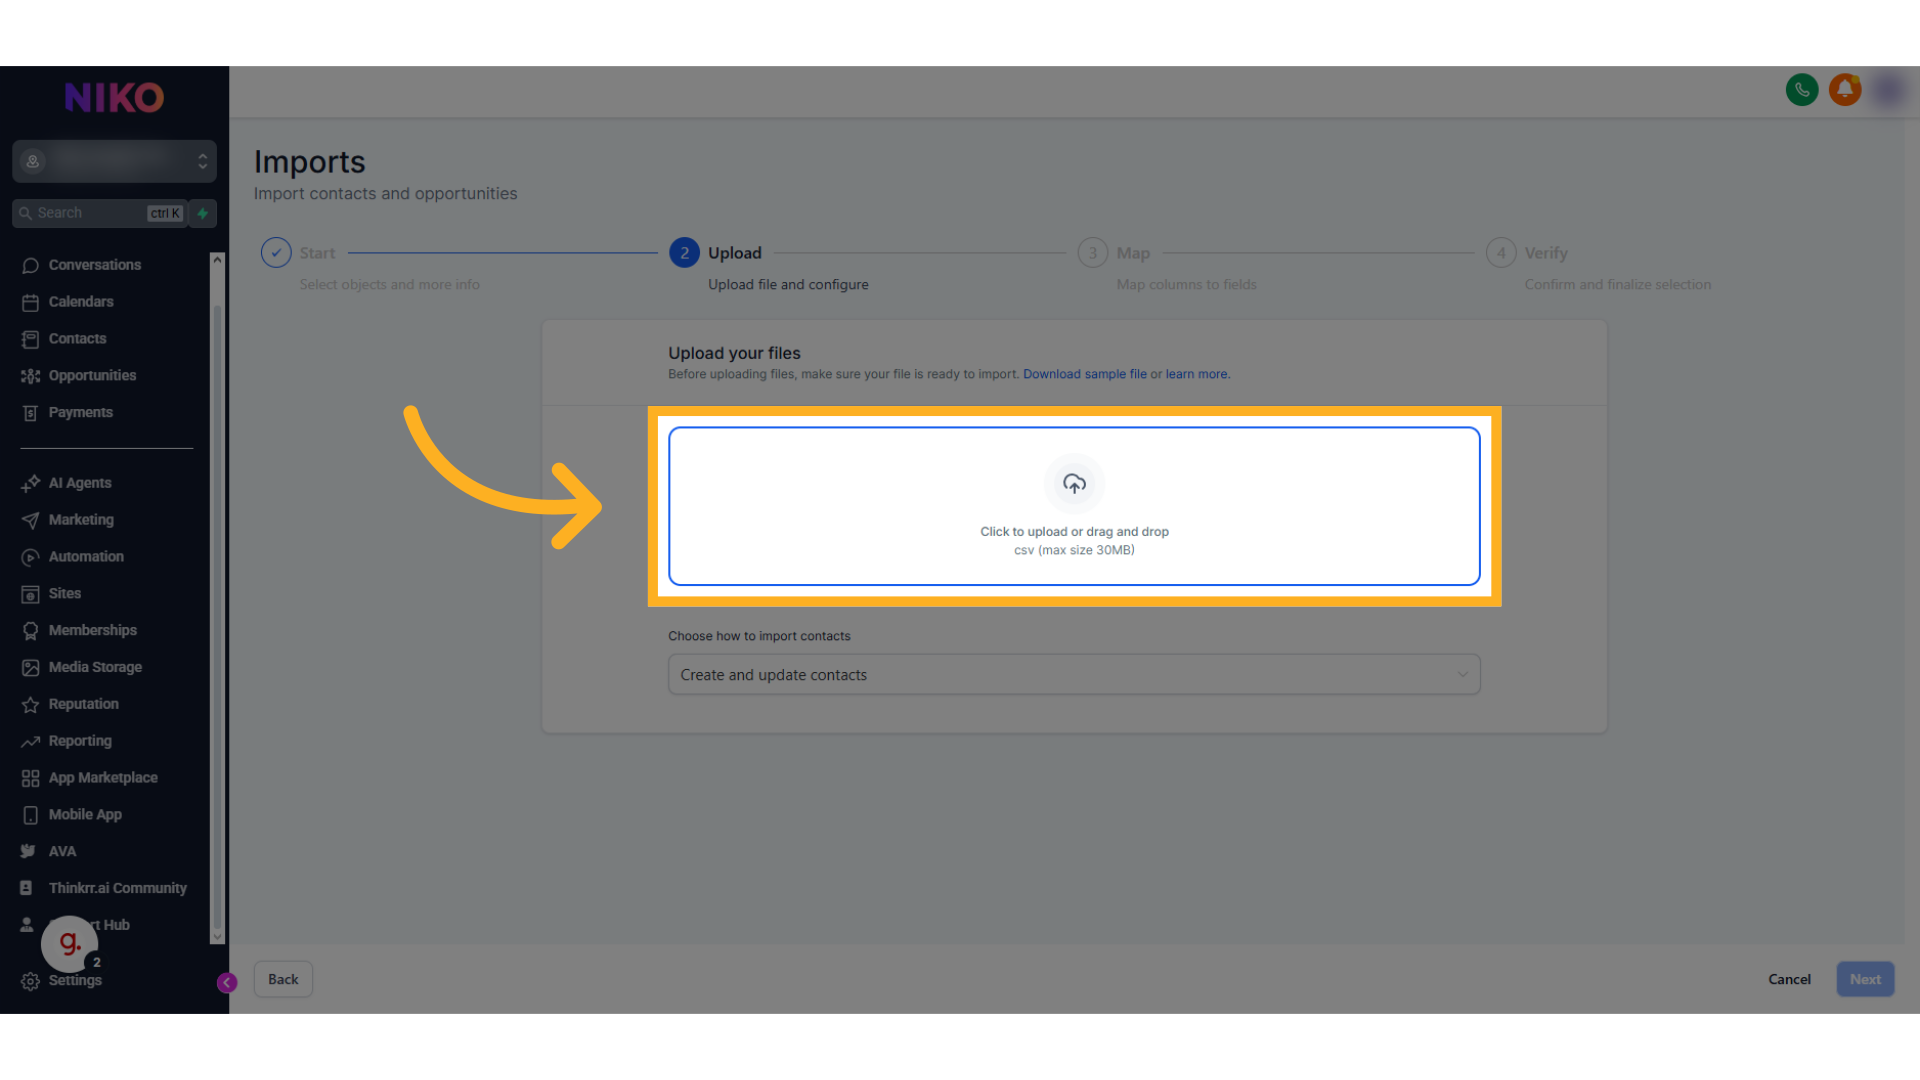
Upload Your CSV File
- Click “Click to upload or drag and drop csv” (max size 30MB).
-
Upload your CSV file through this prompt.
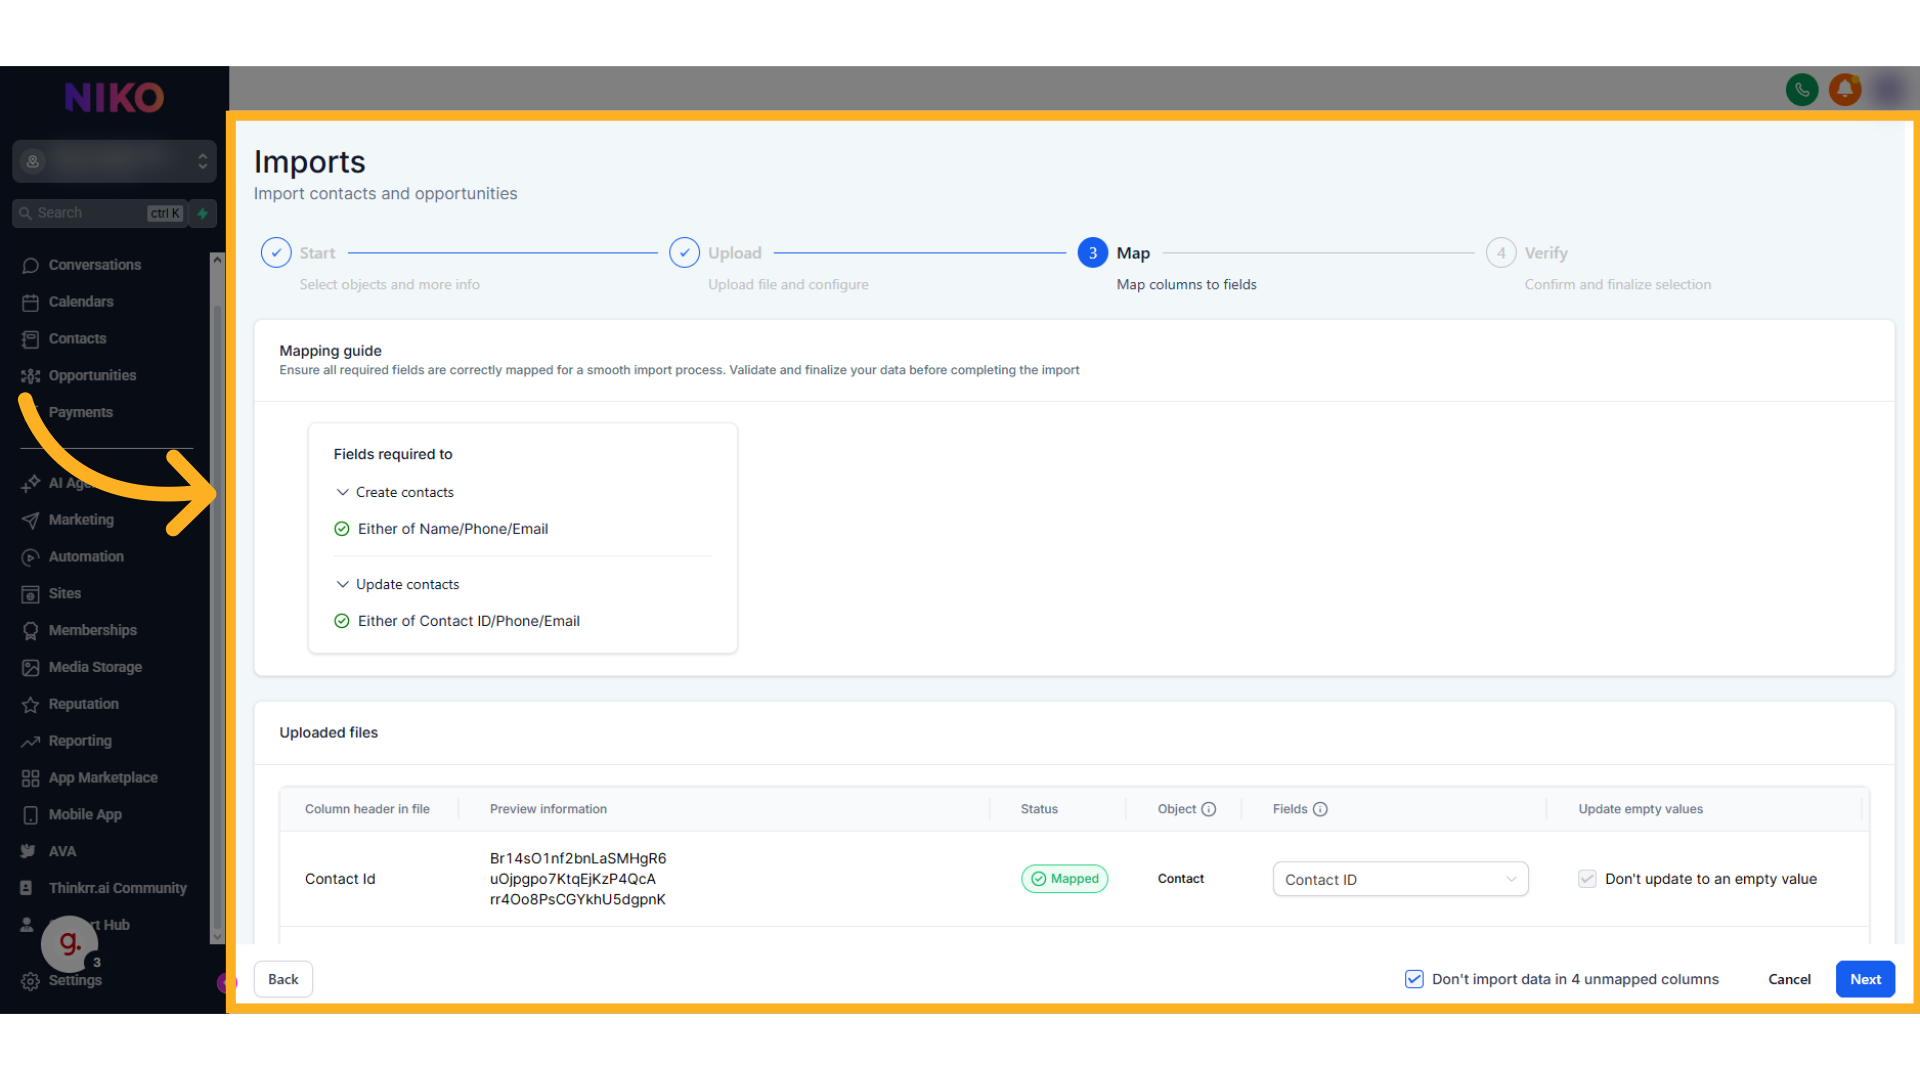
Map Your Fields
-
In the mapping section, you will see:
- The column header from your file.
- A preview of the data.
- The mapping status (whether each field is already mapped).
- The object type.
- The field selection.
- An option to skip updating empty fields.
- Review which fields are required and ensure they are properly mapped.
-
Choose whether or not to update fields if the incoming data is empty.
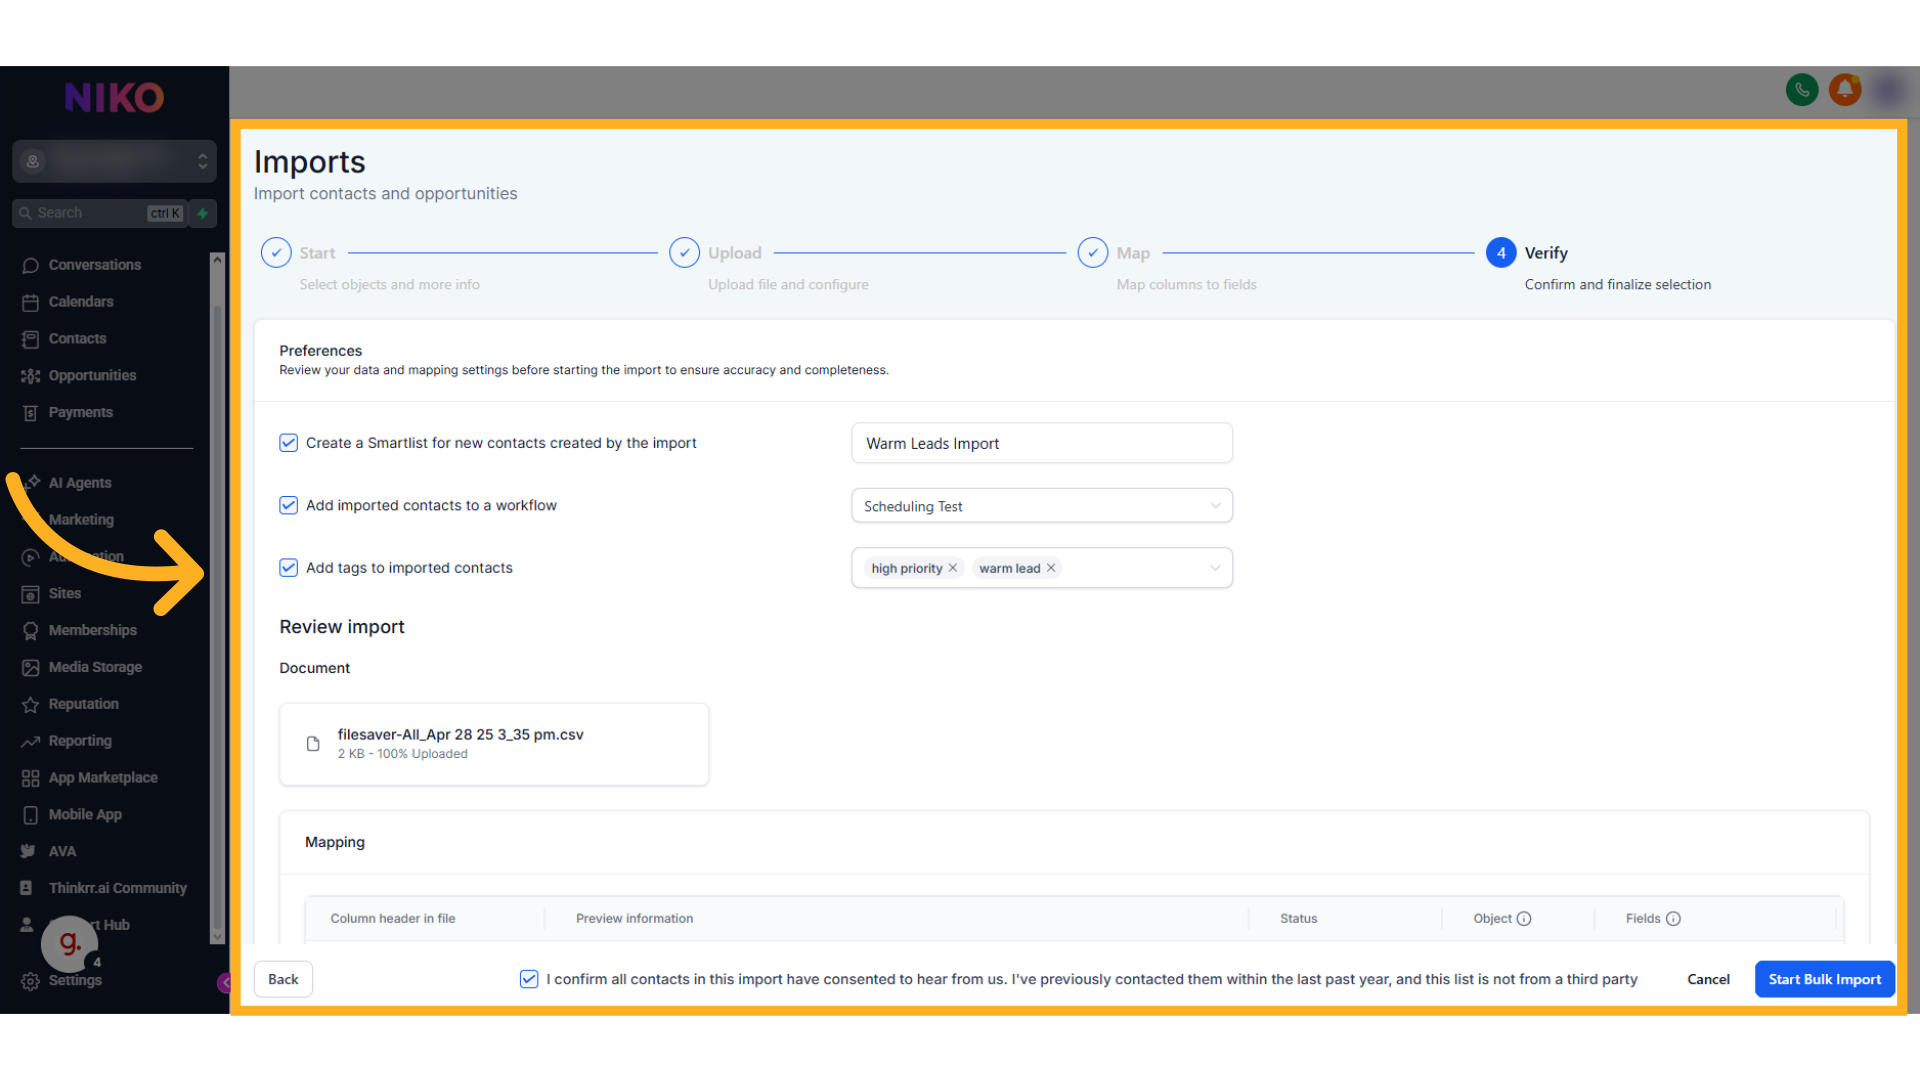
Verify and Review Import Settings
- In the Verify section, review the contacts being imported.
-
Configure your import preferences:
- Create a Smart List.
- Add contacts to an existing published workflow.
- Add tags to your imported contacts.
- Accept the Terms and Conditions at the bottom of the page.
-
Click Start Bulk Import to complete the process.
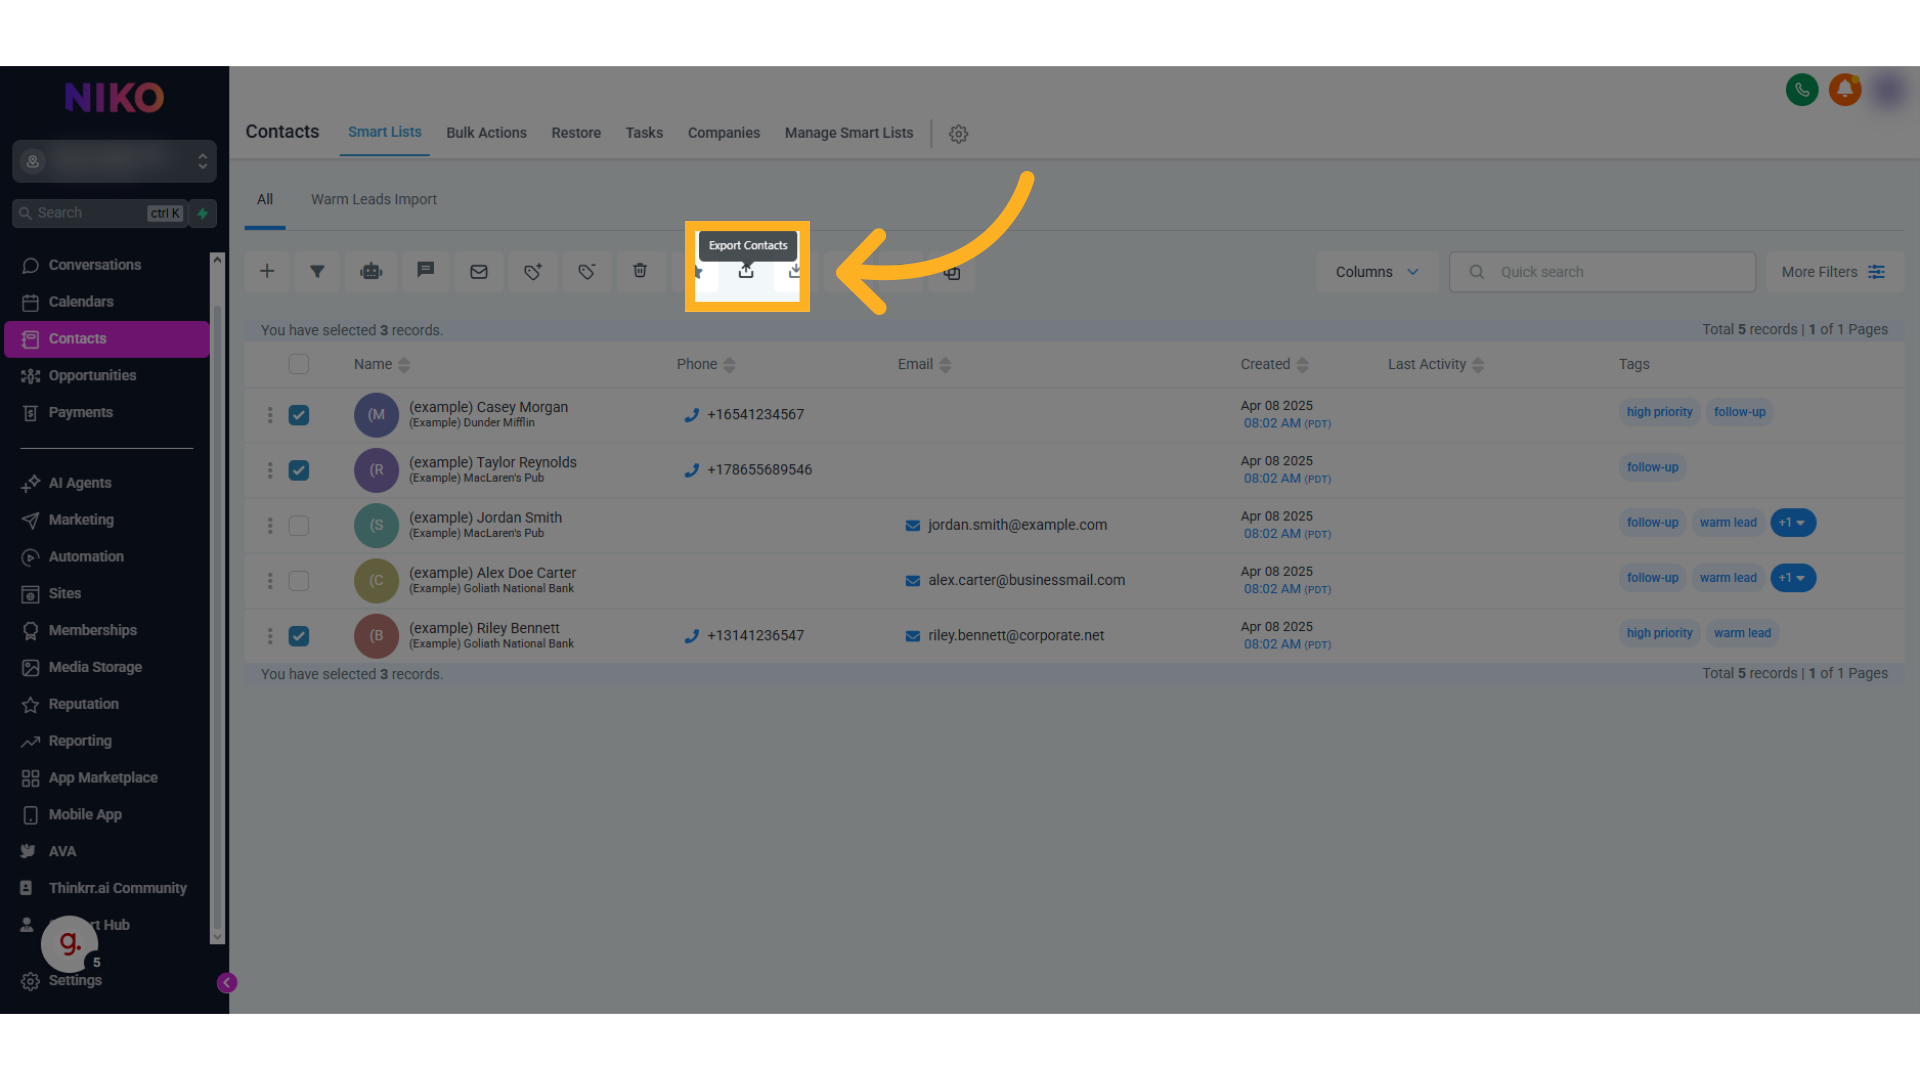
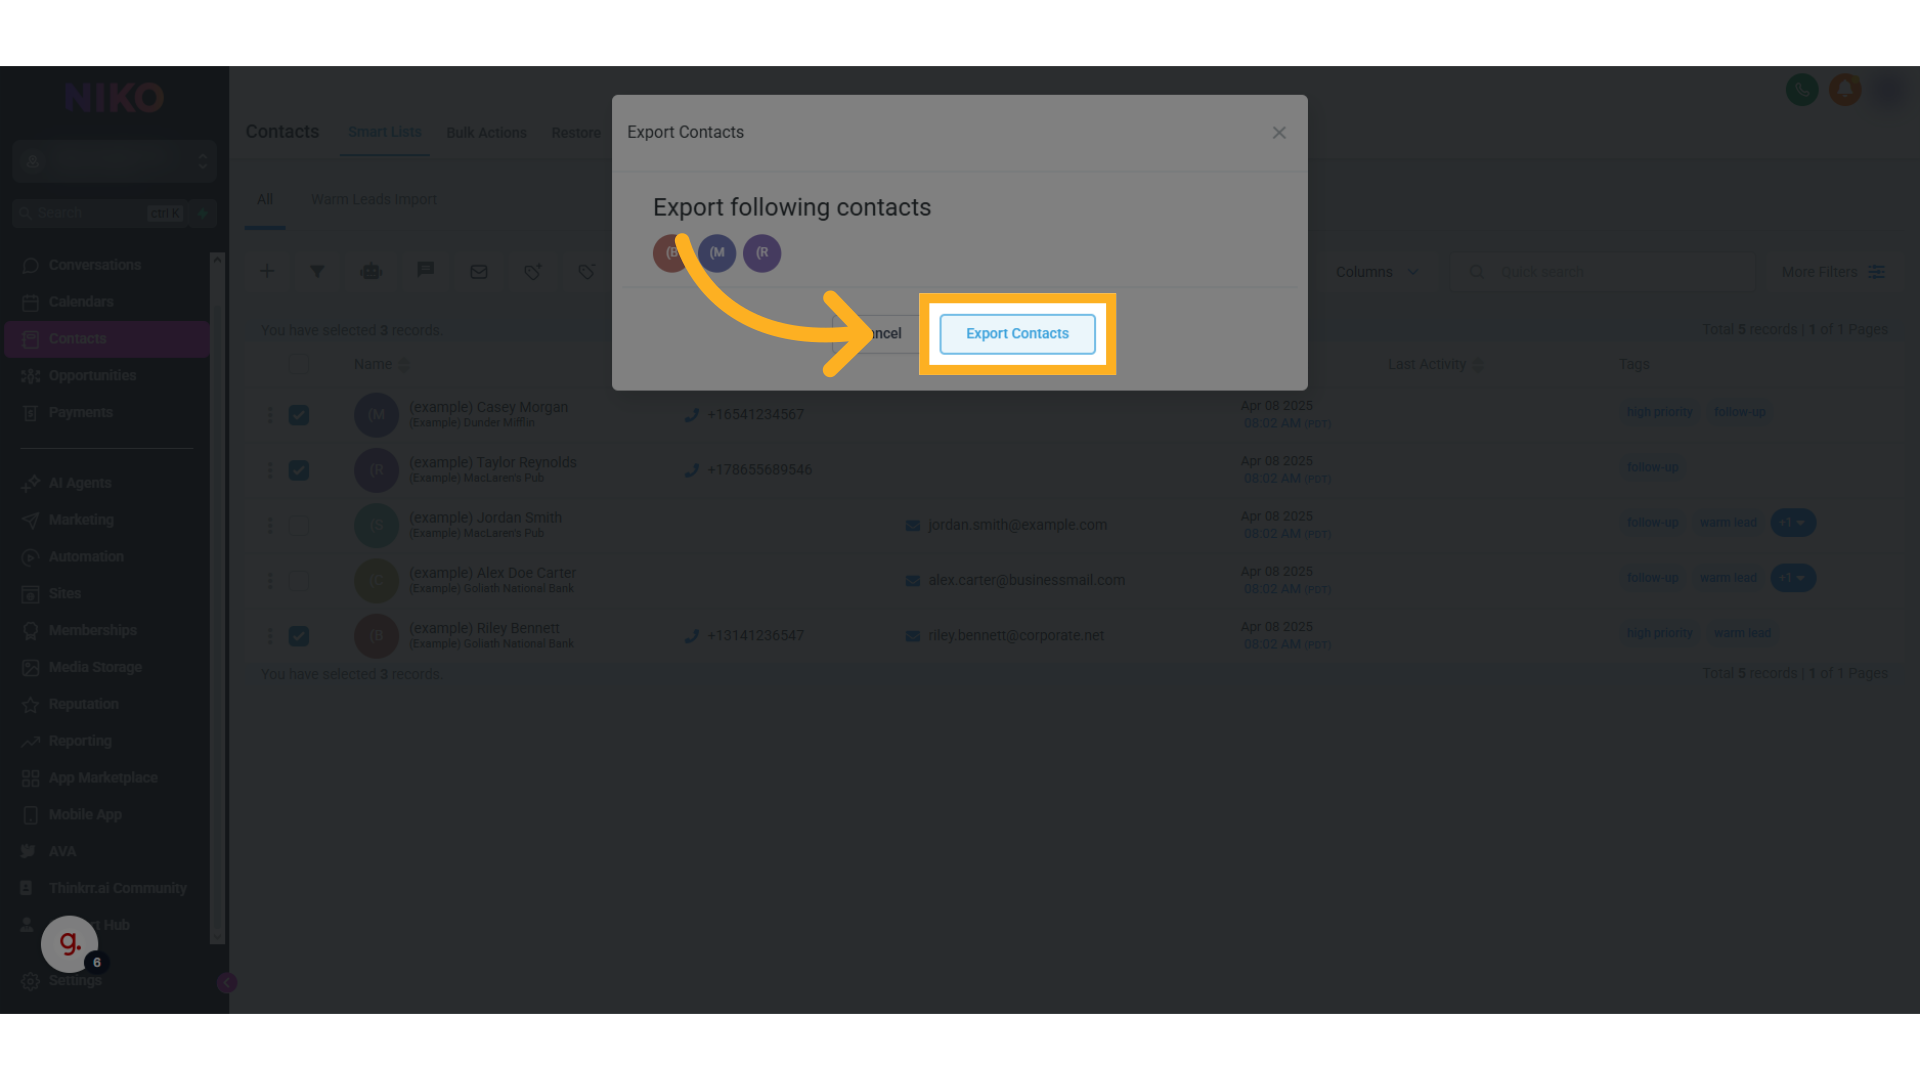
Exporting Contacts
Select Contacts to Export
- From the Contacts list, select the contacts you wish to export.
-
Use the checkbox next to each contact to make your selection.
Do Not Disturb (D&D) Status
Contacts can be marked as Do Not Disturb to prevent them from being called in future campaigns. D&D contacts are automatically skipped when a campaign runs — no minutes are consumed for skipped contacts. There are two types of D&D status:- Manual D&D — You can mark any contact as Do Not Disturb directly from the contacts page. Manual D&D can be removed by the user at any time.
- System D&D — Automatically applied when a contact explicitly requests not to be called during a call, or when a contact has been attempted more than 10 times without answering.
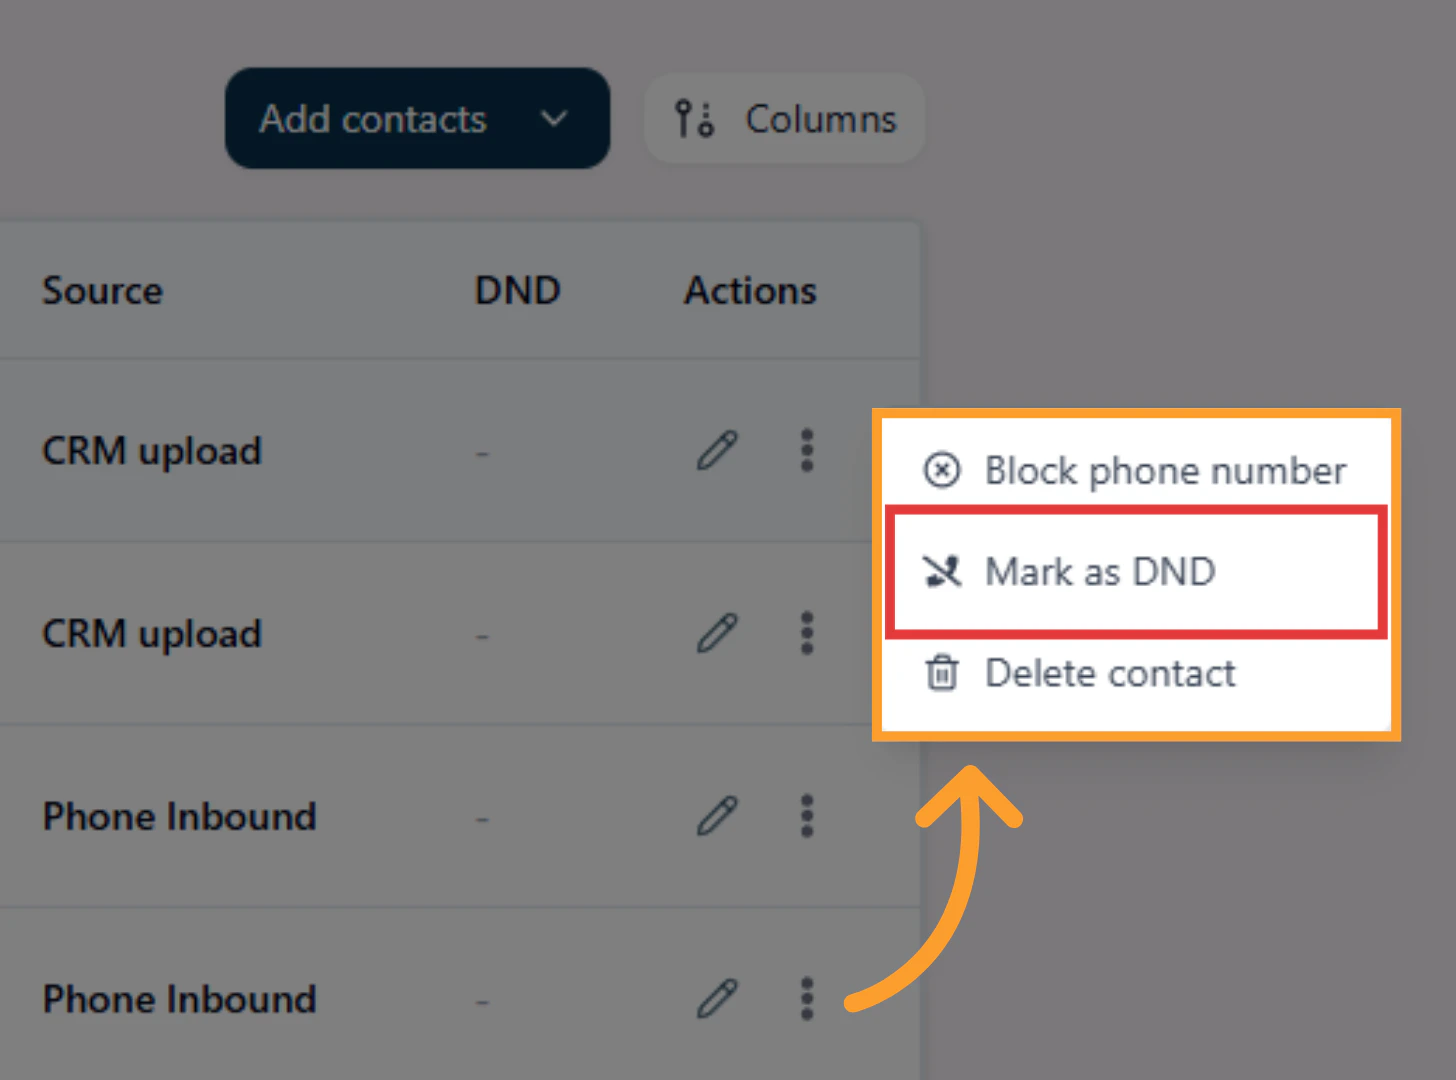
How to Mark a Contact as D&D
- From the home screen, click Contacts in the sidebar.

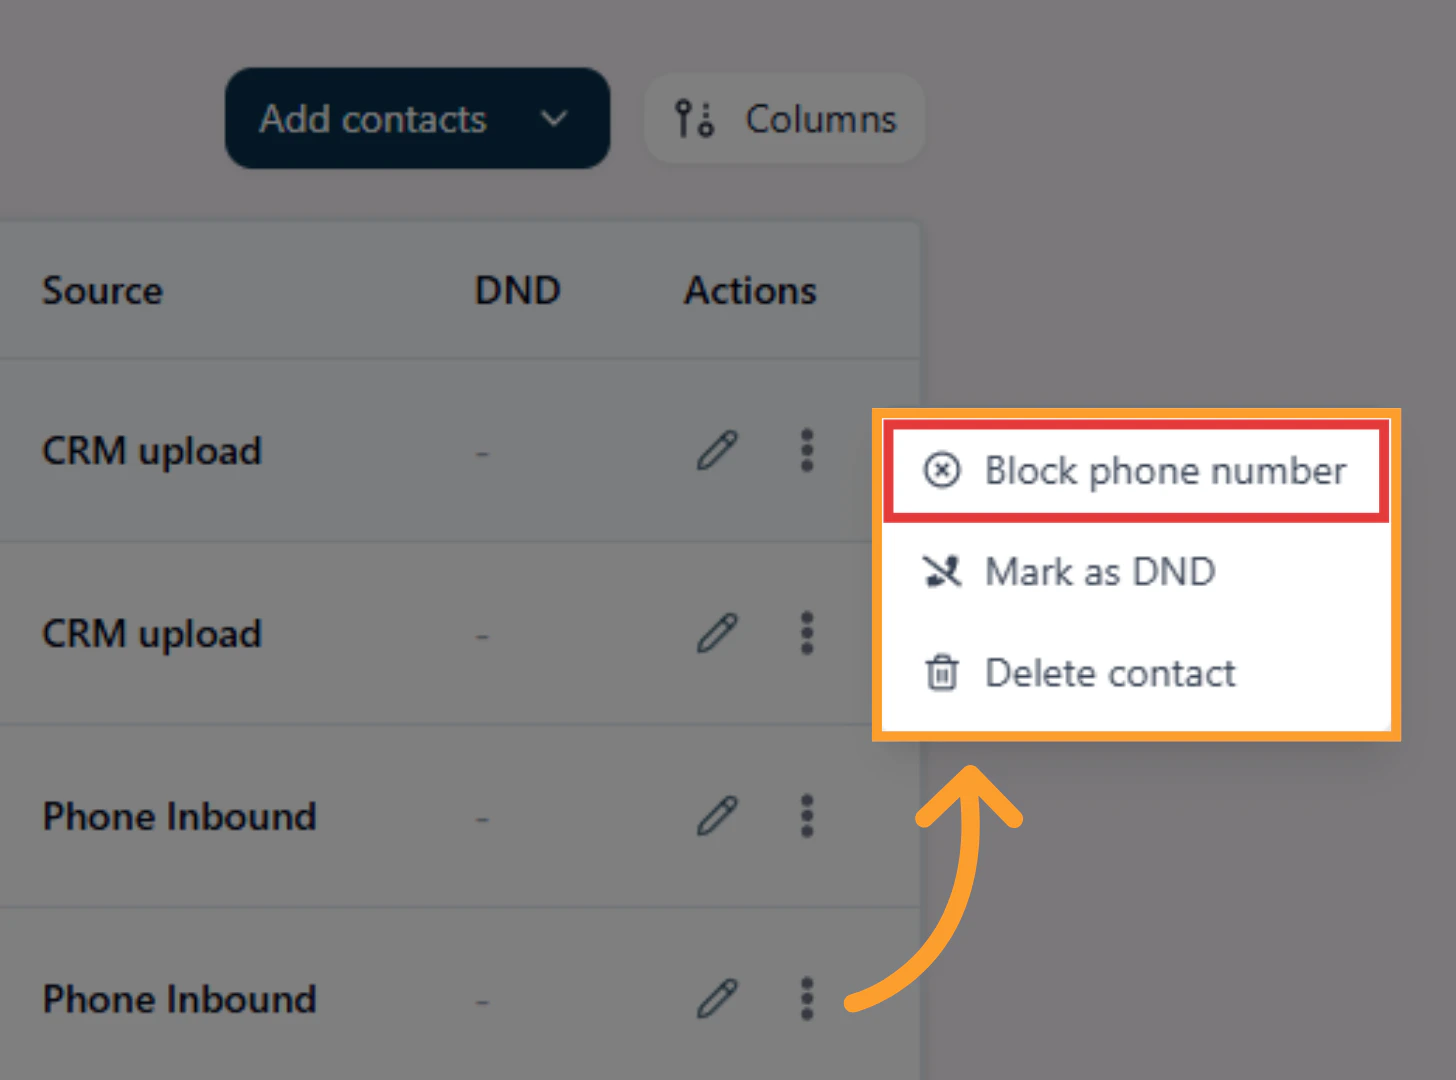
- Find the contact in the table and look for the Actions column on the right.
- Click the three-dot menu (⋮) and select Mark as DND.
- Select a reason:
- Customer Request — The contact has asked not to be called again.
- Billing Issues — There is a billing-related reason to stop contacting them.
- Service Complaints — The contact has raised service-related concerns.
- Other — Enter custom details for any other reason.
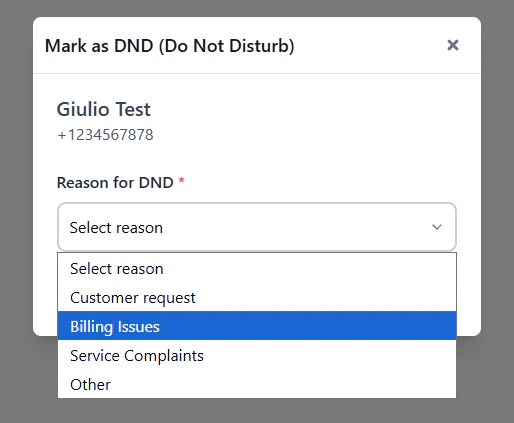
- Confirm your selection. The contact will now be skipped in all future campaigns.
Block Phone Numbers
You can add phone numbers to a block list to prevent unwanted callers from connecting to your inbound agents. This is useful for blocking spam, telemarketers, or any known numbers you don’t want consuming your minutes. Once a contact’s number is logged in your system — whether created automatically from an incoming call or added manually — you can block that phone number. Blocked numbers will hear a system message when they attempt to call in and will not be connected to your agent.How to Block a Phone Number
- From the home screen, click Contacts in the sidebar.
- Find the contact in the table and look for the Actions column on the right.
- Click the three-dot menu (⋮) and select Block Phone Number.
- Select a reason:
- Spam
- Scam
- Unwanted Calls

- Confirm your selection. The number will no longer be able to connect to your inbound agents.
FAQs & Troubleshooting
General Questions
Can I import both contacts and opportunities?
Can I import both contacts and opportunities?
What file formats are supported for import?
What file formats are supported for import?
- thinkrr supports .xlsx and .csv file formats up to a maximum of 5MB each, with up to five files uploaded at once.
- GHL supports only .csv files with a maximum file size of 30MB. Ensure your files are properly formatted before uploading to avoid issues.
How can I check if my import was successful?
How can I check if my import was successful?
- In thinkrr, check the Contacts page to see newly added records and use the Import History tab inside a campaign to review upload date, file name, records processed, and status.
- In GHL, you’ll see an import summary before completing the process, and can verify results on the Contacts page.
Configuration
What fields are required to import contacts?
What fields are required to import contacts?
- First Name (required)
- Last Name (required)
- Phone number (required, must be North American format)
- Timezone (required)
What causes a record to be marked as invalid?
What causes a record to be marked as invalid?
- It’s a duplicate of an existing record
- The email is invalid (if provided)
- The timezone is invalid
- The phone number is invalid (only North American supported)
- Required fields (First Name, Last Name, Phone, Timezone) are missing
📞 Phone numbers must be formatted as:1-XXX-XXX-XXXXor1 (XXX) XXX-XXXX.
Can I update existing contacts without overwriting empty fields?
Can I update existing contacts without overwriting empty fields?
Usage and Results
What is Do Not Disturb (D&D) and how does it work?
What is Do Not Disturb (D&D) and how does it work?
Can I block phone numbers from reaching my inbound agents?
Can I block phone numbers from reaching my inbound agents?
How do I fix errors found during import?
How do I fix errors found during import?
- In thinkrr, check the status section after uploading. Failed contacts can be corrected using the sample file format for reference, then re-uploaded.
- In GHL, errors are flagged during field mapping or import verification and must be corrected in your CSV before retrying.
Can I add imported contacts directly into workflows or smart lists?
Can I add imported contacts directly into workflows or smart lists?
- Add imported contacts to Smart Lists
- Assign tags
- Include them in existing published workflows during the import process
Is it possible to export a filtered list of contacts?
Is it possible to export a filtered list of contacts?
thinkrr does not currently support contact export.
For additional questions or guidance, try using our Virtual Support Agent ! Available 24/7 to help resolve most issues quickly at thinkrr.ai/support. If you still need assistance, visit our support site at help.thinkrr.ai and submit a Ticket or contact our team directly at hello@thinkrr.ai.