> ## Documentation Index
> Fetch the complete documentation index at: https://docs.thinkrr.ai/llms.txt
> Use this file to discover all available pages before exploring further.

# Web Widget

> Deploy your AI Web Agent on your website and connect call data into your workflows with webhooks. This guide covers how to embed the web widget across popular web editors and set up webhook integrations for seamless data logging.

## **Overview**

The **AI Web Agent Widget** allows you to embed your inbound AI assistant directly onto your website, giving visitors the ability to engage with your trained agent through a sleek, customizable widget. Paired with **Webhook Support**, you can automatically log call details and transcripts into your workflows (such as GoHighLevel), enabling deeper insights and automation based on your customer interactions.

This guide walks you through:

* How to configure and deploy your AI Web Agent widget
* Embedding the widget across common website editors
* Setting up webhook integration to log call data

## Web Widget

The **AI Web Widget** is a small, interactive assistant that lives directly on your website, embedded into your page. Think of it as a digital concierge — it allows your site visitors to engage directly with your trained inbound AI agent through a chat-like experience, without needing to pick up the phone or send an email.

In this context, the widget acts as the front-end interface for your AI Agent. Whether it's answering questions, qualifying leads, or booking appointments, the Web Widget provides a seamless way for your customers to interact with your AI, right where they already are — on your website.

> 💡 **Why use a Web Widget?**\
> Embedding the AI agent directly onto your site makes it easy for prospects to engage without friction. It boosts response rates, improves customer experience, and ensures your AI assistant is always available to support your visitors.

The widget can be configured as either:

* **Embedded** – Integrated directly into your page layout
* **Overlay** – Floating on top of your website content

Once your **Inbound Agent** is trained and enabled for Web deployment, you'll unlock a new **Web Agent** tab. This is where you'll customize and configure your widget, preview its appearance, and generate the embed code for your website.

## Web Widget Configuration

<Steps>
  <Step title="Web Widget Style">
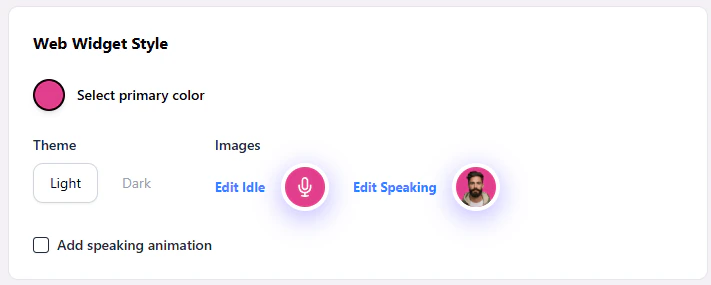
    * **Theme Selection**
      * **Light**
      * **Dark**
    * **Edit Idle** – Select the visual displayed when the widget is idle.
    * **Edit Speaking** – Select the visual displayed while the agent is speaking.

    For both Idle and Speaking states, you can:

    * Choose from available **agent faces**
    * Select from built-in **icons**
    * **Upload a custom image** (PNG format, 64x64 pixels recommended)

    <Frame>
      <img src="https://mintcdn.com/thinkrrai/QVhNYvQdZv9OvOUa/images/widgetstyle.png?fit=max&auto=format&n=QVhNYvQdZv9OvOUa&q=85&s=61ead1089cd6c07735a6cd19233a7c49" alt="Widgetstyle" width="711" height="285" data-path="images/widgetstyle.png" />
    </Frame>
  </Step>

  <Step title="Widget Size">
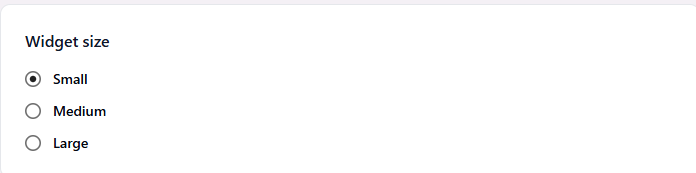
    * Choose from three preset widget sizes:
      * **Small** - 120x120
      * **Medium** - 220x220
      * **Large** - 350x350px

    <Frame>
      <img src="https://mintcdn.com/thinkrrai/zOwlHFOiKc4Q8DwZ/images/widgetsize.png?fit=max&auto=format&n=zOwlHFOiKc4Q8DwZ&q=85&s=c11deaddcce86ff0dda7b11aaca62572" alt="Widgetsize" width="696" height="173" data-path="images/widgetsize.png" />
    </Frame>
  </Step>

  <Step title="Web Widget Experience">
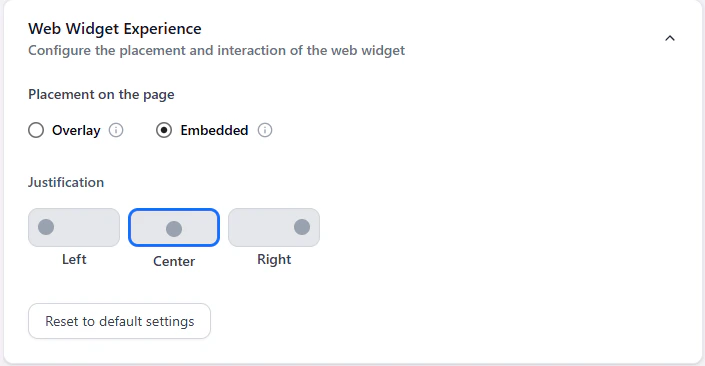
    * **Placement Type**
      * **Embedded**
      * **Overlay**
    * **Justification**
      * **Left**
      * **Center**
      * **Right**
    * **Reset to default settings** – Reverts all fields and visuals to the default configuration.

    <Frame>
      <img src="https://mintcdn.com/thinkrrai/QVhNYvQdZv9OvOUa/images/widgetexp.png?fit=max&auto=format&n=QVhNYvQdZv9OvOUa&q=85&s=53c6a1b0721401d673602e529108bf7f" alt="Widgetexp" width="705" height="366" data-path="images/widgetexp.png" />
    </Frame>
  </Step>

  <Step title="After Call Experience">
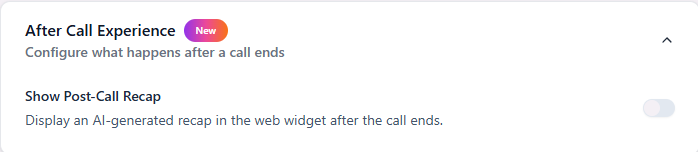
    * Toggle this setting to display an **AI-generated recap** inside the widget after the conversation ends.
    * When enabled, visitors will see a short summary of what was discussed.

    <Frame>
      <img src="https://mintcdn.com/thinkrrai/zOwlHFOiKc4Q8DwZ/images/aftercallexp.png?fit=max&auto=format&n=zOwlHFOiKc4Q8DwZ&q=85&s=c7135caf742714e1294af85abcb9805a" alt="Aftercallexp" width="698" height="152" data-path="images/aftercallexp.png" />
    </Frame>
  </Step>

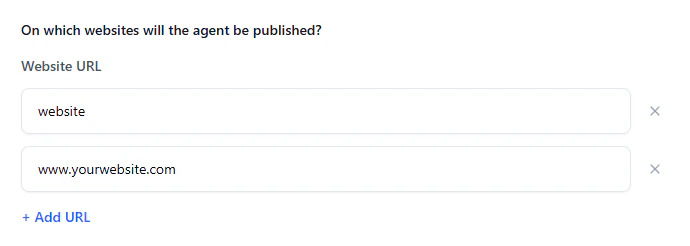
  <Step title="On Which Websites Will the Agent Be Published?">
    * Enter the domain(s) where the Web Agent should be published.
    * Only whitelisted domains will allow the widget to render.
    * Be sure to include variations like `www.domain.com` and `domain.com` if both are in use.

    <Frame>
      <img src="https://mintcdn.com/thinkrrai/xsN9wKBd6ZSVDFwg/images/addurl.png?fit=max&auto=format&n=xsN9wKBd6ZSVDFwg&q=85&s=3d6a39baf6e6e64ed4eac63b4e363bbb" alt="Addurl" width="690" height="246" data-path="images/addurl.png" />
    </Frame>
  </Step>
</Steps>

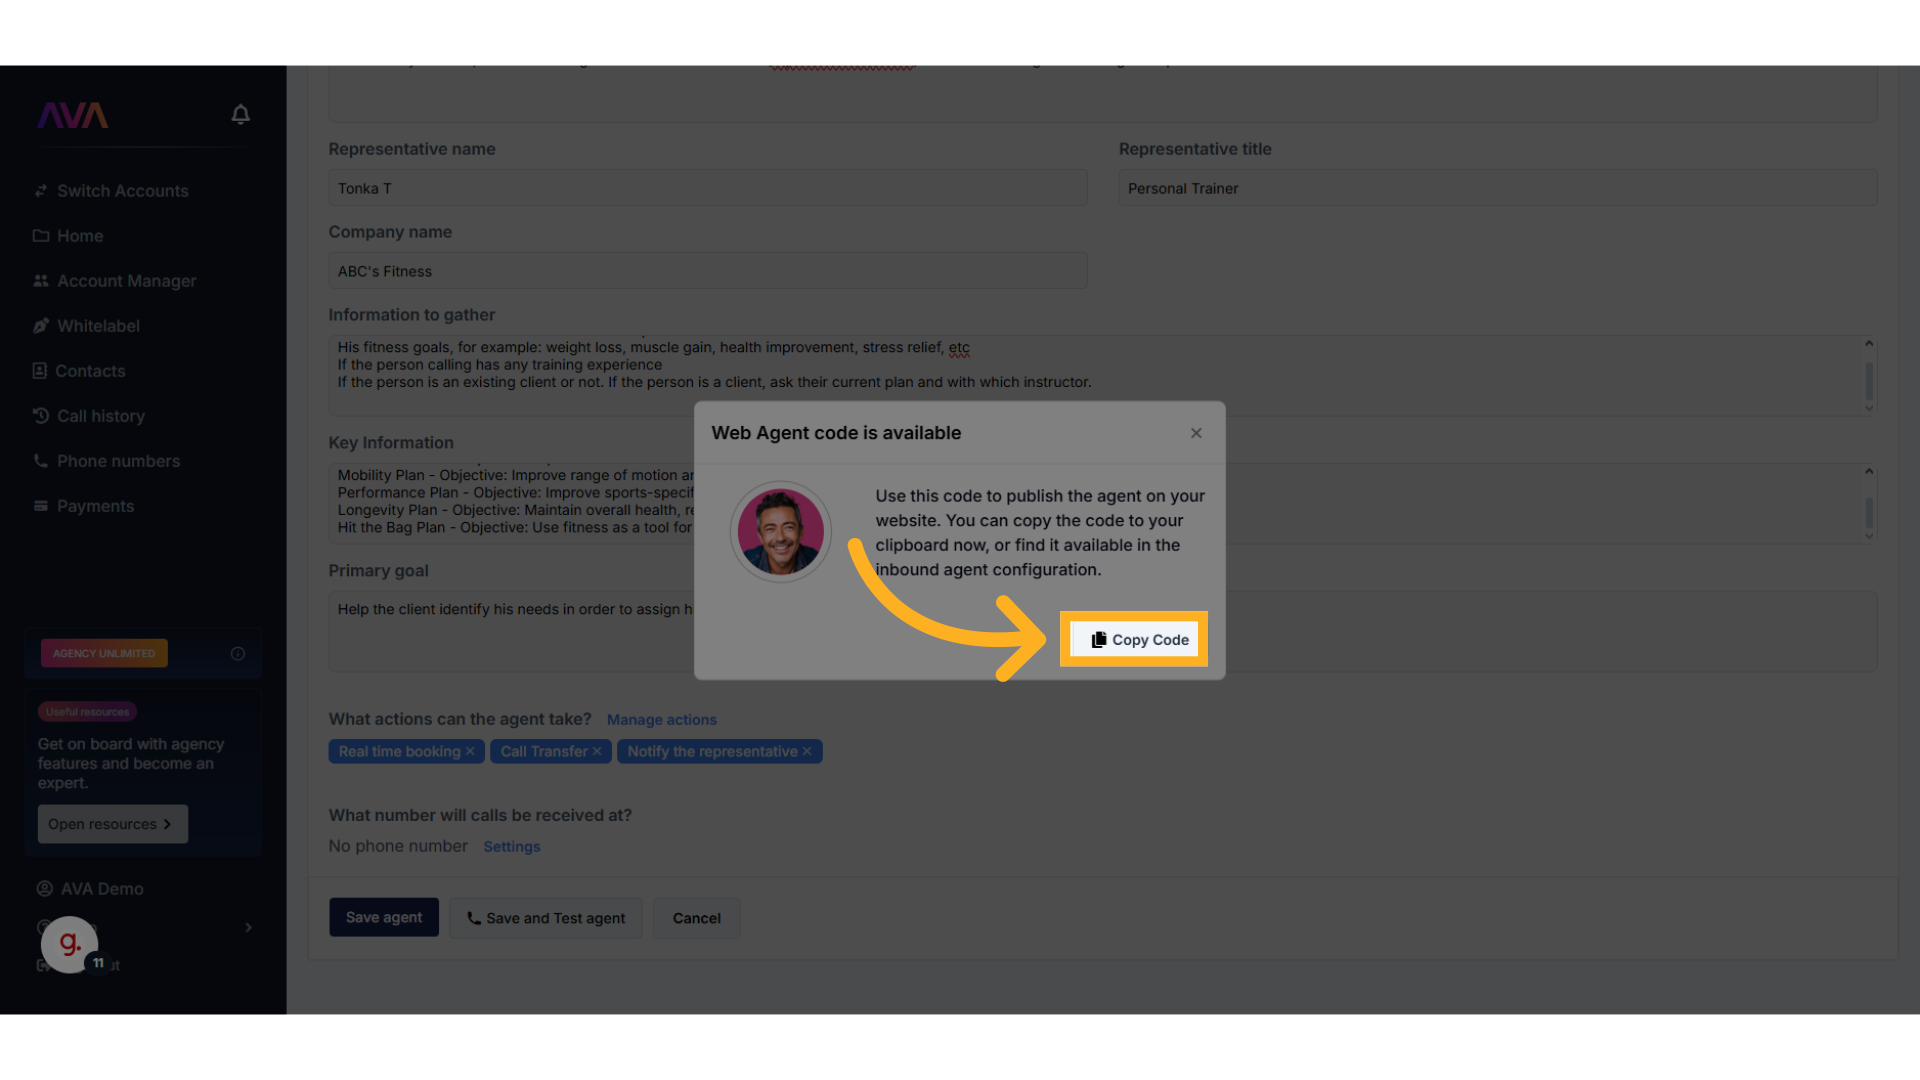
Once these settings are configured and saved, a **code snippet** will be generated. You must embed this snippet directly into your website where the widget should appear.

You will be prompted to copy the integration code after **saving** and **launching** the Web Agent:

<img src="https://mintcdn.com/thinkrrai/_0A6fgFokCqxXCJu/images/inboundseven.png?fit=max&auto=format&n=_0A6fgFokCqxXCJu&q=85&s=02f144b3f32c985516034f862c1a1b57" alt="Inboundseven Pn" width="1920" height="1080" data-path="images/inboundseven.png" />

## Important – Widget Not Responding

> ⚠️ **If your Web Widget appears on your site but is stuck spinning, silent, or never responds, the most common cause is no available minutes on your account.**

The Web Widget requires available call minutes to function. If your balance is empty, the widget may load visually but will not speak or engage.

**What to check immediately:**

* Go to **Payments**
* Confirm you have an active credit balance
* Ensure minutes are available in your account

Once minutes are added, the widget will begin working automatically without needing to redeploy or re-embed it.

## Deploying the Web Widget: Platform-Specific Guides

<Accordion title="GoHighLevel (GHL)">
  1. Navigate to **Sites → Funnels & Websites** and choose **Websites** or **Funnels**.
  2. Select or create a page.
  3. Click **Edit → Add Element → Custom HTML**, then drag the **Custom HTML Block** where you want the AI Web Agent.
  4. Paste the AI Web Agent code snippet.
  5. Publish and test the page.
</Accordion>

<Accordion title="Framer">
  1. Open your **Framer project** and select the page where the agent should appear.
  2. Click **Insert → Embed** and position the embed block.
  3. Paste the AI Web Agent snippet inside the embed window.
  4. Click **Save & Publish**.
</Accordion>

<Accordion title="WordPress (Classic & Gutenberg Editors)">
  1. Navigate to **Pages** in the WordPress dashboard.
  2. Select the page for the Web Agent.
  3. In the **Classic Editor** → switch to **Text (HTML) mode** and paste the snippet where desired.\
     In the **Gutenberg Editor** → add a **Custom HTML Block** and paste the snippet.
  4. Click **Update/Publish**.
</Accordion>

<Accordion title="WordPress (Elementor)">
  1. Open the page in **Elementor Editor**.
  2. Drag an **HTML Widget** to the desired section.
  3. Paste the AI Web Agent snippet.
  4. Click **Update**.
</Accordion>

<Accordion title="Wix">
  #### Basic Embed (Standard Method)

  1. Open **Wix Editor** and select the target page.
  2. Click **Add (+) → Embed → Embed Code**.
  3. Choose **Embed HTML** and paste the widget snippet.
  4. Click **Update**, position the widget, and publish the page.

  #### Embedding the Widget in Wix

  Wix has unique limitations when embedding custom code, especially when using preview mode or the Wix Editor. Follow this method to properly embed and render your web agent in Wix:

  <Steps>
    <Step title="Enable Developer Mode in Wix">
      * Open your Wix site in the editor.
      * From the top menu, enable **Dev Mode** to access advanced custom code options.
    </Step>

    <Step title="Add a Custom Element">
      * Navigate to **Add > Embed Code > Custom Element**.
      * Create a new custom element for your widget.
    </Step>

    <Step title="Configure the Custom Element">
      * Set the **Tag Name** (example: `widget-element`).
      * Upload your widget JavaScript file (see code snippet below).
      * Assign this uploaded file as the source for your custom element.
    </Step>

    <Step title="Set Widget Attributes">
      * Apply the required attributes inside the Custom Element settings:
        * `widget-key`
        * `api-key`
    </Step>

    <Step title="Publish and Test">
      * Publish your site.
      * Open the live site (not preview mode) to verify the widget is rendering properly.
      * ⚠ **Note:** The widget will not render correctly inside Wix's Preview Mode or Editor sandbox.
    </Step>
  </Steps>

  #### Wix Custom Element Code Snippet

  ```javascript theme={null}
  class Widget extends HTMLElement {
    constructor() {
      super();
    }

    connectedCallback() {
      const script = document.createElement("script");
      script.src = "https://d2cqc7yqzf8c8f.cloudfront.net/web-widget-v1.js";

      script.onload = () => {
        window.widgetLib.scanWidgets();
      };

      document.head.appendChild(script);
    }
  }

  customElements.define("widget-element", Widget);
  ```

  #### Known Limitations

  * The widget may not render properly in Preview Mode due to Wix sandbox restrictions.
  * Always test the widget on the live published version of your site.
</Accordion>

<Accordion title="Shopify">
  1. Navigate to **Online Store → Pages**.
  2. Select the page where the Web Agent should appear.
  3. Click **Edit HTML** and paste the snippet.
  4. Save and refresh to confirm placement.
</Accordion>

<Accordion title="Webflow">
  1. Open your Webflow project and go to the desired page.
  2. Click **Add (+) → Embed** to add an **Embed Code Block**.
  3. Paste the snippet inside the block.
  4. Click **Save & Close**, then **Publish**.
</Accordion>

<Accordion title="Squarespace">
  1. Navigate to **Pages** in your Squarespace dashboard.
  2. Select the desired page.
  3. Click **Edit** and add a **Code Block**.
  4. Paste the snippet into the **Code Block** and click **Apply**.
  5. Save and publish.
</Accordion>

<Accordion title="Weebly">
  1. Open your Weebly site editor and choose the target page.
  2. Drag an **Embed Code element** into the desired section.
  3. Paste the AI Web Agent snippet.
  4. Click **Publish**.
</Accordion>

<Accordion title="Duda">
  1. Open your **Duda website editor** and go to the correct page.
  2. Use **Widgets → HTML Widget** and drag it to the placement area.
  3. Paste the snippet into the HTML field.
  4. Click **Save & Publish**.
</Accordion>

<Accordion title="ClickFunnels">
  1. Open your **ClickFunnels editor** and select the funnel step (page).
  2. Click **Add New Element → Custom HTML**.
  3. Paste the AI Web Agent snippet into the custom HTML block.
  4. Click **Save & Preview**.
</Accordion>

## FAQ & Troubleshooting

<Accordion title="SPA Frameworks (React, Vue, etc.)" icon="screwdriver-wrench" iconType="duotone">
  If you're embedding the Web Widget into a Single Page Application (SPA) such as a site built with **React**, **Vue**, or **Angular**, the widget may fail to appear.

  This often occurs because the widget script loads before the container `<div>` is rendered in the DOM.

  After confirming the widget container is present in the DOM, manually trigger the widget scan using:

  ```javascript theme={null}
  window.widgetLib.scanWidgets();
  ```

  In React apps, calling this inside a `useEffect()` hook after the component mounts typically resolves the issue.
</Accordion>

### General Questions

<Accordion title="What is the AI Web Widget and how does it work?" icon="message-question" iconType="duotone">
  The AI Web Widget is an embedded digital assistant that lives directly on your website. It allows visitors to engage with your trained inbound AI agent through a chat-like experience, helping them ask questions, book appointments, or request callbacks—all without leaving your site.
</Accordion>

<Accordion title="Why should I use the Web Widget instead of a pop-up or overlay?" icon="message-question" iconType="duotone">
  The Web Widget can be configured as embedded or overlay. Embedded mode integrates directly within your page layout, while overlay mode floats on top of your content.
</Accordion>

### Configuration

<Accordion title="How do I whitelist my website for the widget to work properly?" icon="gear" iconType="duotone">
  During widget configuration, you must enter the domain(s) where you want the Web Widget to appear. This ensures that the widget only renders on authorized websites and prevents unauthorized use.
</Accordion>

<Accordion title="What happens if I forget to whitelist the domain?" icon="gear-complex" iconType="duotone">
  If your website domain is not properly whitelisted, the widget will not load or display on your site. Make sure to enter the correct domain(s) in the widget configuration panel before deploying the snippet.
</Accordion>

<Accordion title="How do I customize the appearance of the Web Widget?" icon="gear" iconType="duotone">
  The widget appearance can be customized through the configuration panel. You can adjust:

  * Widget size (small, medium, large)
  * Theme (Light or Dark)
  * Idle and Speaking visuals
  * Agent faces or built-in icons
  * Custom image uploads
  * Placement (Embedded or Overlay)
  * After Call recap display
</Accordion>

### Usage and Results

<Accordion title="My Web Widget shows on my site but just spins and doesn’t talk" icon="book-open" iconType="duotone">
  In most cases, this means your account has **no available minutes**.

  The Web Widget uses the same minute balance as inbound phone calls. If your balance is empty, the widget may appear visually but will not respond or speak.

  **How to fix it:**

  * Go to **Payments**
  * Add credits to your account
  * Confirm minutes are available

  No redeploy or code changes are required. Once minutes are added, the widget will begin working automatically.
</Accordion>

<Accordion title="Where do I place the code snippet for the Web Widget?" icon="book-open" iconType="duotone">
  Once configuration is complete, thinkrr generates a code snippet. You must paste this snippet directly into the HTML of your website where you want the widget to appear. Placement guidance for specific platforms like Wix, GHL, WordPress, Shopify, and others is provided in this guide.
</Accordion>

<Accordion title="Does the widget work across all devices?" icon="book-open" iconType="duotone">
  Yes. The AI Web Widget is responsive and designed to work across desktop, tablet, and mobile devices, ensuring a consistent experience for all users.
</Accordion>

<Accordion title="What should I do if the widget isn't rendering on Wix during editing or preview?" icon="book-open" iconType="duotone">
  Due to how Wix handles domain sandboxing, the widget may not render properly in the Wix Editor or Preview mode. To resolve this:

  * Temporarily whitelist **filesusr.com** in your widget settings.
  * Remove **filesusr.com** from the whitelist after your site is published to maintain security.
</Accordion>

***

For additional questions or guidance, use our [**Virtual Support Agent**](/Thinkrr-Support-Agent), available 24/7 at [thinkrr.ai/support](https://thinkrr.ai/support).

If you need further assistance, visit our help site at [help.thinkrr.ai](http://help.thinkrr.ai) or submit a [Support Ticket](/Support-Ticket-System). You can also reach us directly at [hello@thinkrr.ai](mailto:hello@thinkrr.ai).