Overview
Campaigns are how outbound calls are executed in thinkrr. While a Project defines how the AI agent behaves, a Campaign controls who gets called, when calls happen, and how outreach is structured for a specific audience. You can run multiple campaigns under a single project to segment contacts, test different approaches, or schedule calls at different times, all while using the same underlying project configuration.Terms & Definitions
Campaign
A campaign is an execution layer within a project. It inherits the project’s configuration by default and allows campaign-specific overrides, scheduling, and contact selection.Campaign Configuration
The main workspace for a campaign. This is where you customize scenario fields, manage contacts, and assign campaign-level Knowledge Packs.Campaign Settings
A settings panel used to control agent identity, scheduling, call behavior, and voice behavior for a campaign.Accessing Project Campaigns
To manage campaigns, start from an existing outbound project.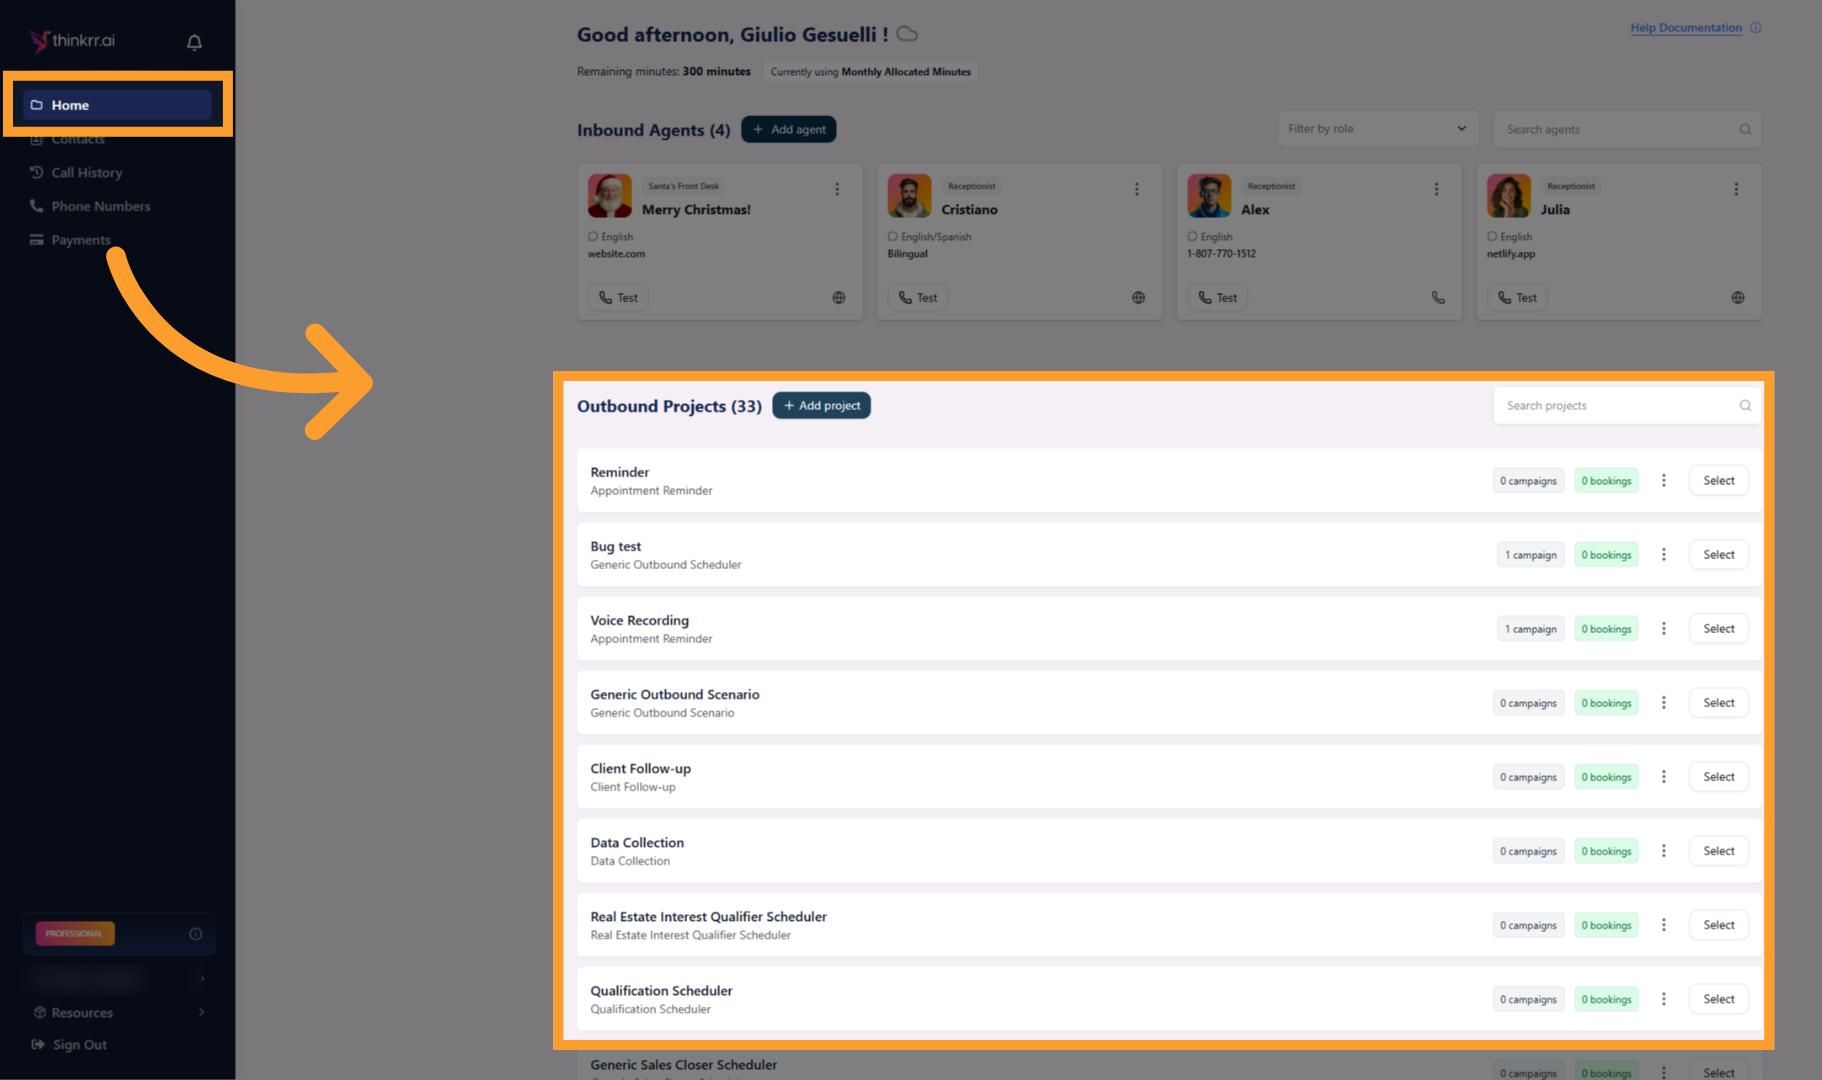
Navigate to Project Campaigns
Click the Project Campaigns tab to view all campaigns associated with the project.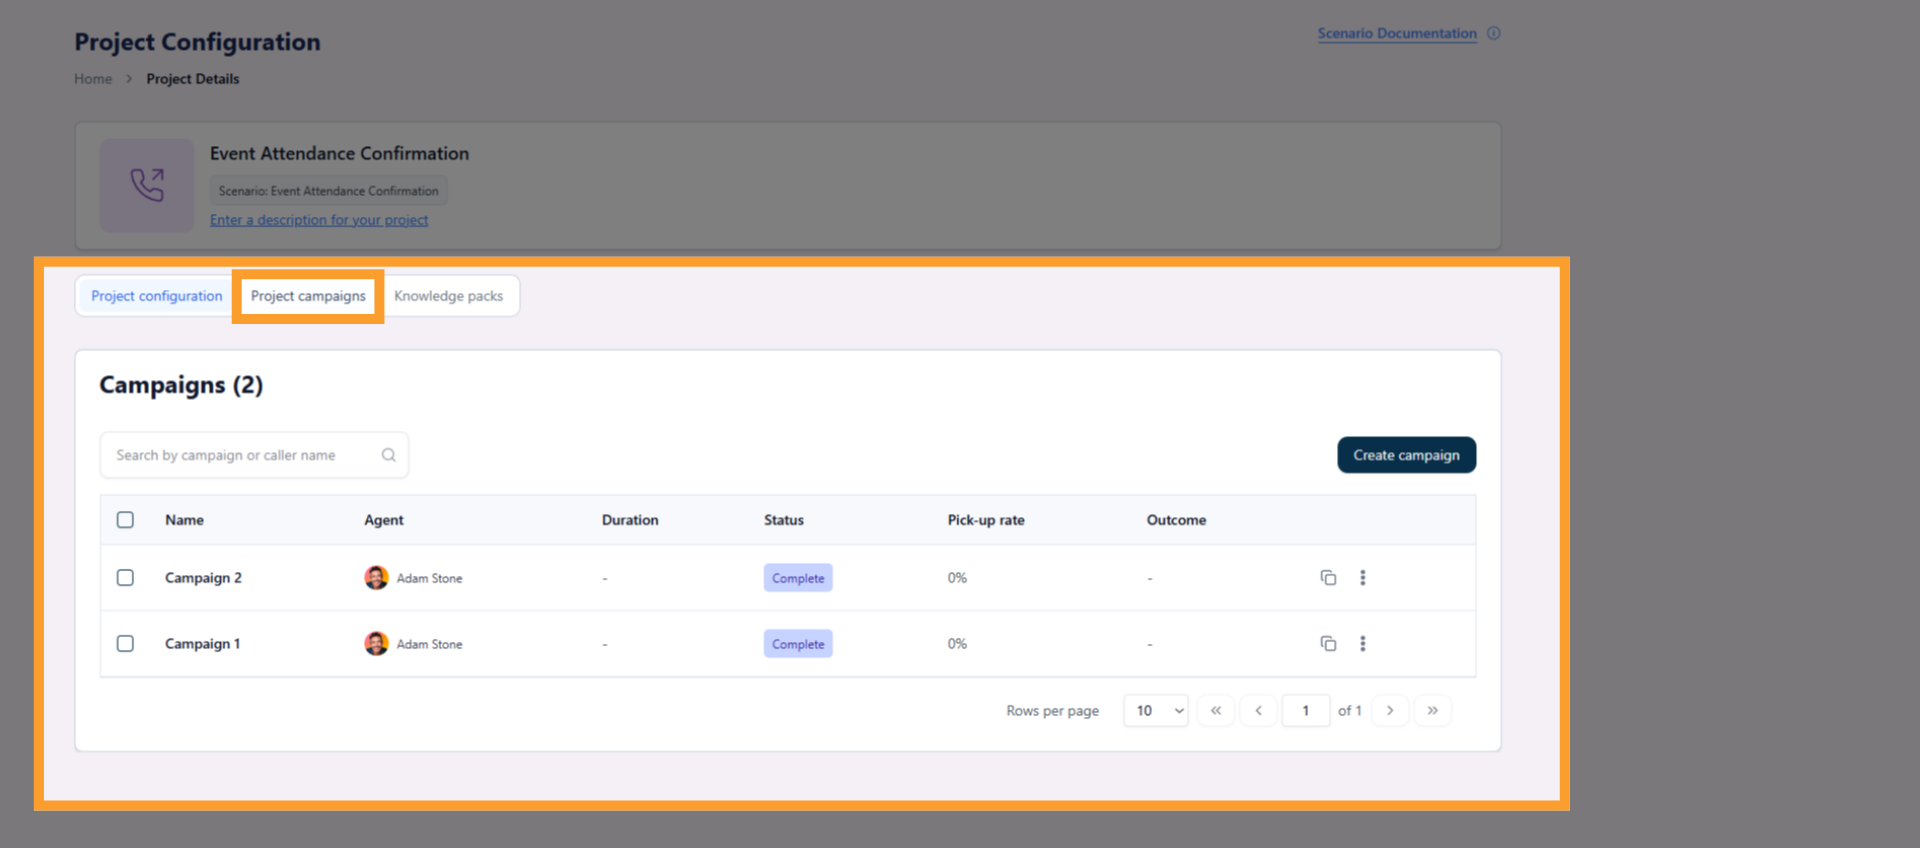
Campaign Workspace Overview
When you open a campaign, you’ll see three main tabs.Campaign Configuration
This tab contains the same configurable fields found at the project level.- Campaigns inherit all project configuration by default
- Fields can be overridden to tailor messaging for a specific audience
- Changes here affect only this campaign
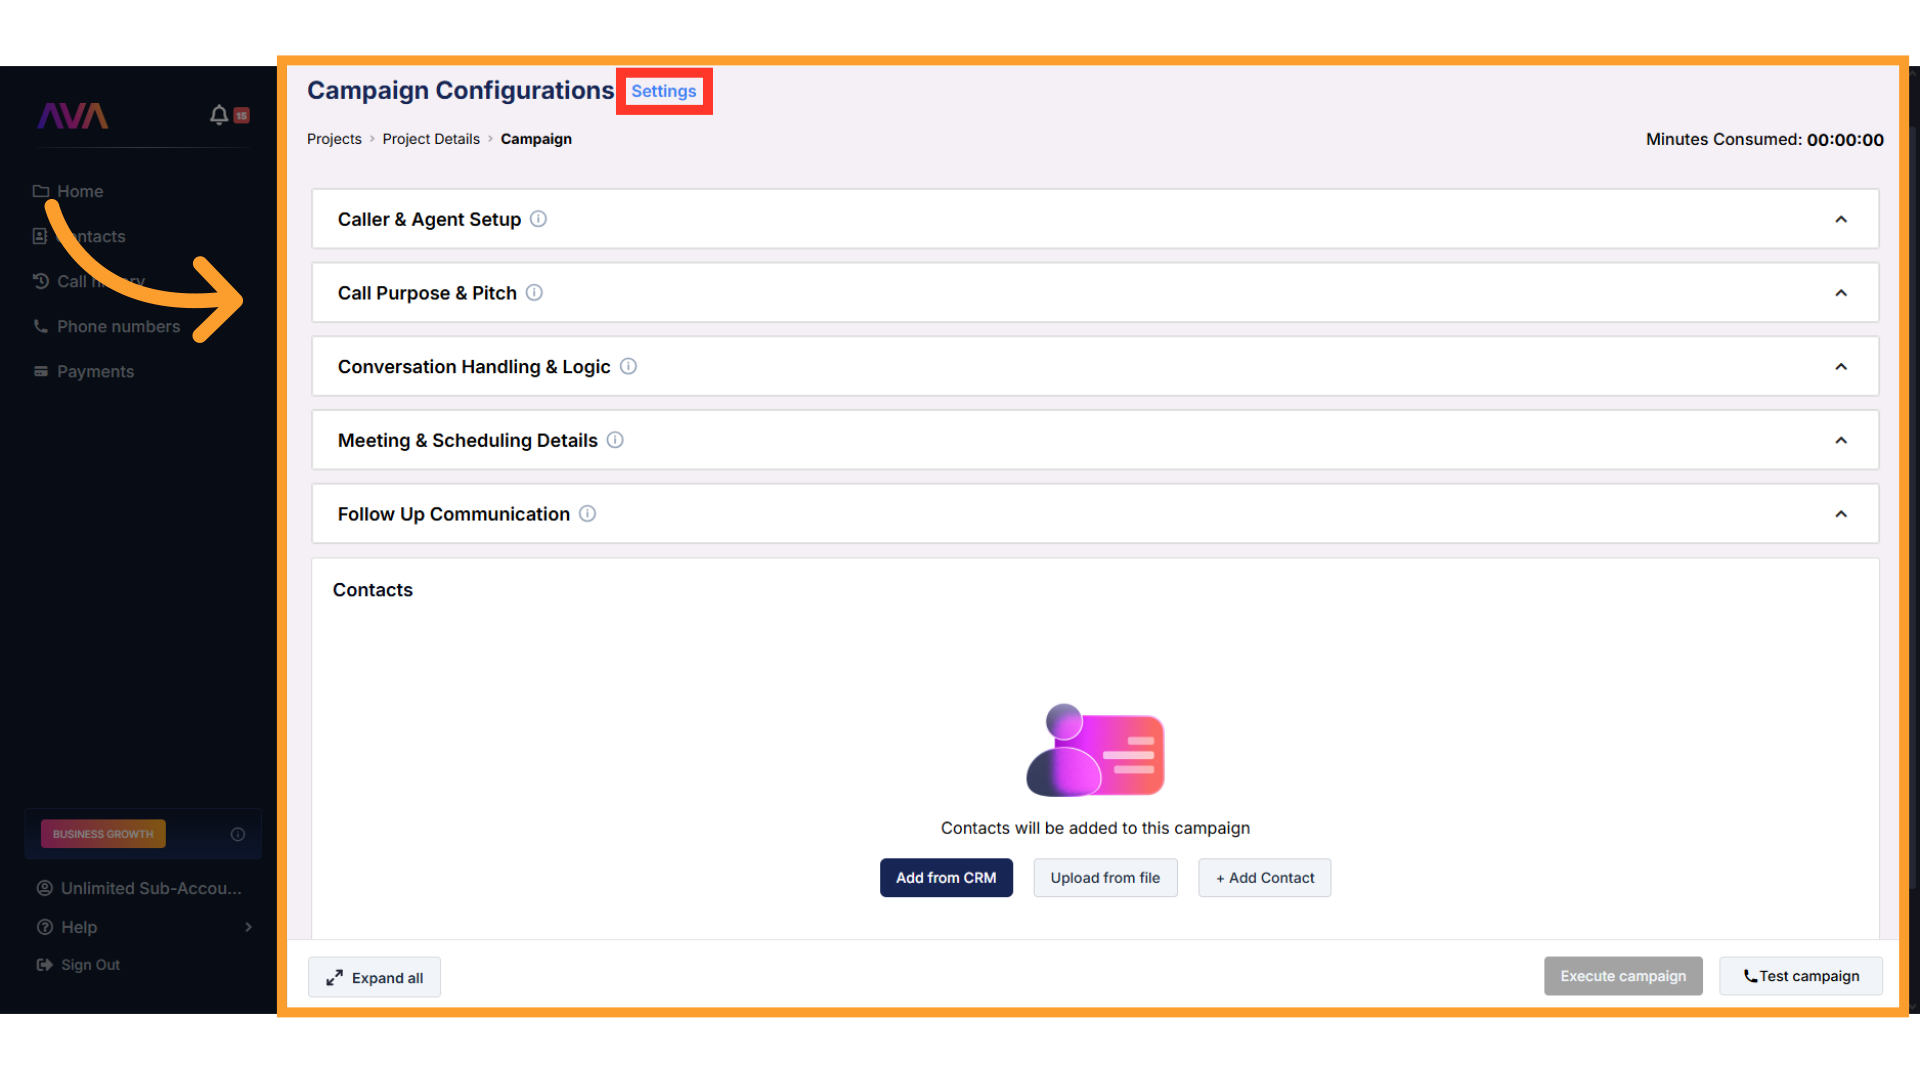
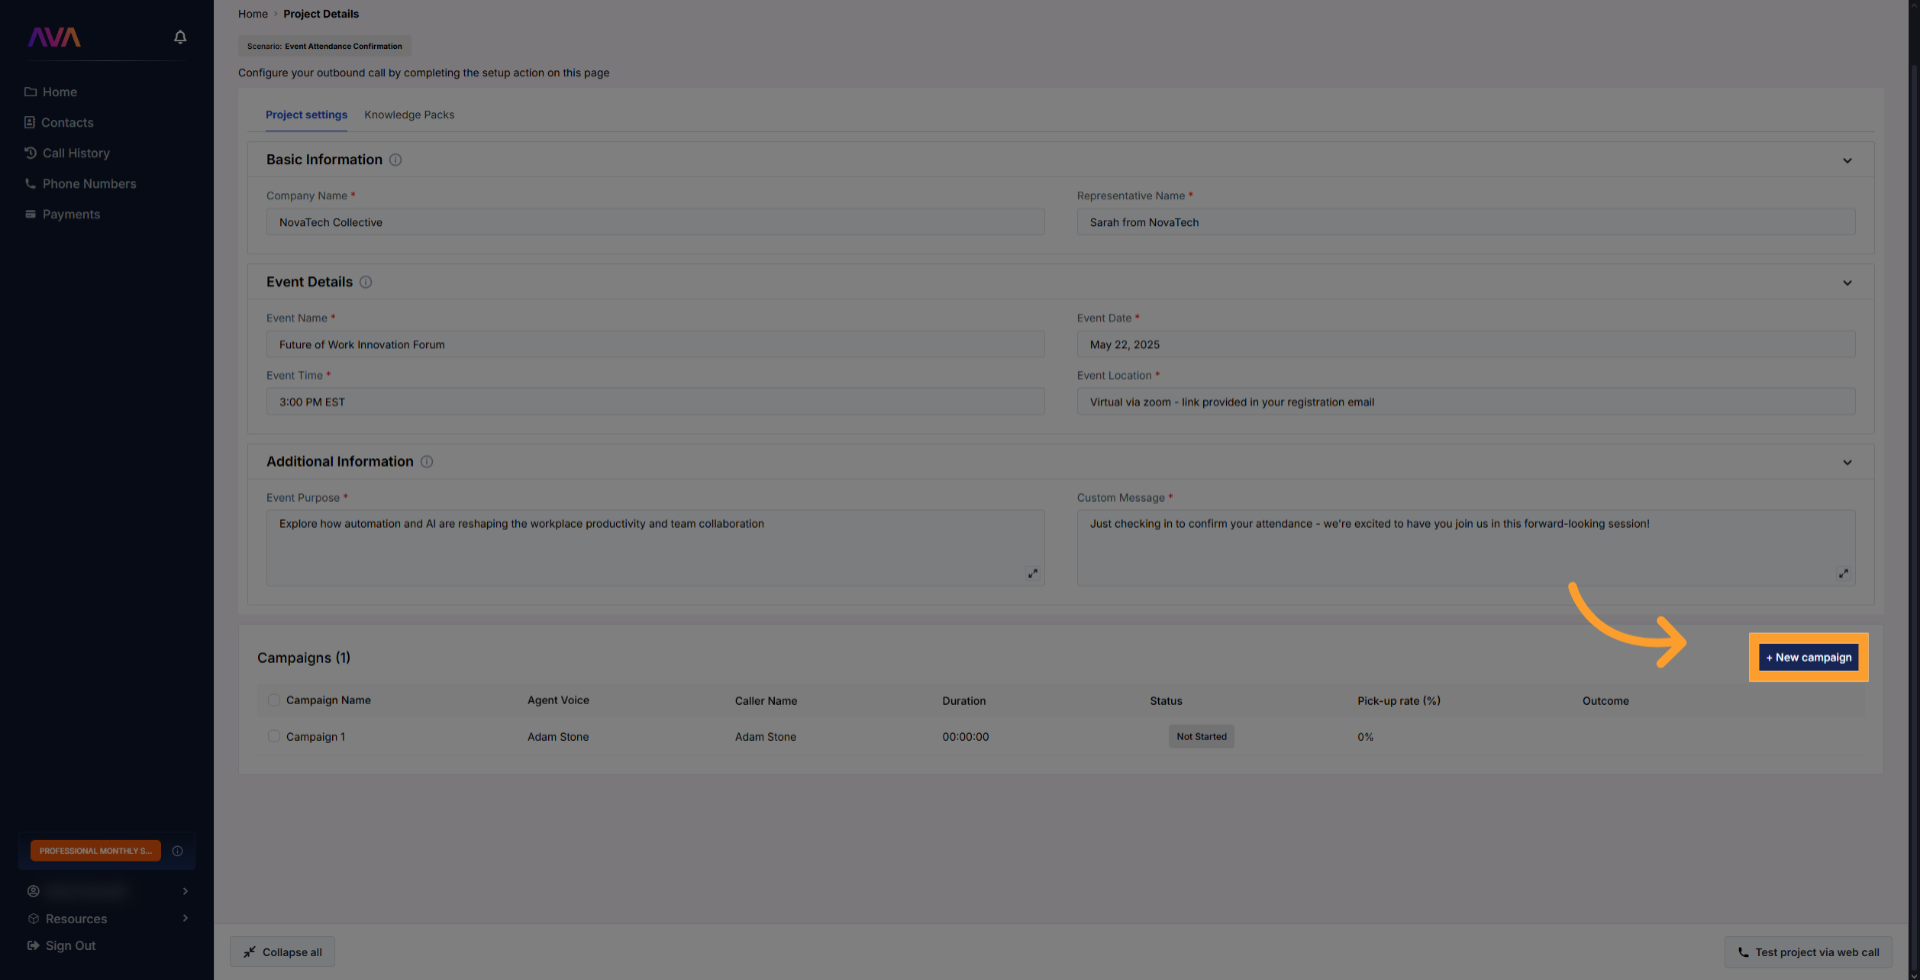
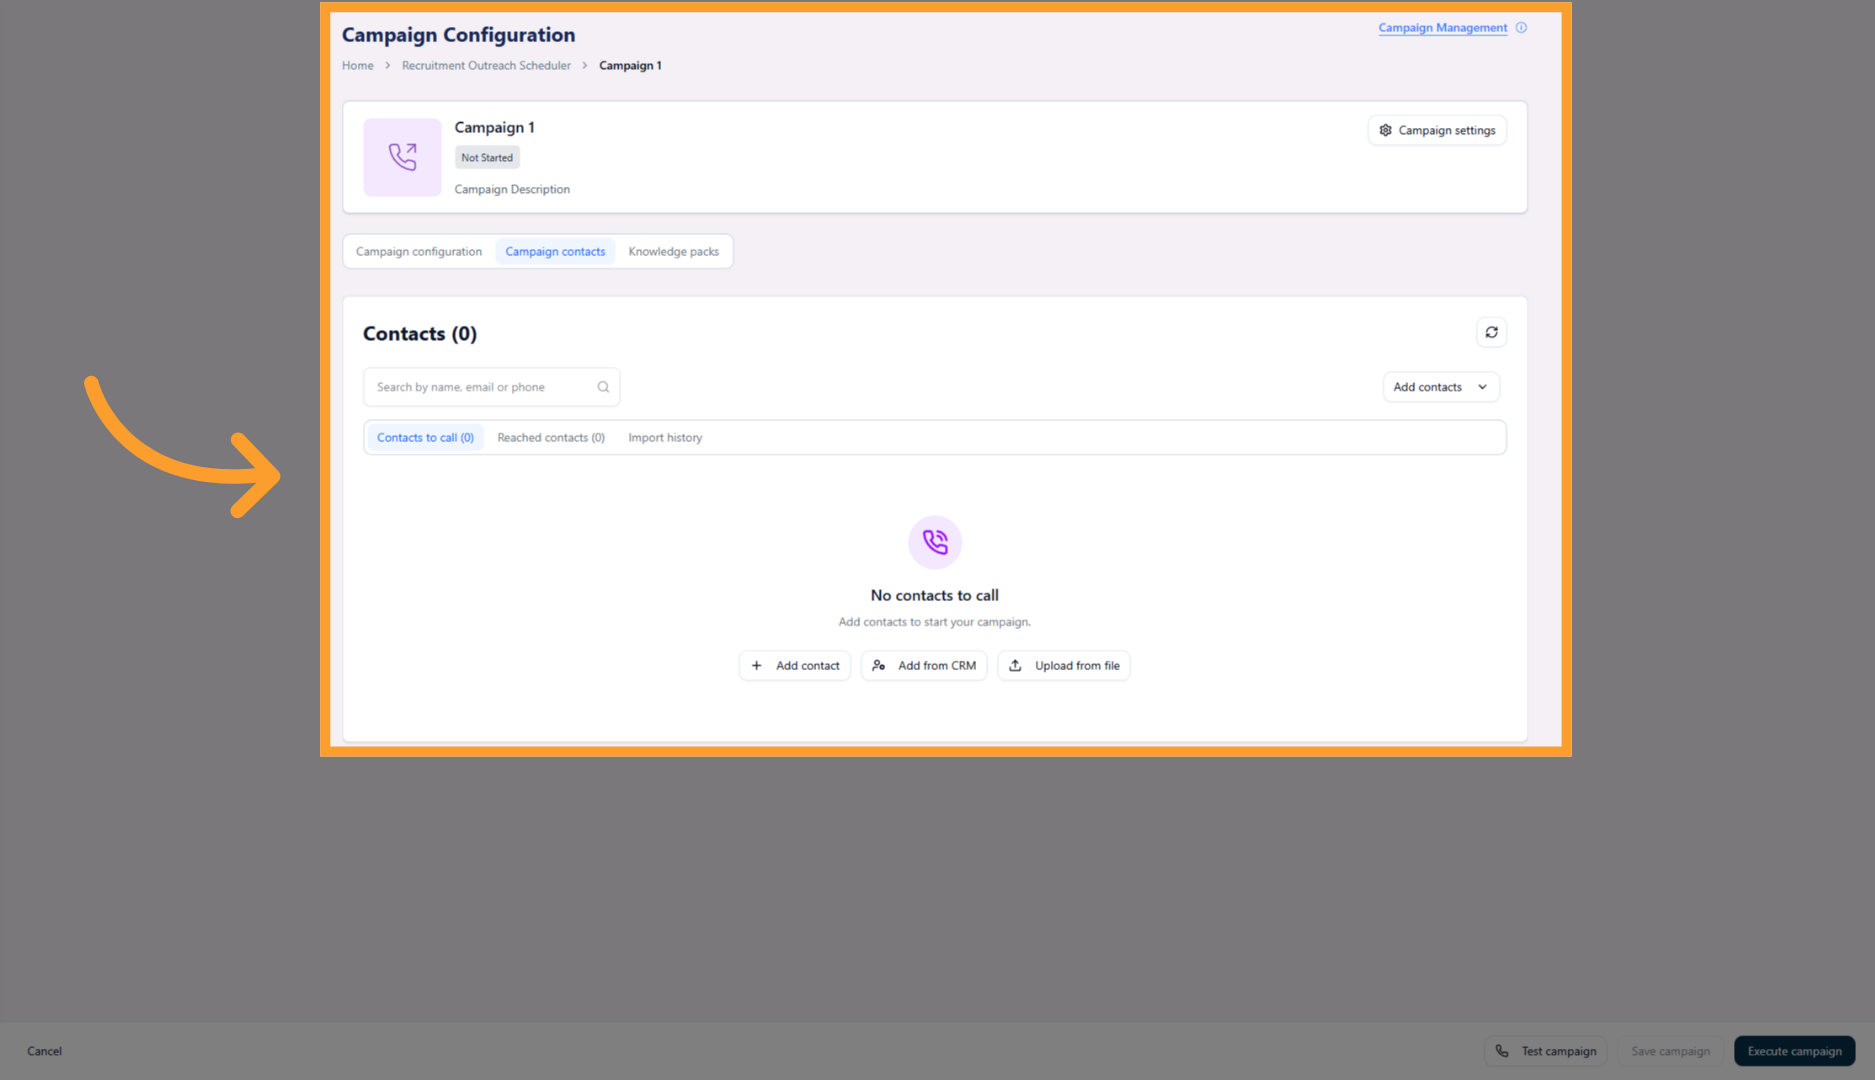
Contacts
Use this tab to define who the campaign will call. You can:- Import contacts from your connected CRM
- Upload contacts via CSV
- Add contacts manually
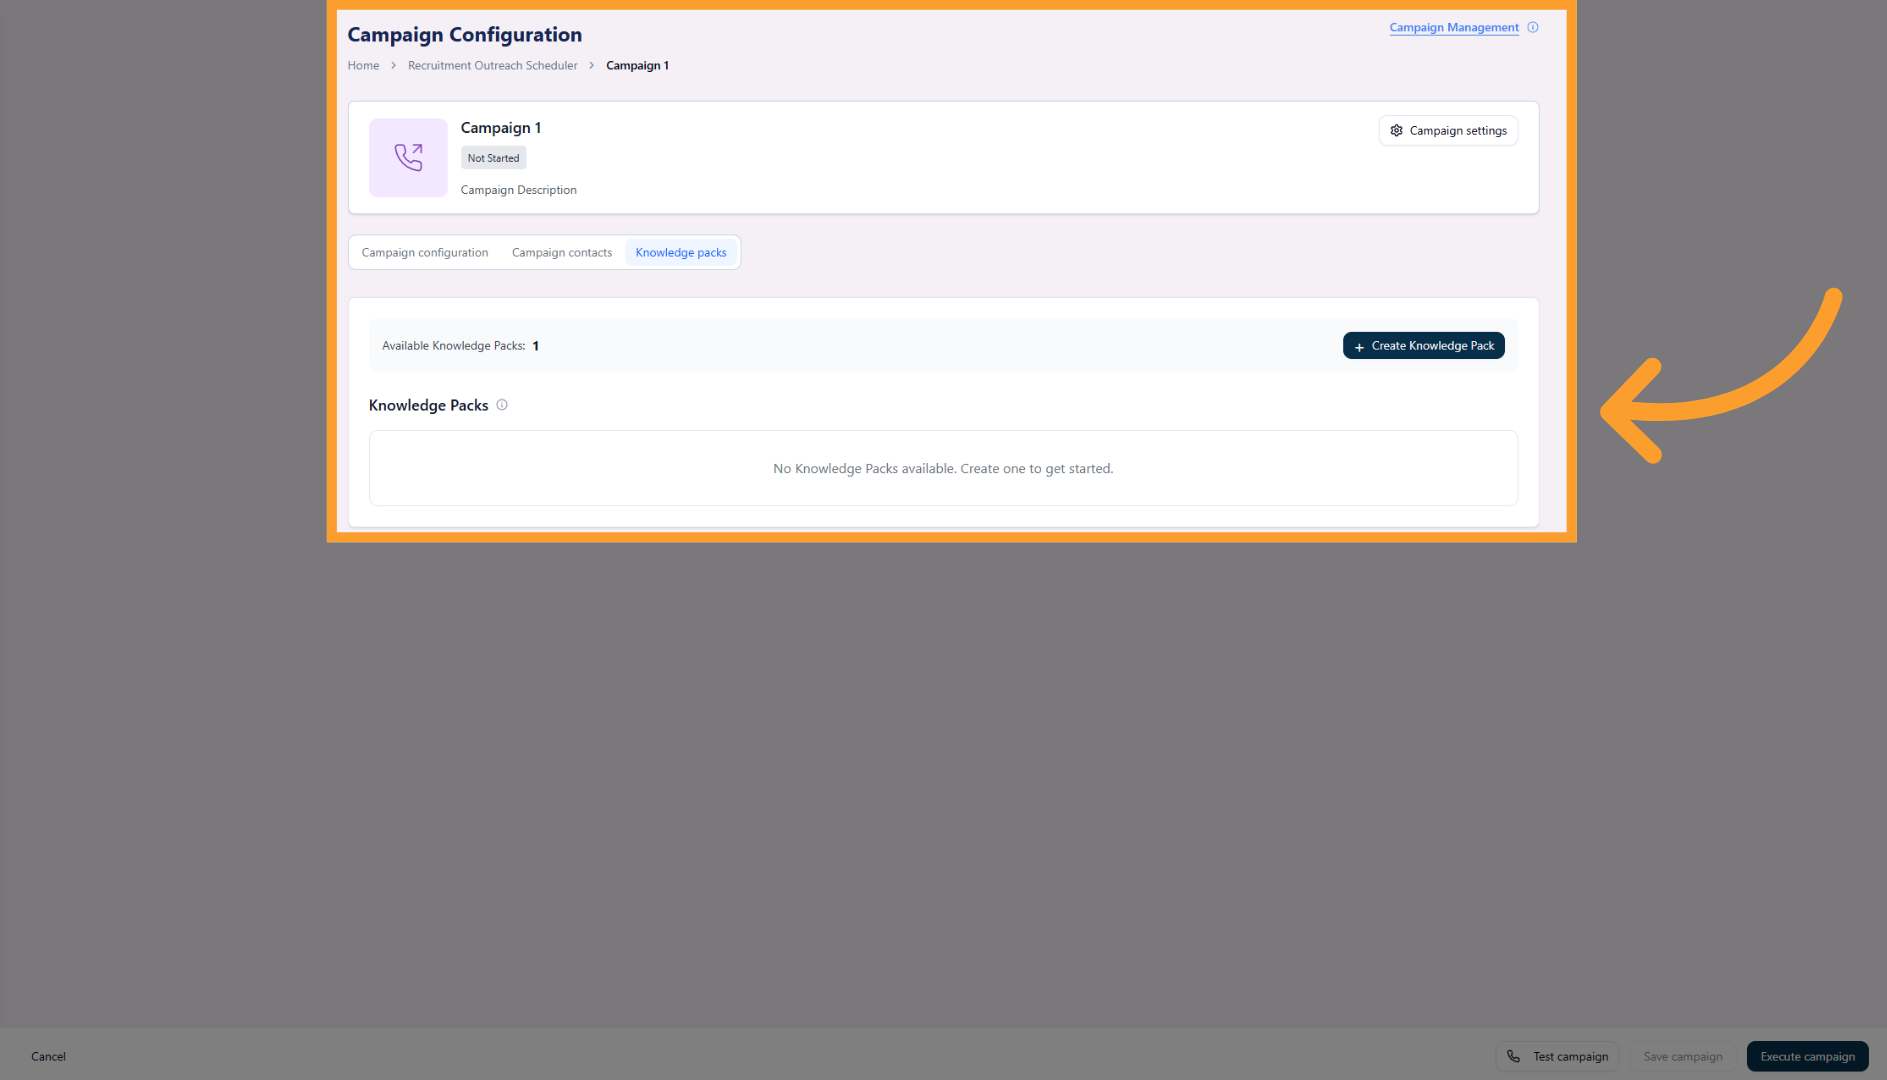
Knowledge Packs
Campaign-level Knowledge Packs allow you to attach or override knowledge specifically for this campaign.- Inherits project-level Knowledge Packs by default
- Can be customized for campaign-specific context
Campaign Settings
From within the campaign workspace, click Campaign Settings in the top-right corner to open the settings panel.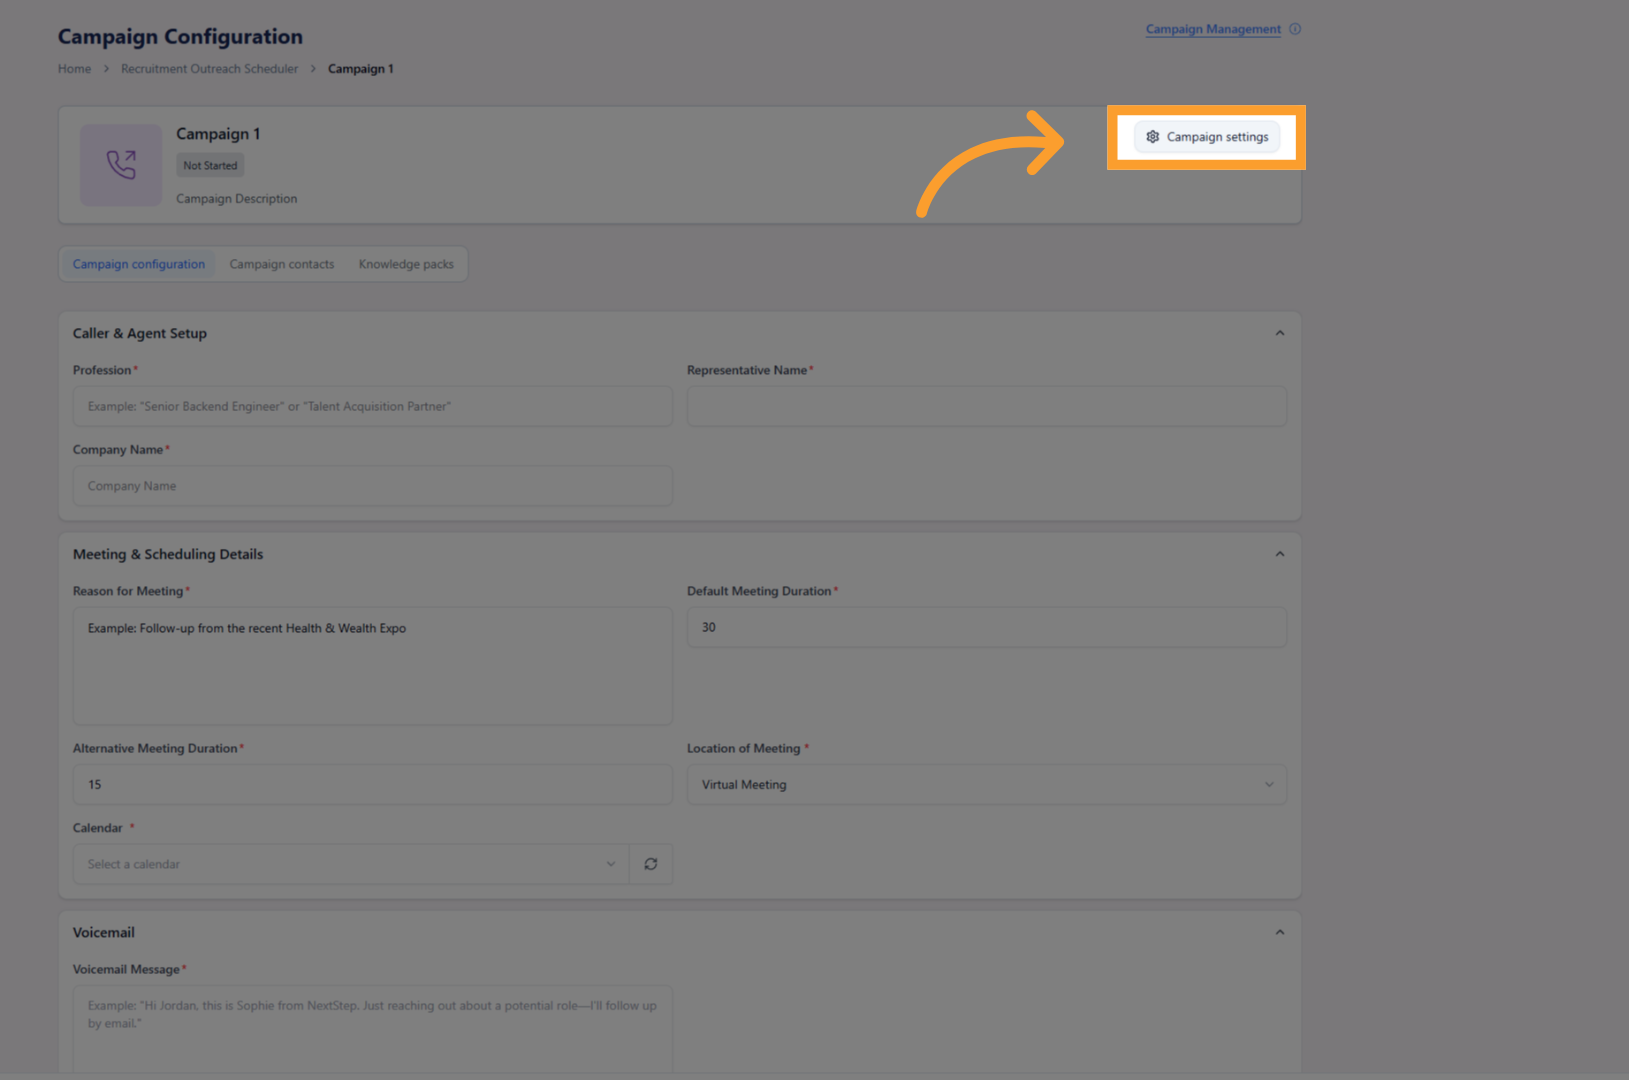
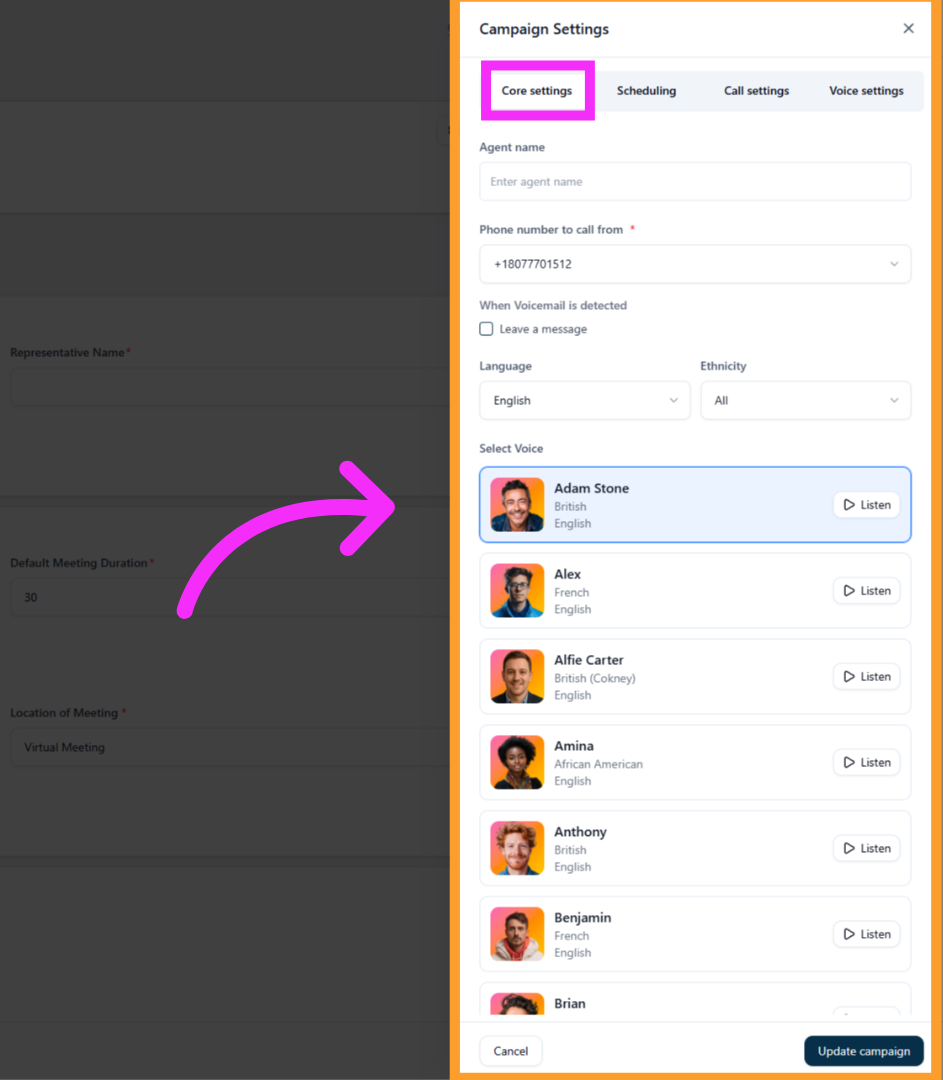
Core Settings
Use this tab to define the AI agent’s identity and core behavior for the campaign. You can configure:- Agent name
- Phone number to call from
- Leave voicemail toggle
- Language
- Ethnicity
- Voice selection
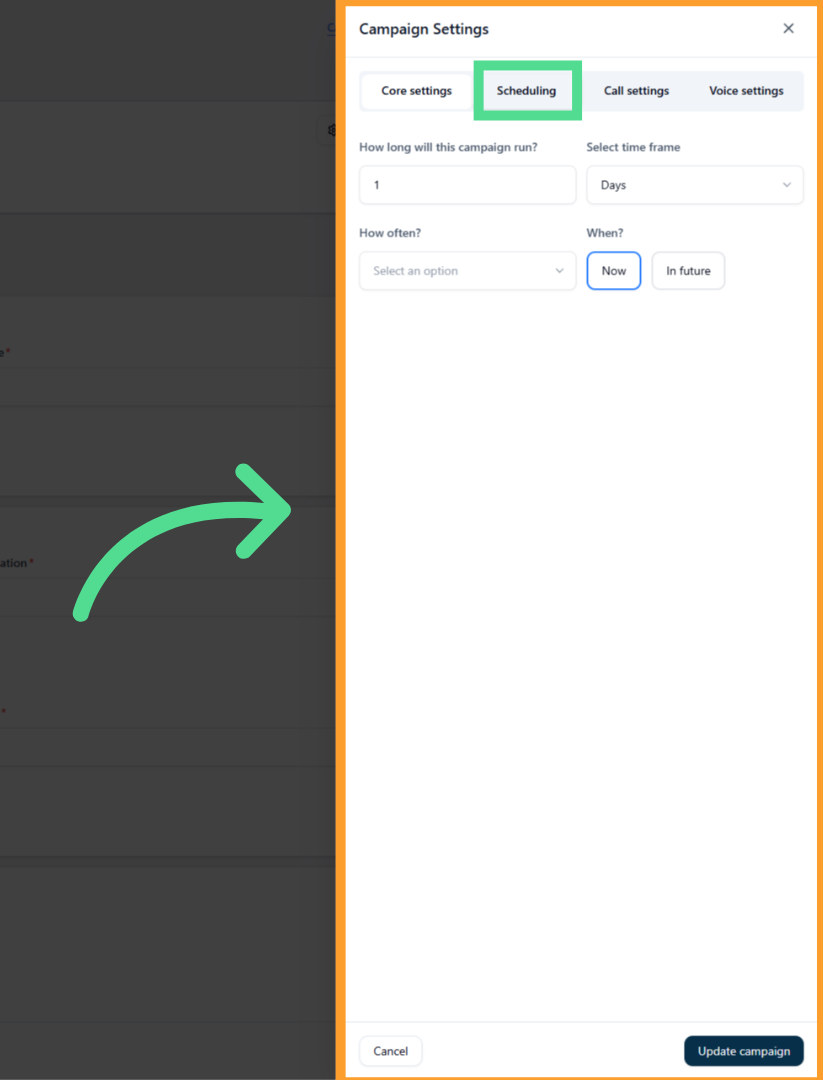
Scheduling
This tab controls when and how long the campaign runs. You can configure:- Campaign duration (number + unit: hours, days, or months)
- Frequency (hourly, daily, monthly)
- Start time (now or scheduled for the future)
- Scheduling windows using the same interaction fields as before
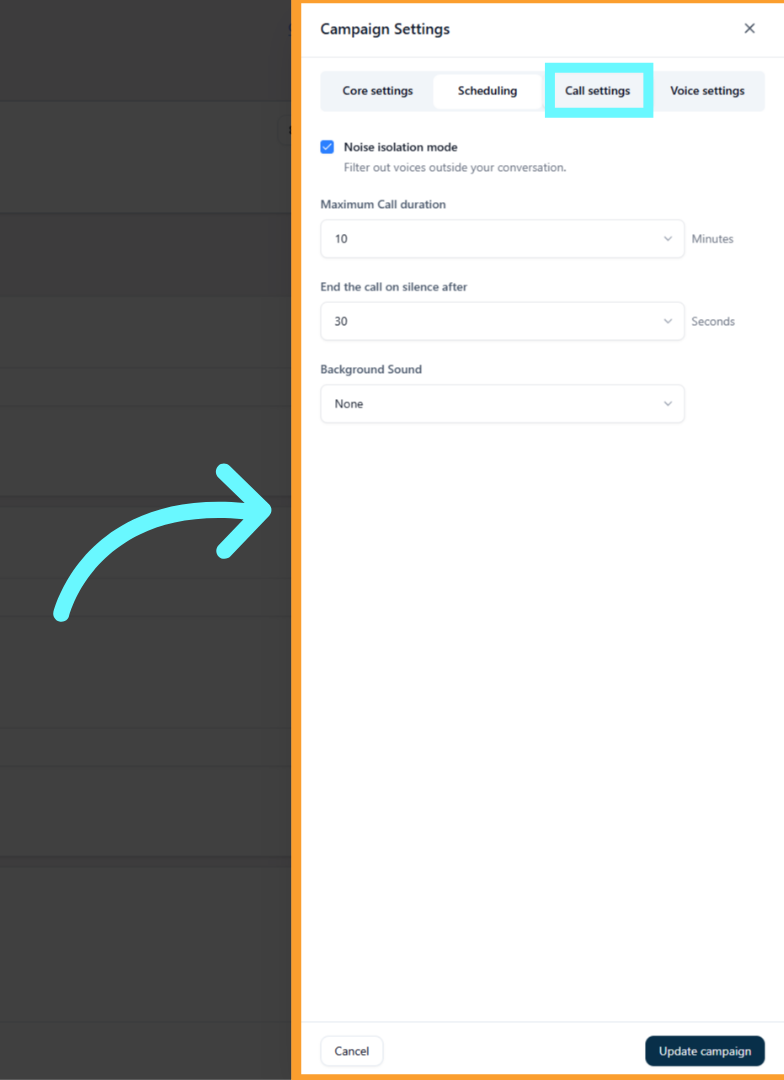
Call Settings
This tab controls how calls are handled during execution. Options include:- Noise isolation toggle
- Maximum call duration
- End call on silence after a defined number of minutes
- Background noise selection
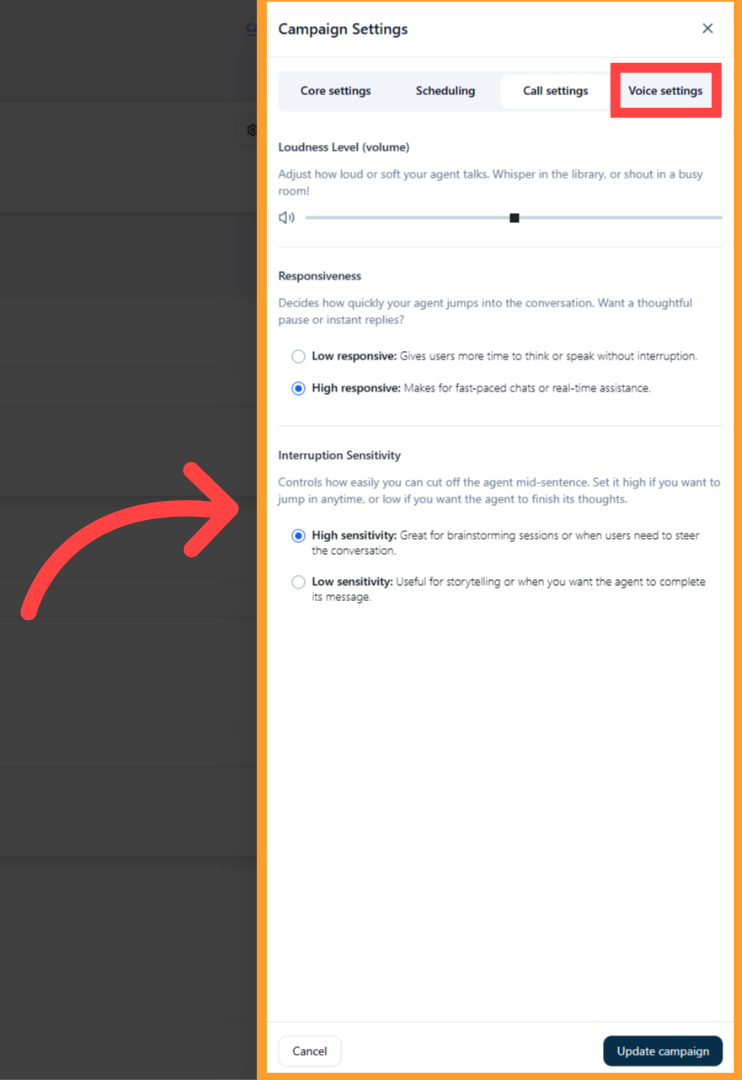
Voice Settings
This tab controls conversational behavior. You can adjust:- Loudness level (volume slider)
- Responsiveness (low or high)
- Interruption sensitivity (low or high)
Executing and Managing Campaigns
Once a campaign is configured:- Add contacts in the Contacts tab
- Review settings
- Click Execute to start the campaign
FAQs & Troubleshooting
General Questions
What is the role of a Campaign in thinkrr?
What is the role of a Campaign in thinkrr?
Campaigns control execution. They determine who gets called, when calls occur, and allow you to run multiple outreach strategies from a single project.
Can I run multiple campaigns under one project?
Can I run multiple campaigns under one project?
Yes. You can create multiple campaigns under the same project to segment contacts, test messaging, or schedule outreach differently.
Configuration
Can I edit a campaign after it has started?
Can I edit a campaign after it has started?
Yes. Campaigns can be edited at any time. Changes apply based on the campaign’s current state and execution timing.
What is the difference between Campaign Configuration and Campaign Settings?
What is the difference between Campaign Configuration and Campaign Settings?
Campaign Configuration controls scenario-specific fields and campaign overrides.
Campaign Settings control scheduling, call behavior, and voice behavior.
Campaign Settings control scheduling, call behavior, and voice behavior.
Usage and Results
How do I monitor campaign progress?
How do I monitor campaign progress?
Campaign status, call outcomes, and execution details are visible directly from the project dashboard and campaign list.
Can I stop a campaign mid-run?
Can I stop a campaign mid-run?
Yes. Campaigns can be paused or ended at any time without affecting other campaigns in the project.
For additional questions, use the Virtual Support Agent or visit help.thinkrr.ai.
You can also contact support at hello@thinkrr.ai.