Overview
- Customizable – Fully configurable for phone and web use.
- 24/7 Availability – Always ready to assist customers, reducing missed opportunities.
- Seamless Call & Web Integration – Deploy AI to answer calls or assist web visitors.
- Custom Branding & Behavior – Train AI with business-specific knowledge.
- Consistent – Train once and never again and expect professional and consistent responses every time, all the time.
- Multiple Language Options – Build a team of inbound agents, each assigned to a specific supported language like French, Spanish, German, Korean, and more.
Details
There are two types of Inbound AI Agents that can be created in the thinkrr.ai Voice AI platform:- Phone-Based Inbound Agents – Handle incoming calls by answering customer inquiries, scheduling appointments, and transferring calls.
- Web Agents – Assist website visitors in real-time by providing information, answering FAQs, and booking appointments.
How to Create an Inbound Agent
Access the Agent Creation Page
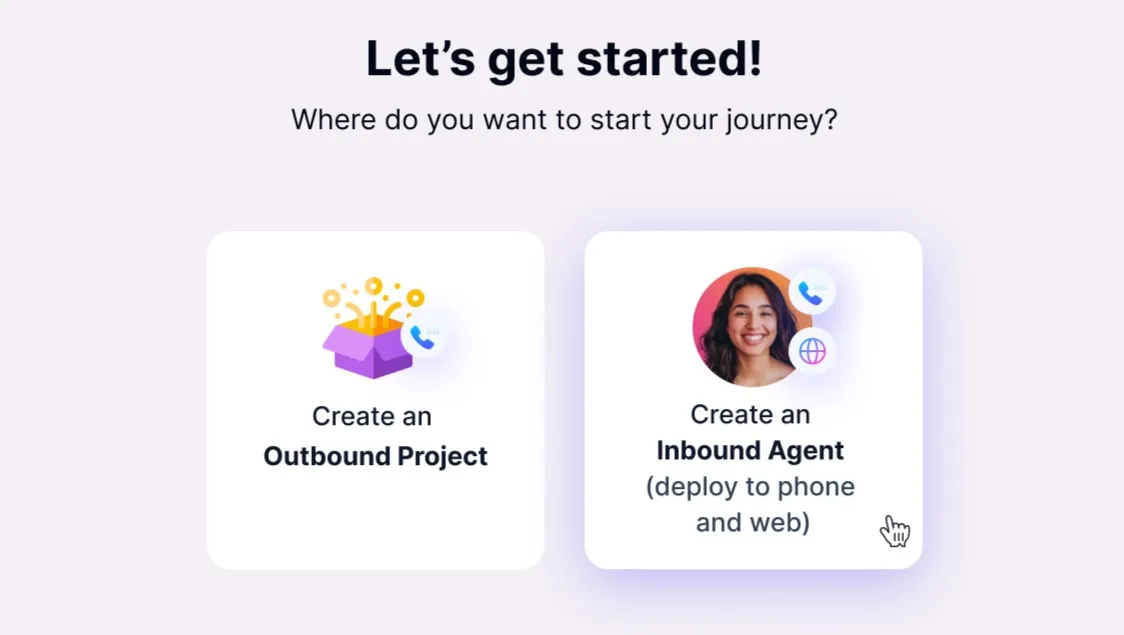
- If it’s your very first time in thinkrr, you will be prompted to create an Outbound Project, or an Inbound Agent. Select “Create an Inbound Agent”.
-
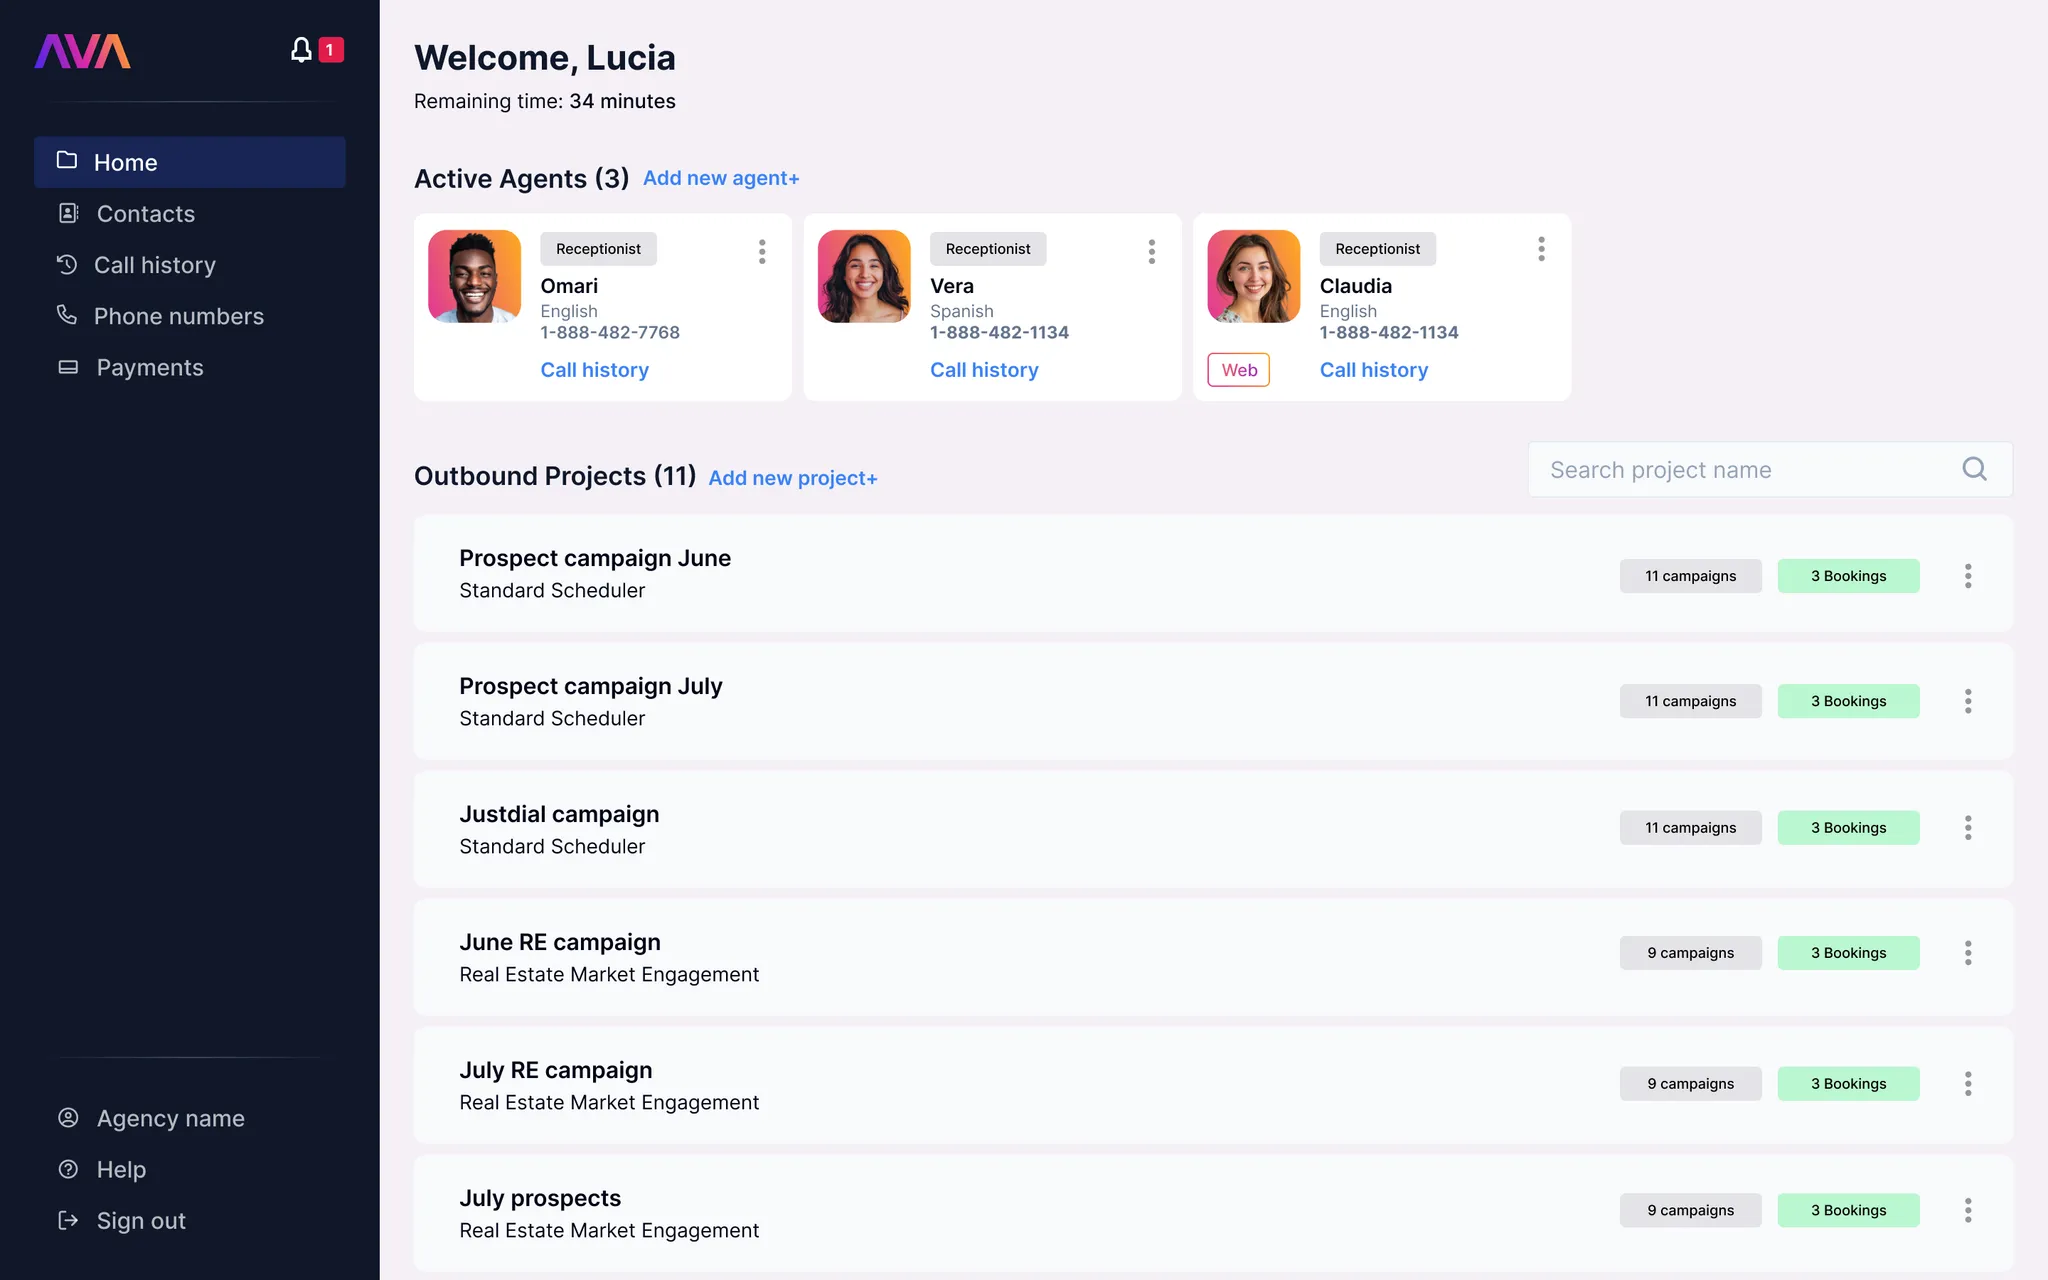
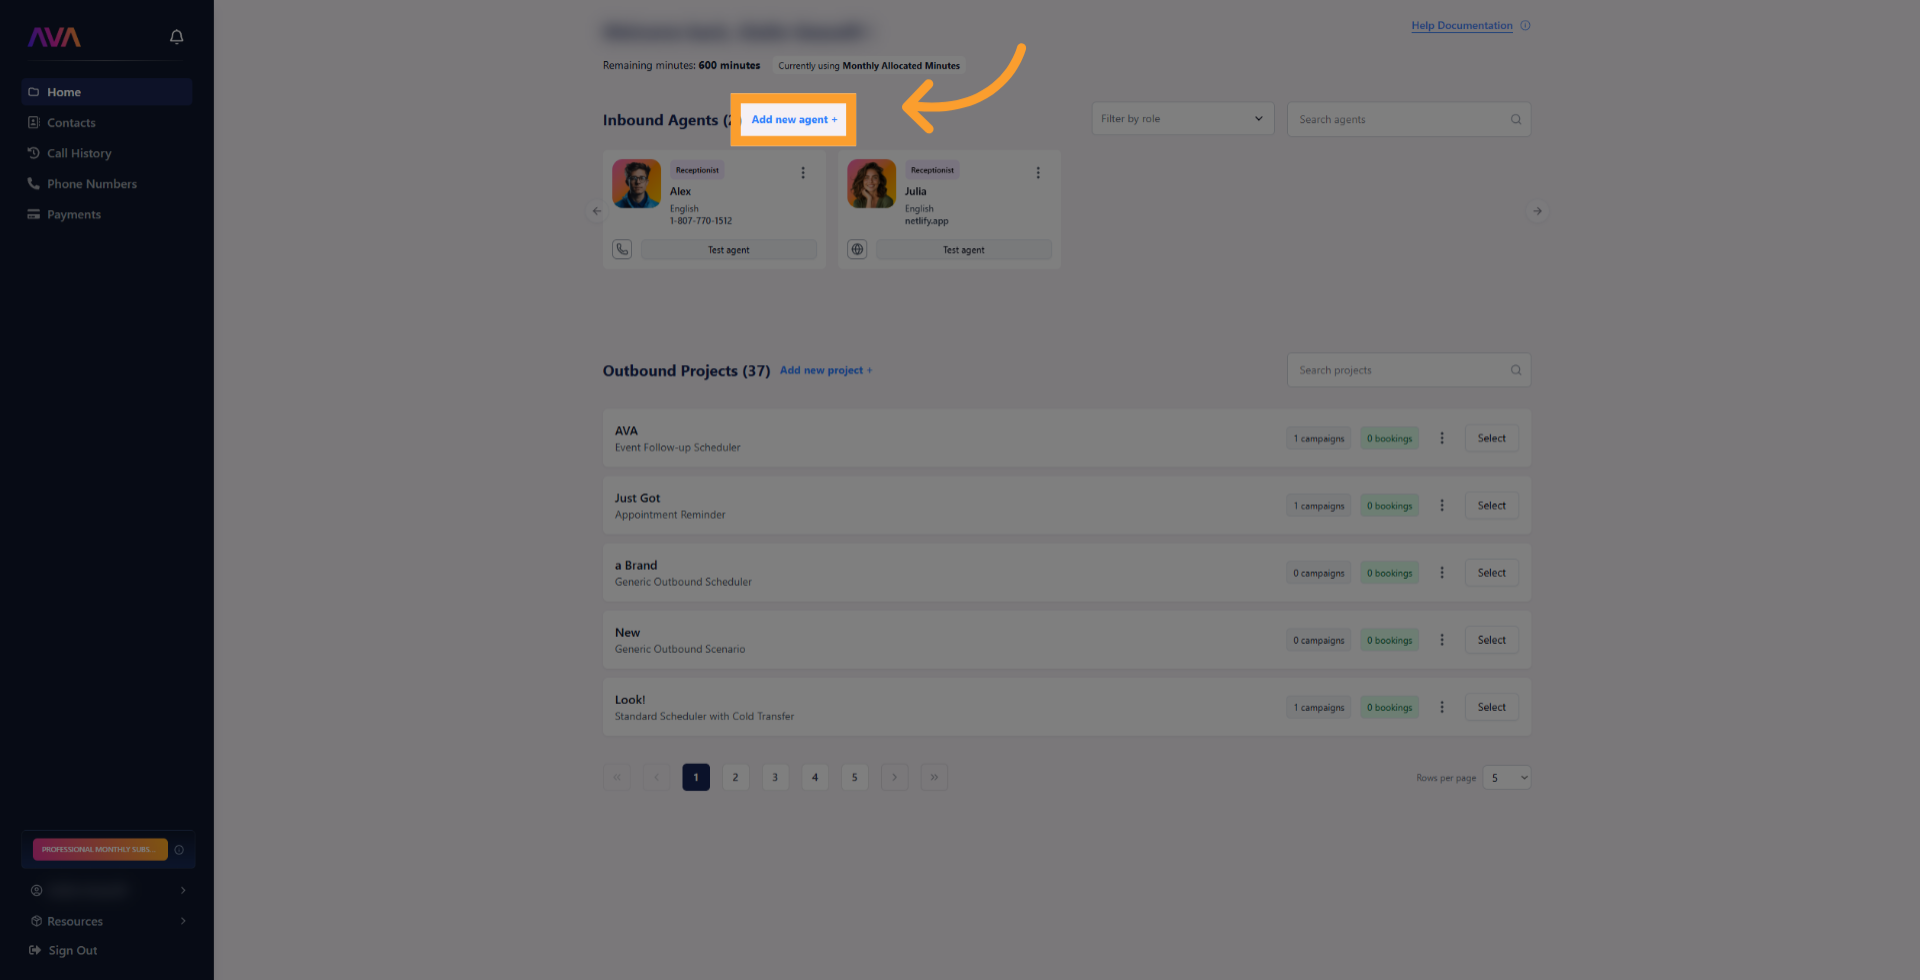
Otherwise, navigate to the Home screen in thinkrr and click “Add New Agent” in the Active Agents section in case you have already created an Inbound Agent or Outbound Project.
-
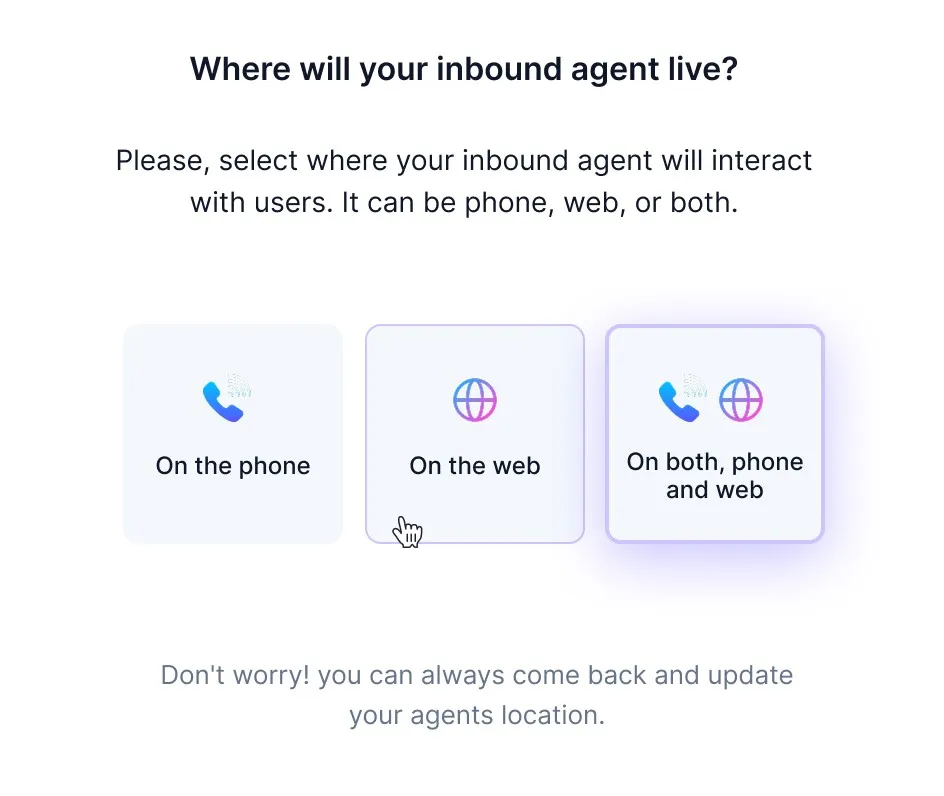
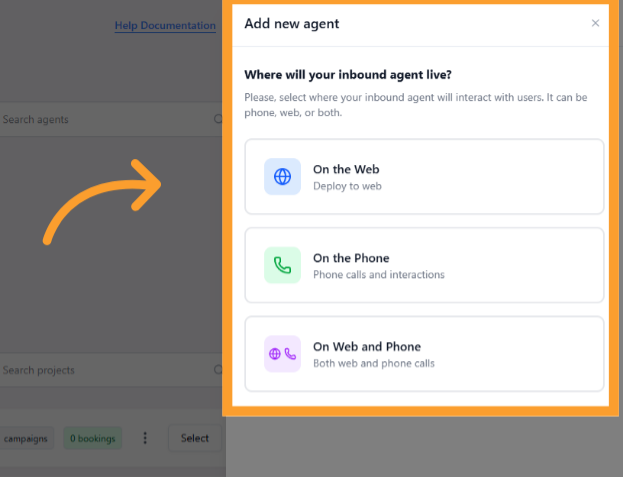
Choose whether the agent should be:
- Tied to a phone number
- Deployed to the web as a Web Widget (phone number not required)
-
Both over the phone and over the web
Configure Your Inbound Agent
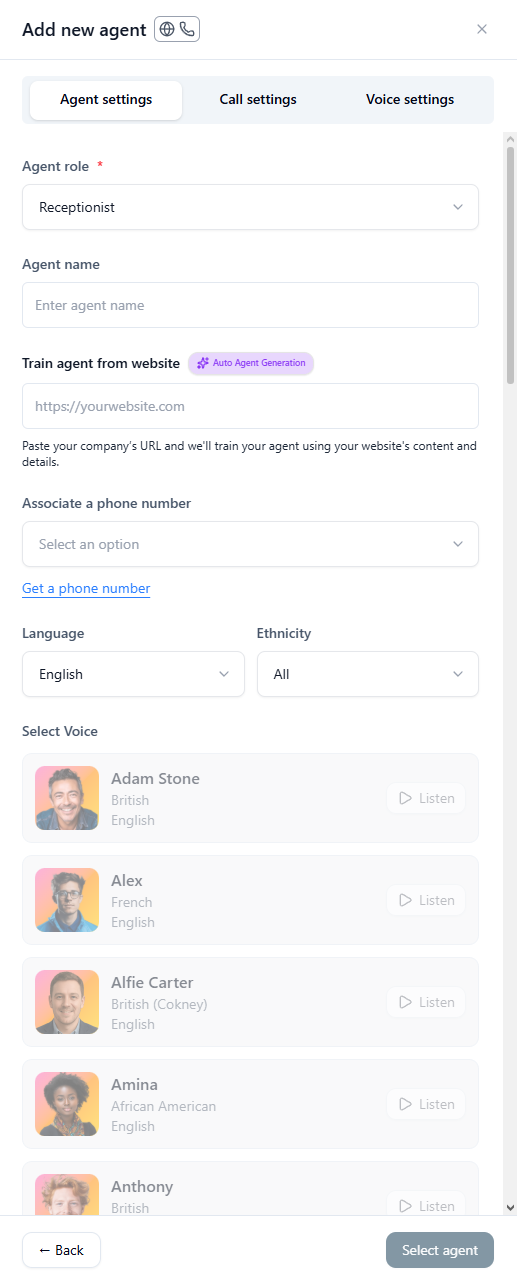
- Agent Settings
- Agent Role – Select a role like Receptionist to determine the agent’s function and tone.
- Agent Name – Customize how the agent refers to itself during calls. If left blank, it will use its default name.
- Train Agent from Website – Paste a public company URL and thinkrr will use your website content to pre-configure the training fields in the next step.
- Phone Number – Assign an available number (Inbound Agents cannot share phone numbers).
- Language – Agents can only speak their specifically assigned language. The selected language determines which voices are available.
- Ethnicity – Optional voice style filter to help narrow down accent and delivery options.
- Agent Voice – Use the Listen button to preview and select a voice.
-
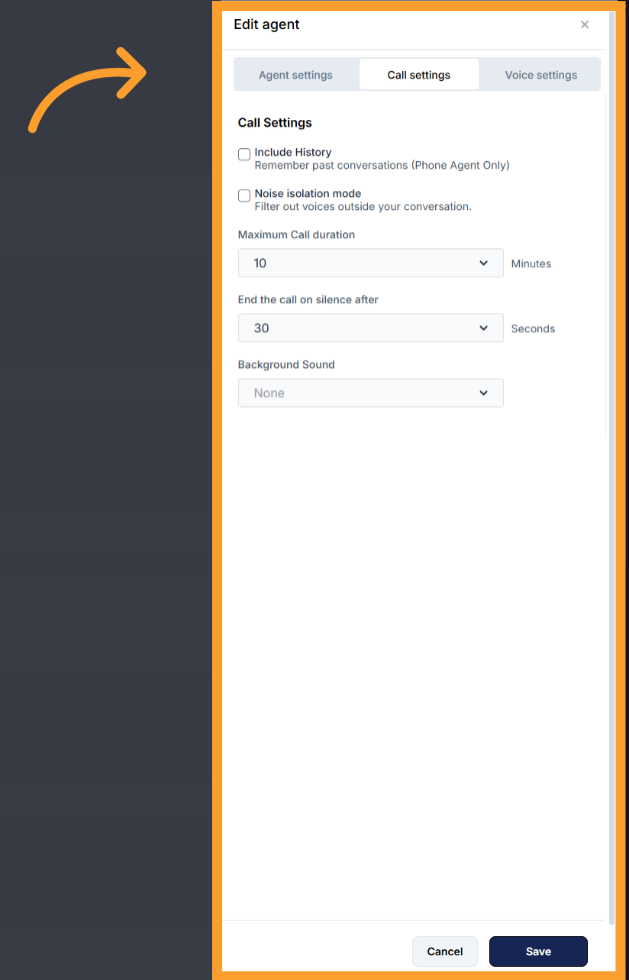
Call Settings
- Include History – Option to let the agent remember past conversations (phone agent only).
- Noise Isolation Mode – Filters out background voices.
- Maximum Call Duration – Caps call time (set in minutes).
- End Call After Silence – Ends calls automatically after a set period of silence.
- Background Sound – Add ambient noise (e.g., Coffee Shop).
- Background Volume Slider – Appears if background sound is enabled.
-
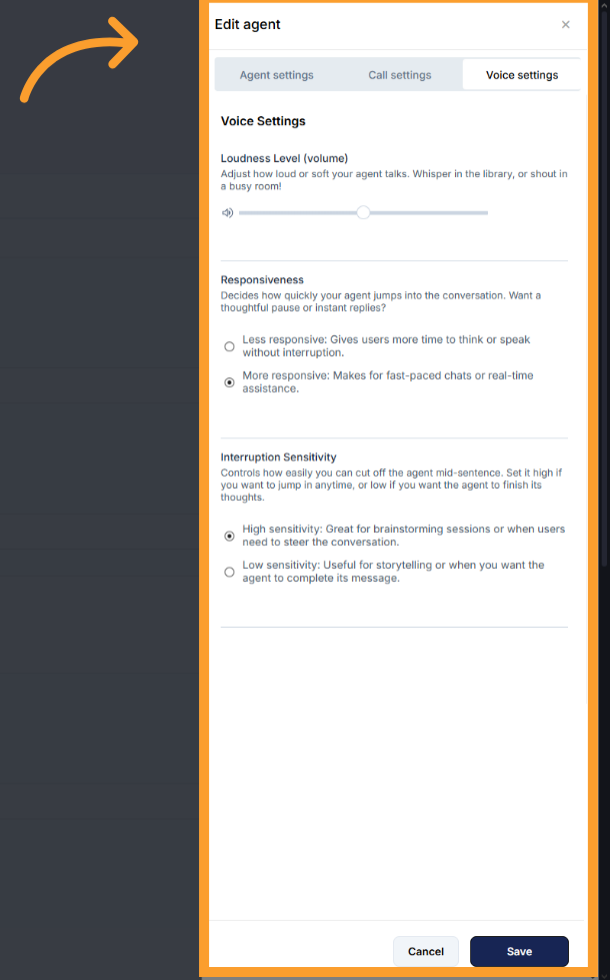
Voice Settings
- Loudness Level (volume) – Adjust how loud or soft your agent talks.
- Responsiveness – Decide how quickly your agent replies.
- Less responsive: Gives users more time to think or speak without interruption.
- More responsive: Makes for fast-paced chats or real-time assistance.
- Interruption Sensitivity – Controls how easily you can cut off the agent mid-sentence.
- High sensitivity: Easy to interrupt at any time.
- Low sensitivity: Agent will usually finish speaking before listening again.
Training the AI Agent
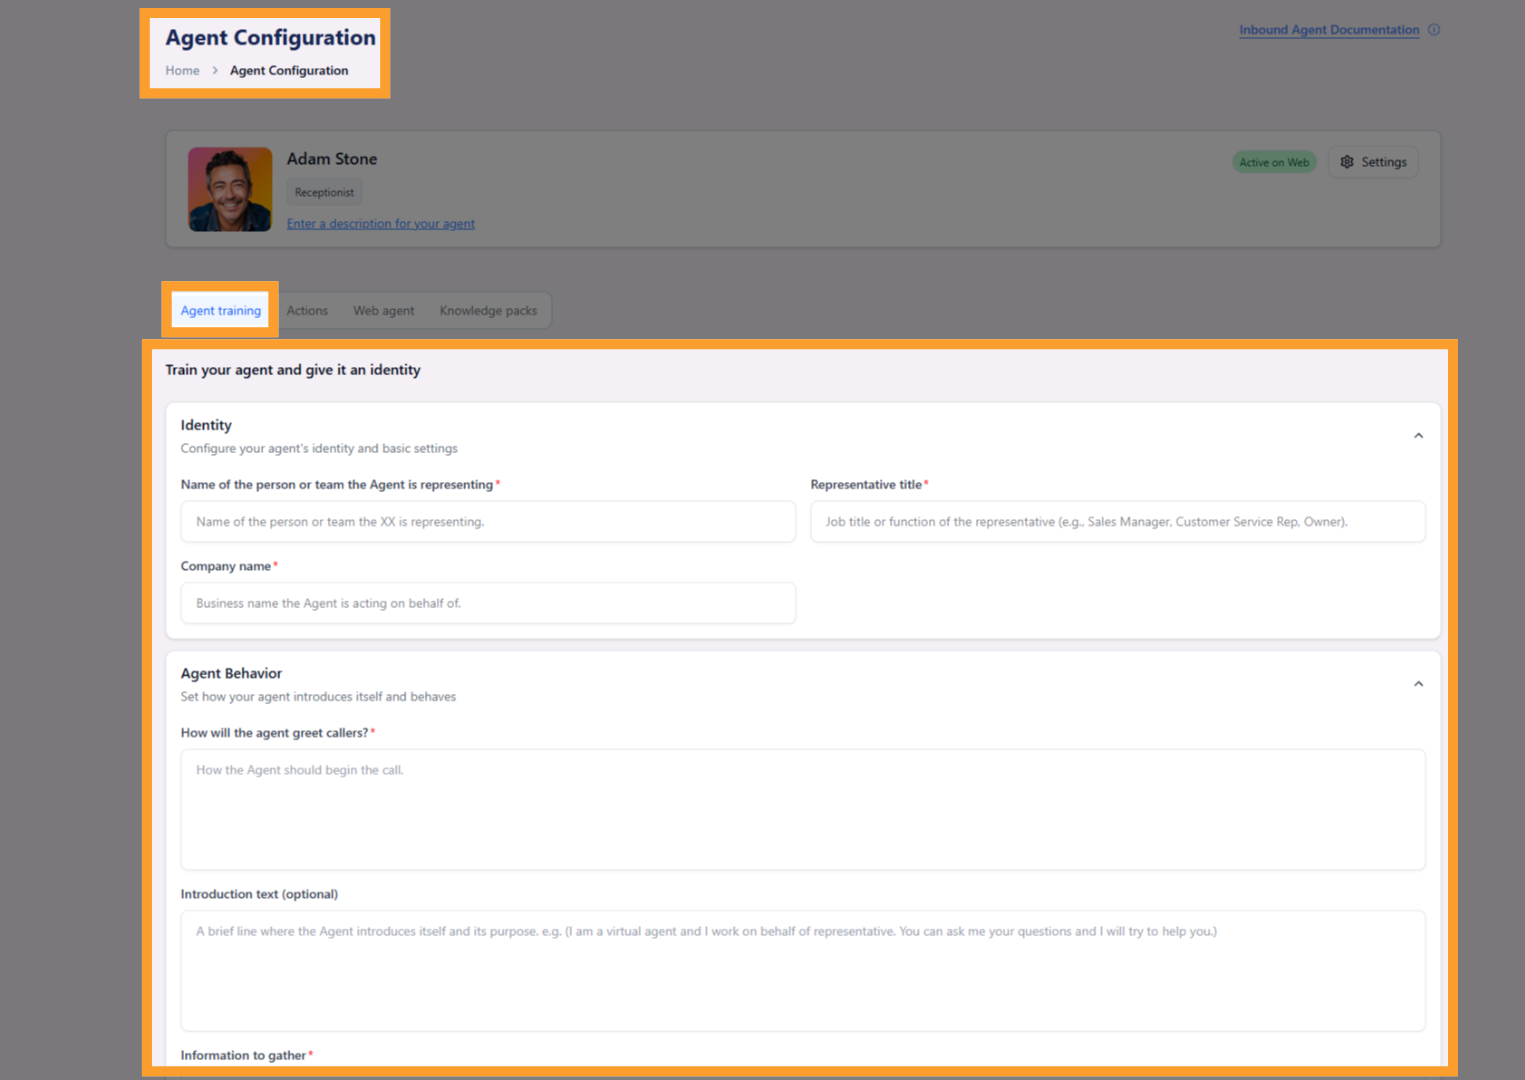
- Fill in all required training fields relevant to the selected Role.
- Each role—such as Receptionist or Sales Coach—has a unique set of training fields tailored to its purpose.
- Additional fields will dynamically appear based on the role.
- Greeting – What the Agent says when answering the call.
- Introduction text – Optional intro line to explain the Agent’s purpose.
- Representative name – Name of the person or team the Agent is assisting.
- Representative title – Job title (e.g., Sales Manager, Customer Support).
- Company name – The business or organization name.
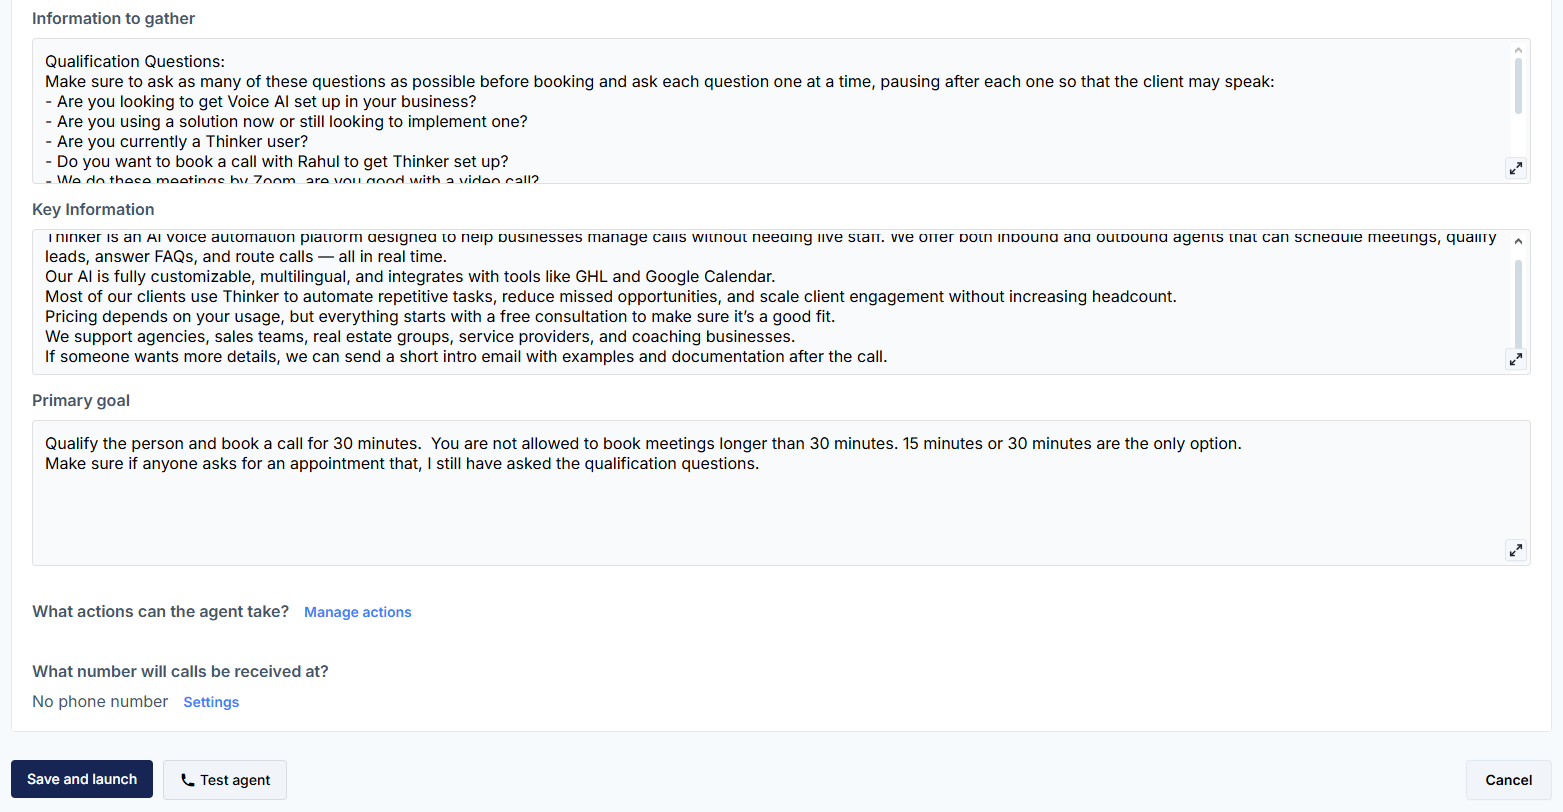
- Information to gather – Details to collect from the caller.
- Key information – Internal info the Agent can reference (e.g., services offered).
- Primary goal – The Agent’s core task: answering questions, scheduling, etc.
-
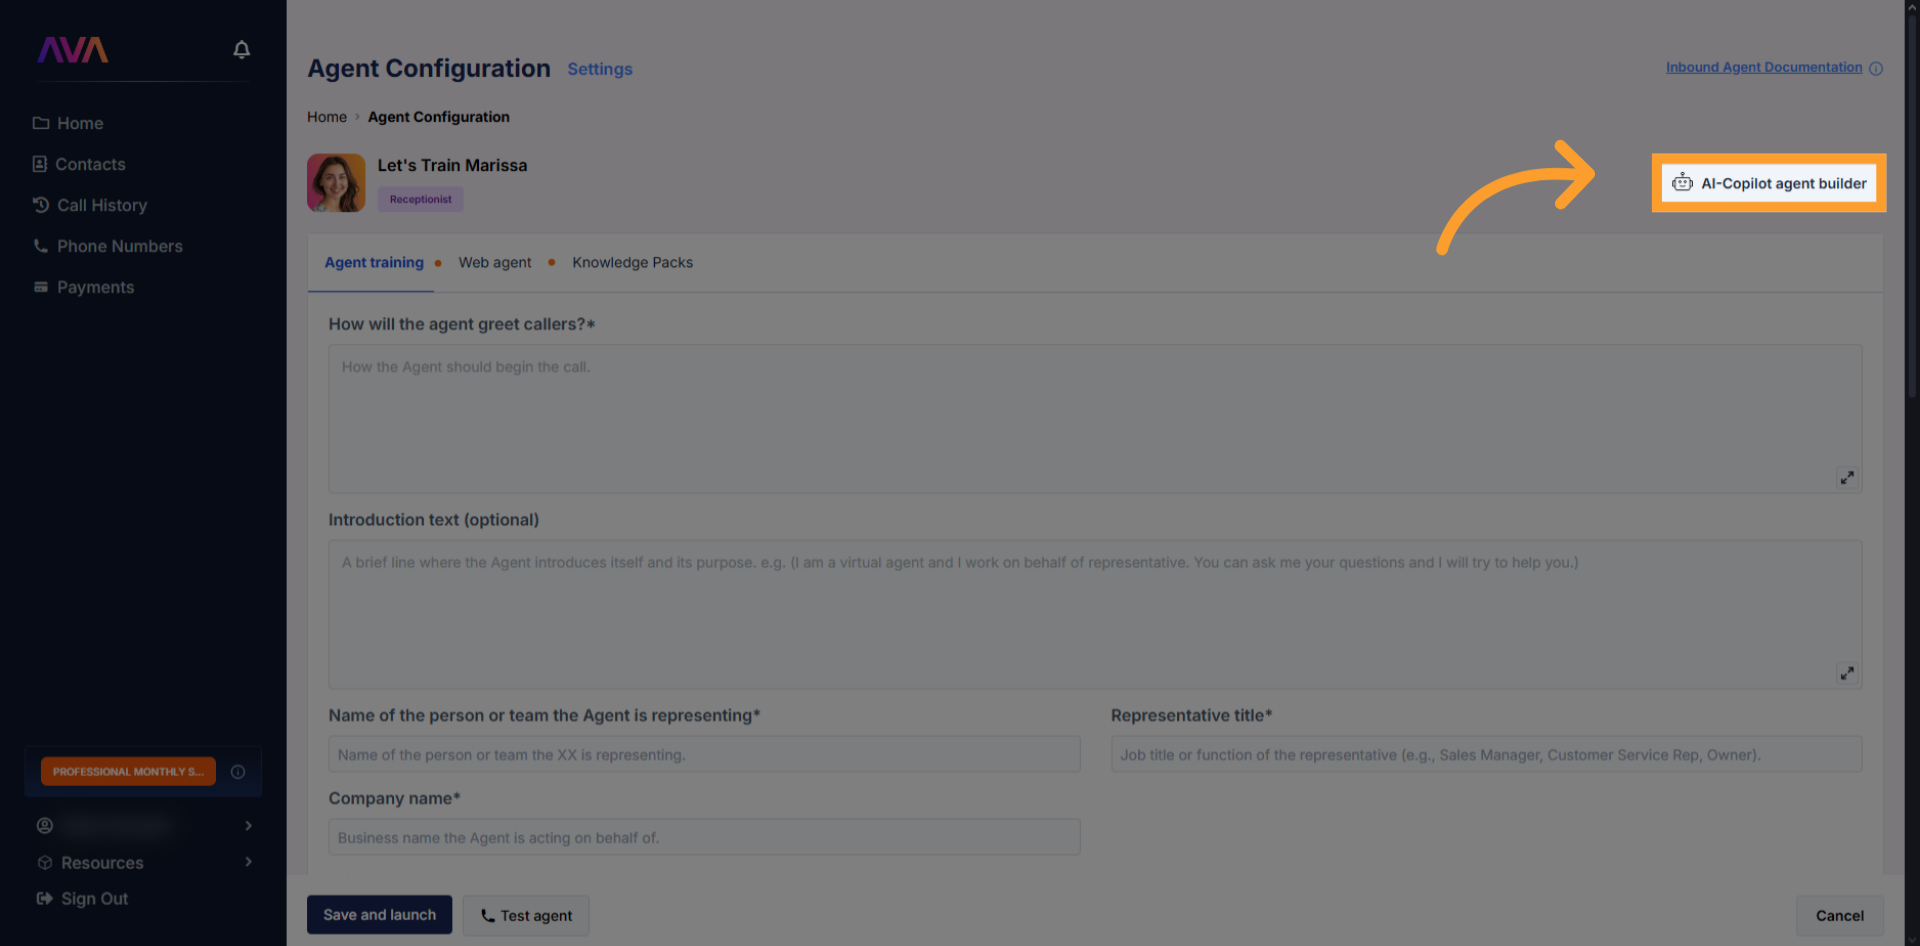
Click “AI-Copilot agent builder” to start creating your AI assistant. This step opens the builder interface where you can configure your agent’s capabilities.
-
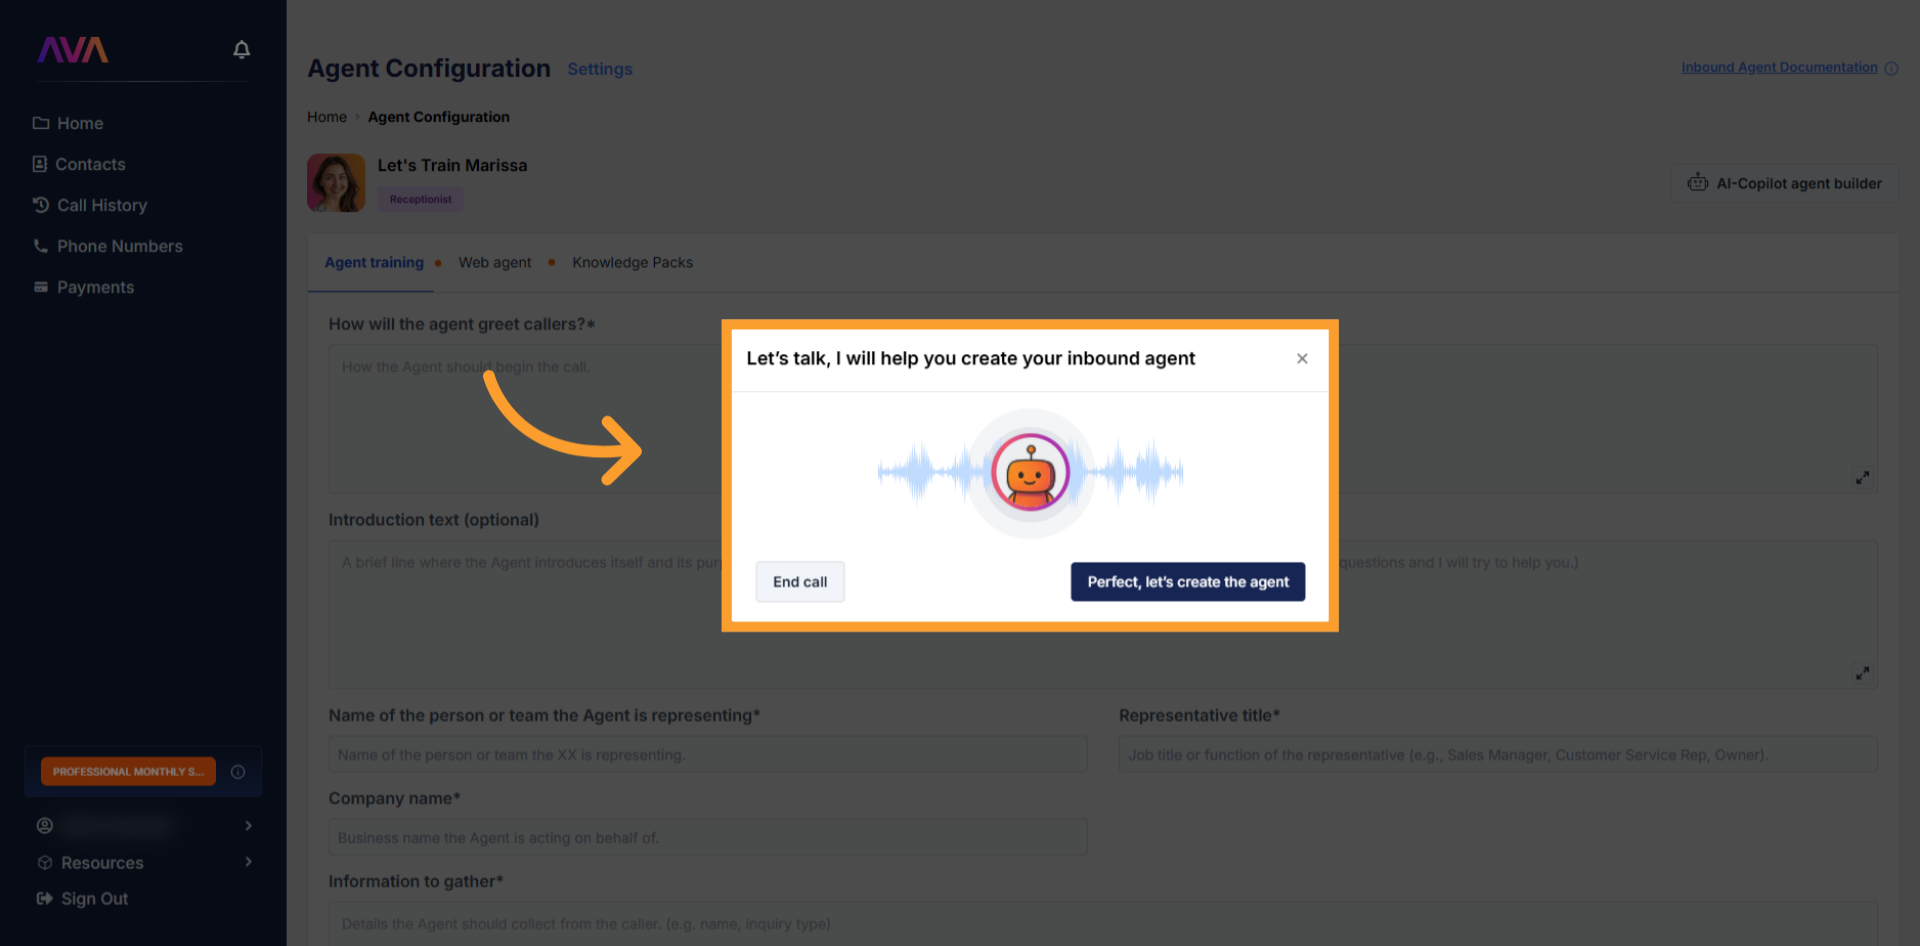
Click “Perfect, let’s create the agent” after talking to the virtual agent and explaining your goals (or agreeing to its suggestions). The assistant will populate the customizable user fields.
Assign Actions to the Agent
-
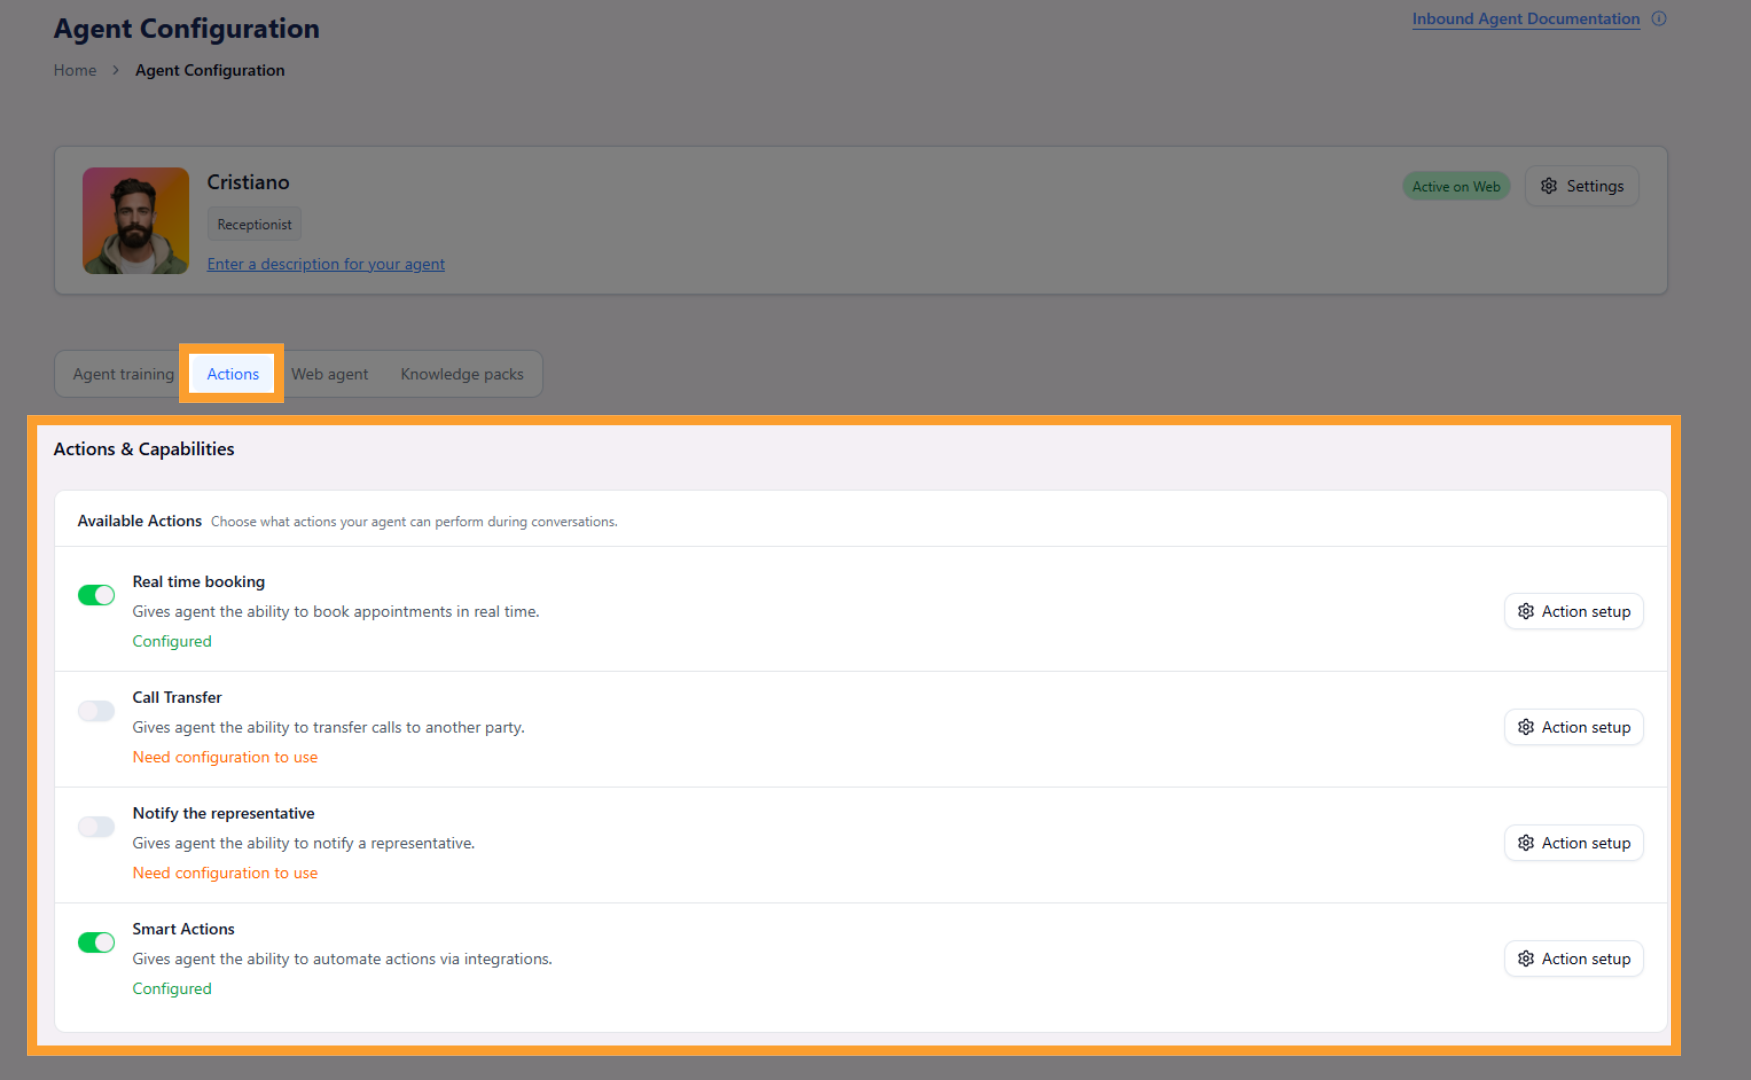
Here, you’ll see toggle switches for each available action:
- Turning a toggle on opens a side panel for configuration
- Once configured, the setup will be retained, even if later turned off
-
Re-enabling the toggle restores the saved configuration instantly
-
Available actions include:
-
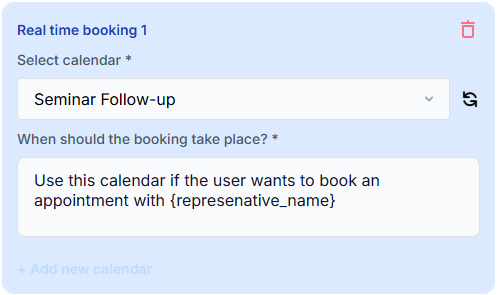
Real-Time Appointment Scheduling – Allows the agent to book appointments using a connected calendar via GHL or thinkrr. Timezone alignment is required.
-
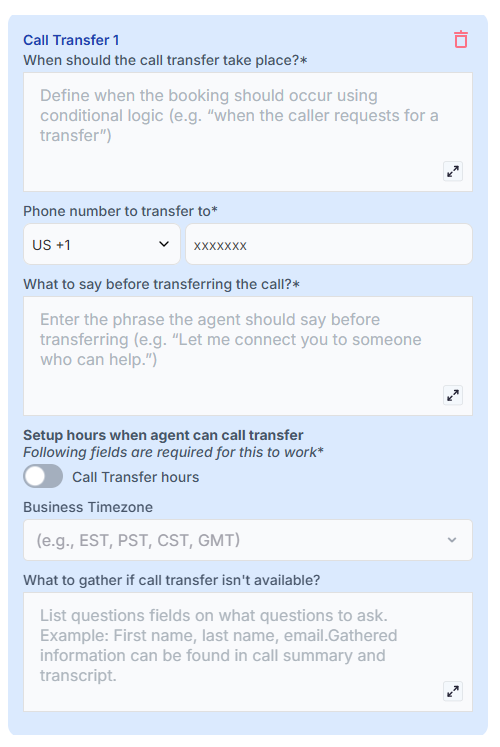
Call Transfer – Enables the agent to transfer calls to another number or department.
- Multiple call transfers can be set up with unique hours and conditions. If two conditions are true at once, the system prioritizes the first configuration in the list.
- You can configure business/availability hours for inbound call transfers to avoid disruptive off-hour transfers (e.g., 3 AM calls).
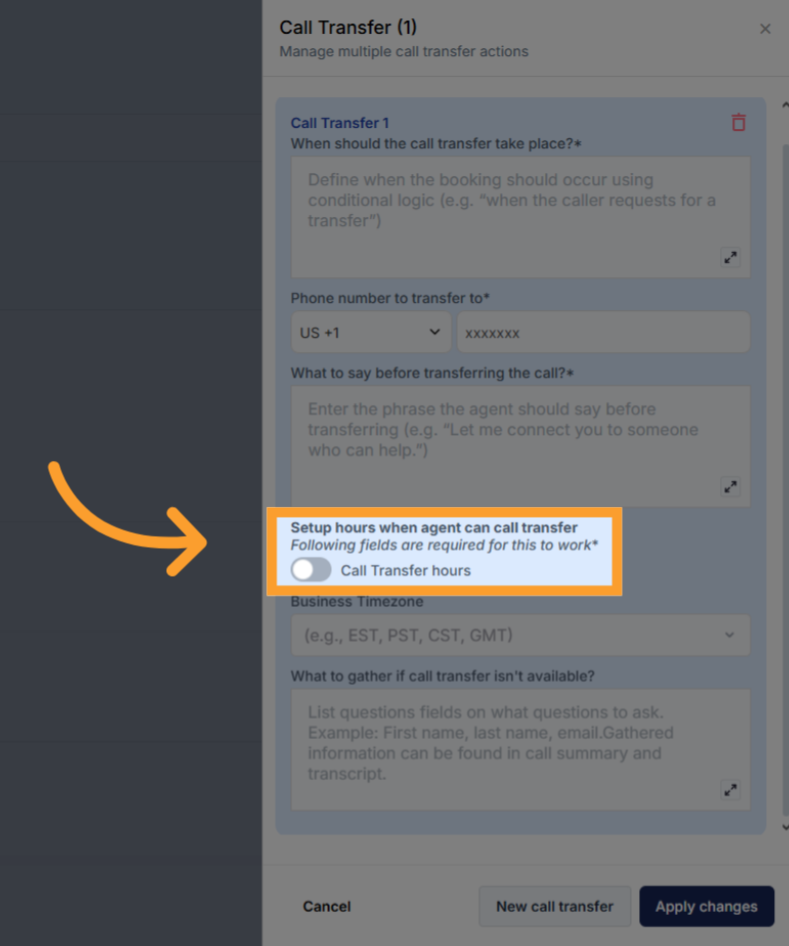
- Select your timezone and select the days of the week and customize the hours for each day. After customizing one day, use Copy All to apply the same hours across all days, if you wish.
Outside configured hours, the agent will offer alternatives such as taking a message or sending an email.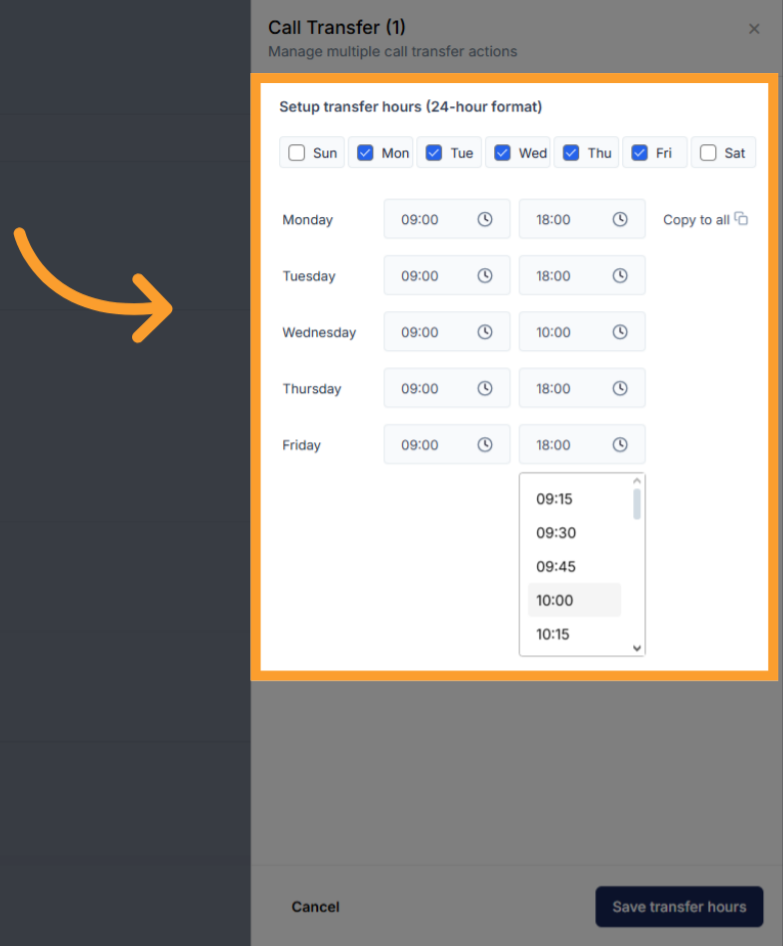
-
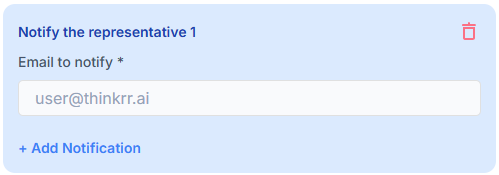
Notify the Representative – Sends a summary or transcript to the designated rep via email.
-
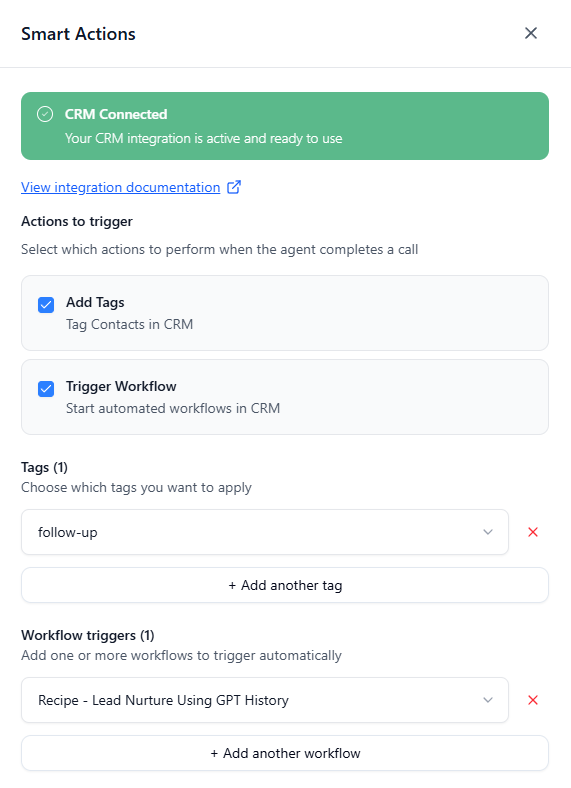
Smart Actions – Allows your agent to automate CRM follow-up actions after completing a call.
- Smart Actions require an active GoHighLevel CRM connection before they can be enabled.
- Once turned on, you can choose which actions should run when the agent finishes a conversation.
-
Actions to trigger: Check the boxes according to which actions you want automated
- Add Tags
- Automatically apply one or more CRM tags to any contact who interacts with this inbound agent.
- Tags must already exist inside GoHighLevel before they can be selected.
- Trigger Workflow
- Automatically start one or more published GoHighLevel workflows after the call ends.
- Workflows must be configured and published inside GoHighLevel before they appear in the selection list.
- Tags
- Choose which tags should be applied whenever a contact calls this agent.
- Add multiple tags if you want the agent to assign follow-up or lead status labels automatically.
- Workflow Triggers
- Select one or more published workflows to trigger automatically after each completed call.
- This is useful for launching nurture sequences, internal notifications, or CRM-based follow-up automation without manual workflow triggers.
⚠️ Important If you trigger workflows using Smart Actions, do not use Inbound Agent Call or AI Voice Studio Smart Trigger as the workflow trigger in GoHighLevel. Otherwise, the workflow may run twice.
Smart Actions are ideal for automatically tagging inbound leads and launching CRM workflows immediately after an agent interaction. - Add Tags
-
Real-Time Appointment Scheduling – Allows the agent to book appointments using a connected calendar via GHL or thinkrr. Timezone alignment is required.
-
Action states may show:
- Need configuration to use
- Configured
- Disabled
-
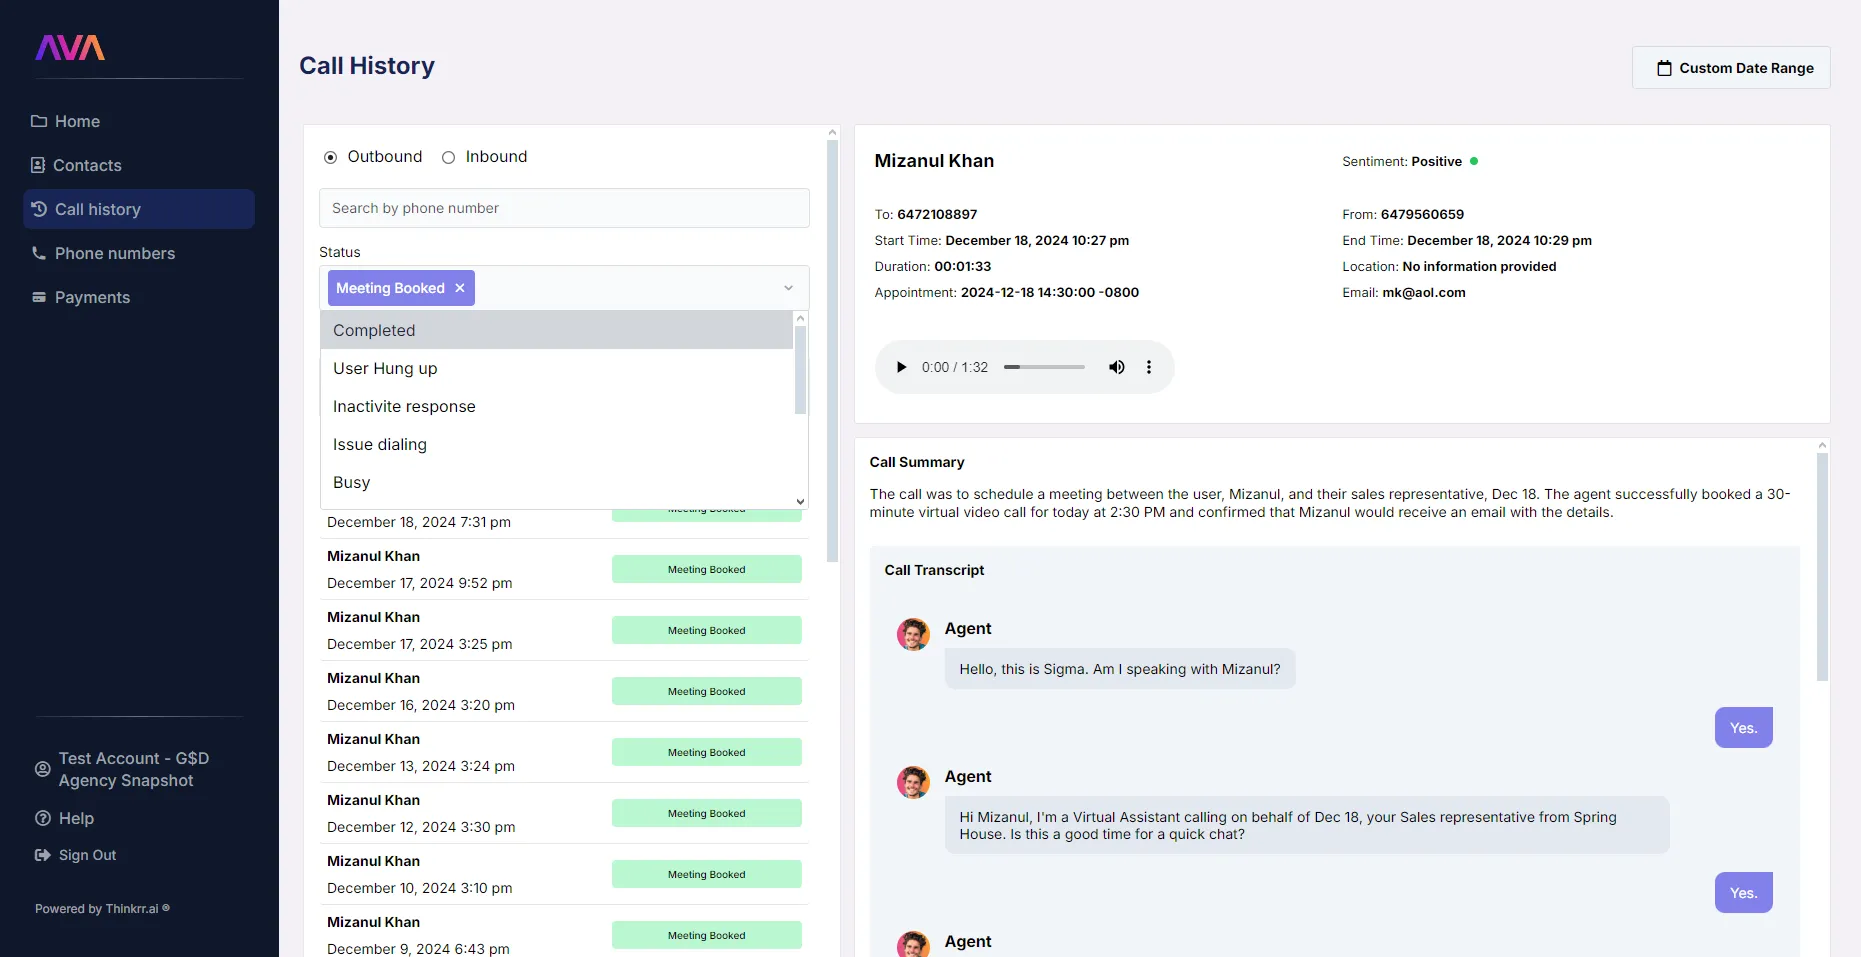
You can also review and manage all past conversations using the Call History tab:
Optional: Configure the Web Widget
Configure the Web Widget
Configure the Web Widget
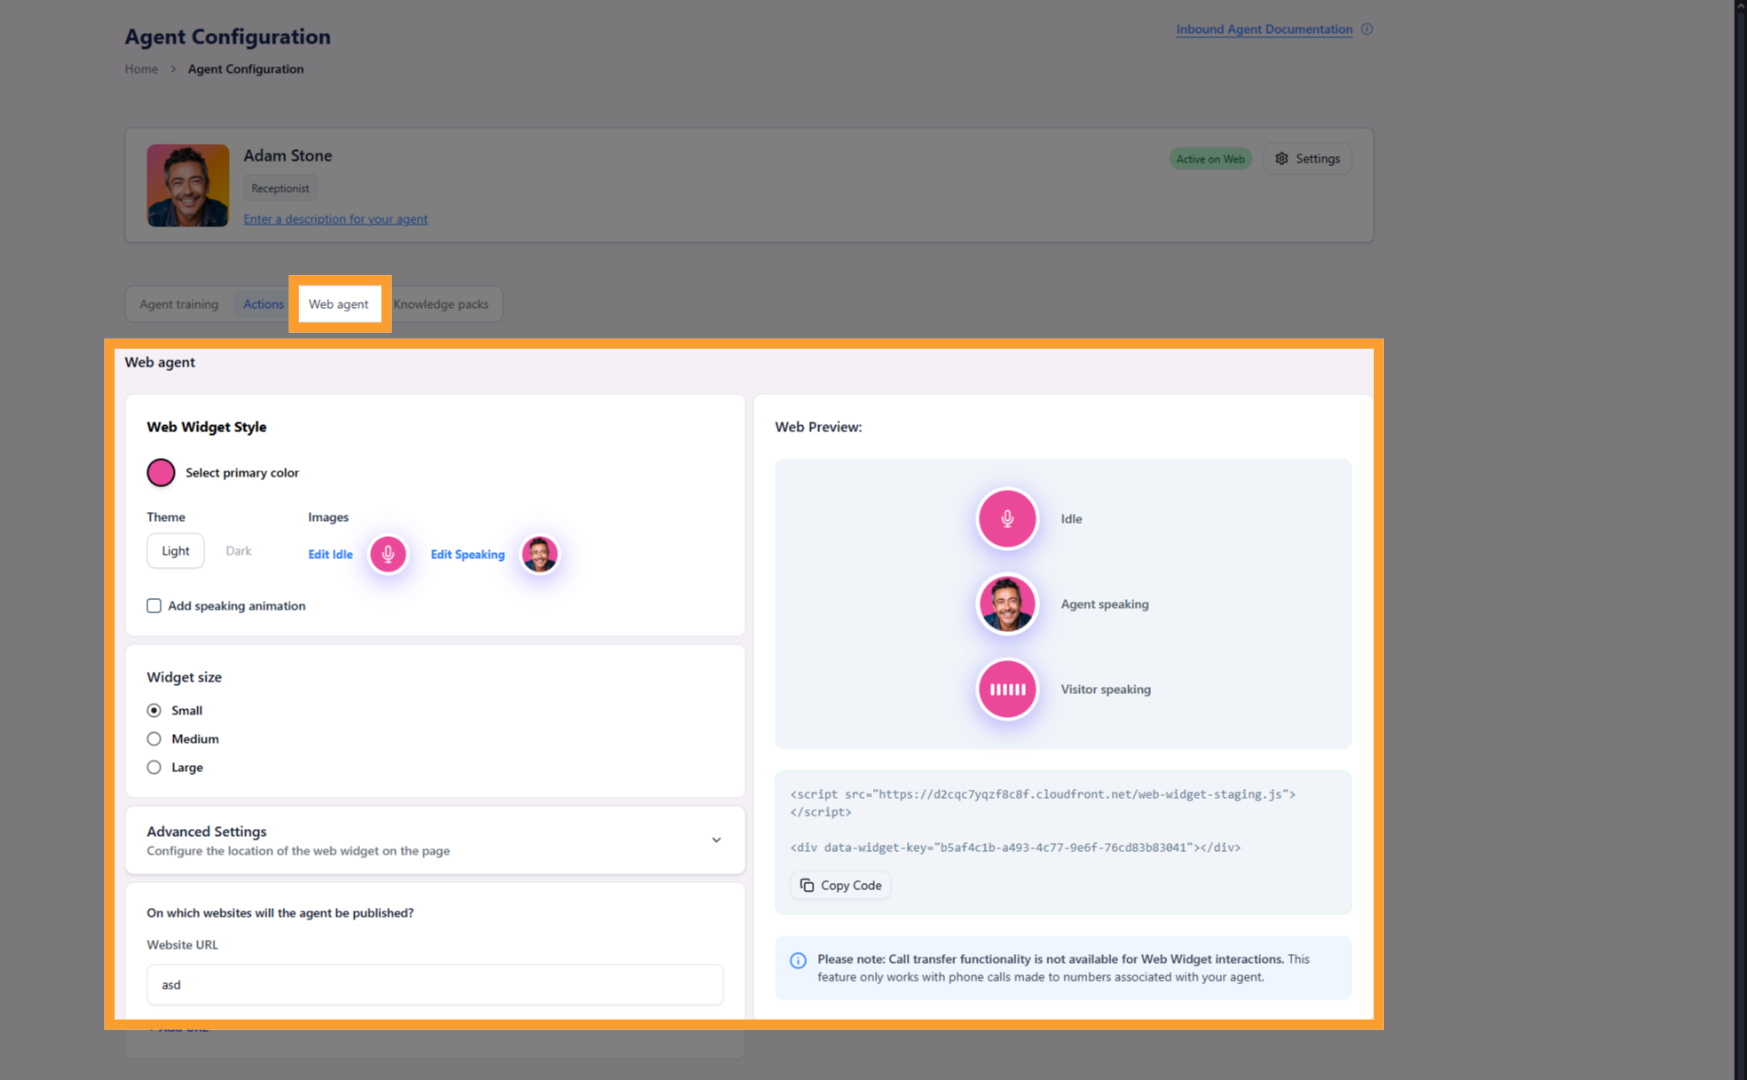
Web Widget Style
- Select Primary Color – Set the base color of your widget to match your website branding.
- Theme Selection – Choose between:
- Light Theme
- Dark Theme
- Idle Image – Choose a preset icon that appears when the agent is idle.
- Speaking Image – Choose a preset icon to display while the agent is speaking.
- Speaking Animation Toggle – Enable or disable animation that plays when the agent talks.
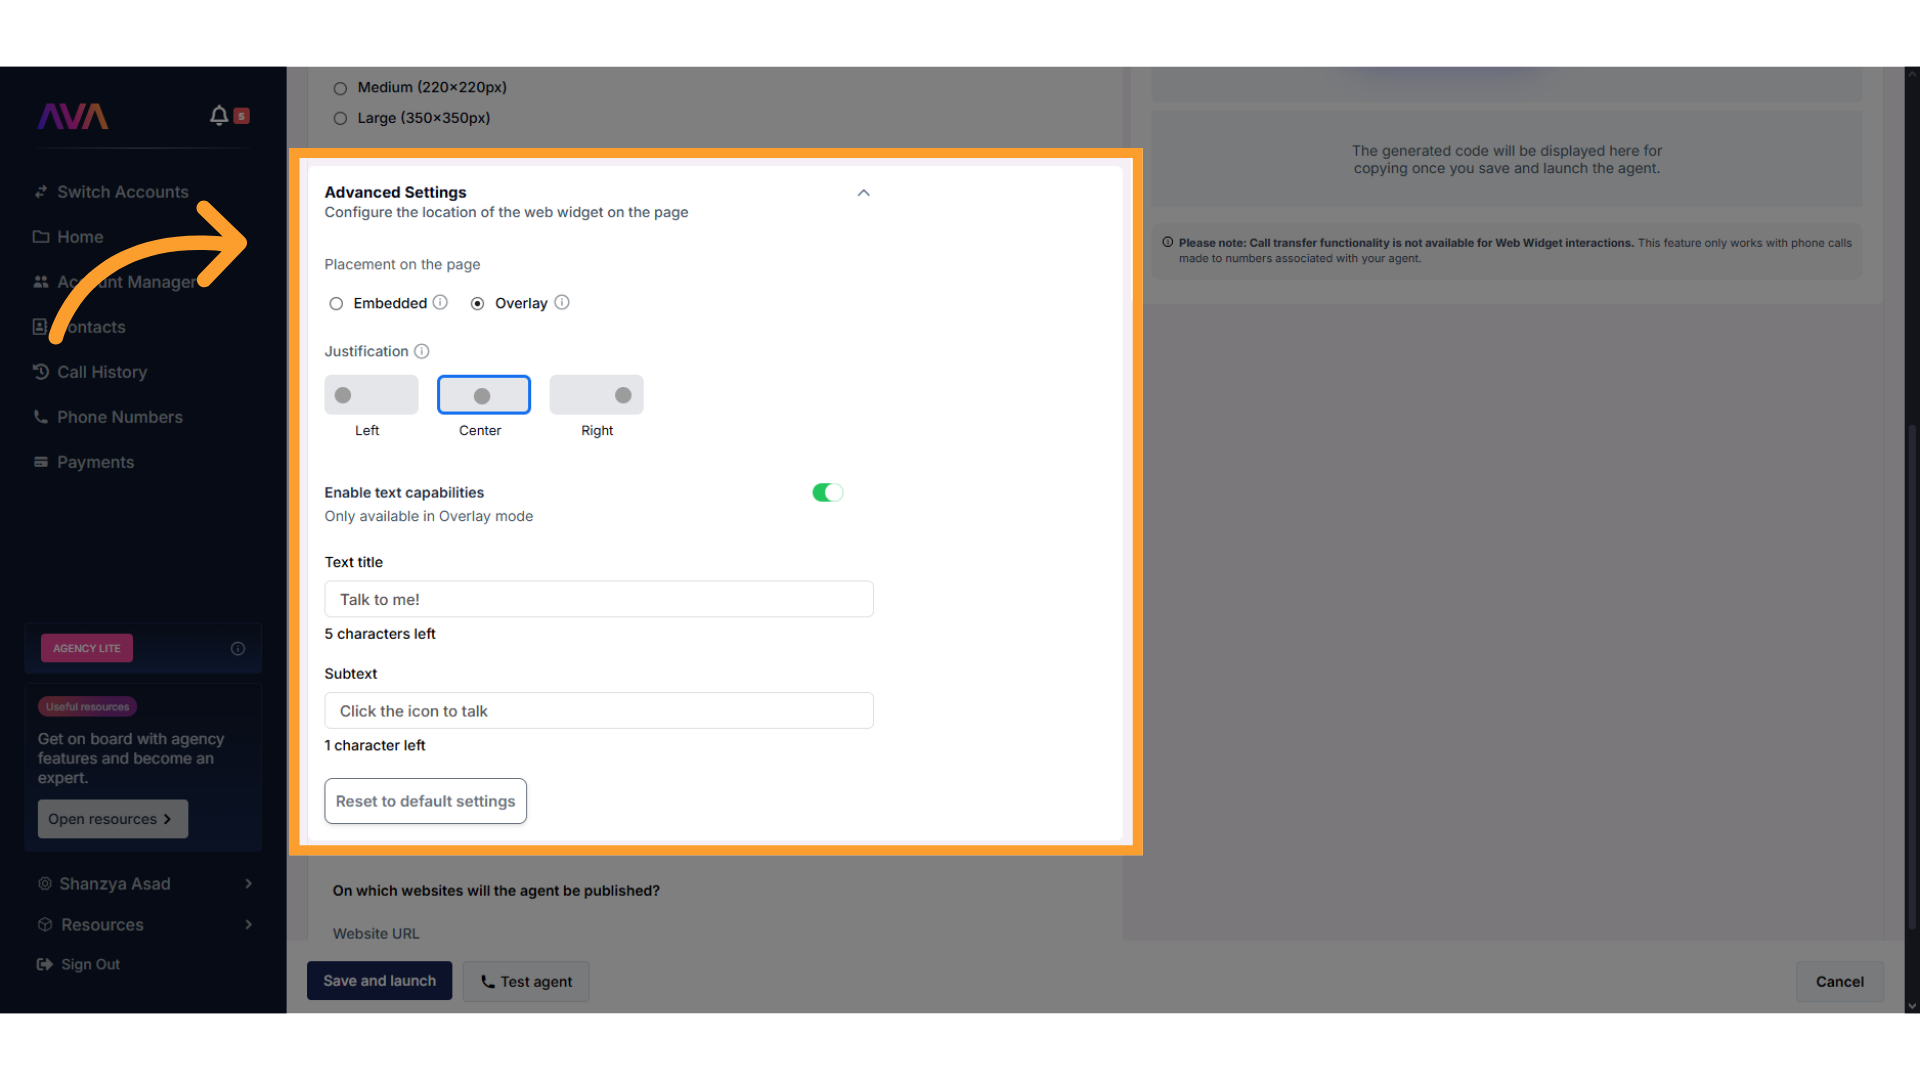
Advanced Settings
- Select Embedded or Overlay placement.
- Choose justification: Left, Center, or Right.
- Enable text features (Overlay only) with max 16/23 characters.
Optional: Add a Knowledge Pack
Add a Knowledge Pack
Add a Knowledge Pack
- Business Professional: 1 Pack
- Business Growth: 2 Packs
- Agency Lite: 1 Pack
- Agency Unlimited: 2 Packs
Steps to Add a Knowledge Pack:
-
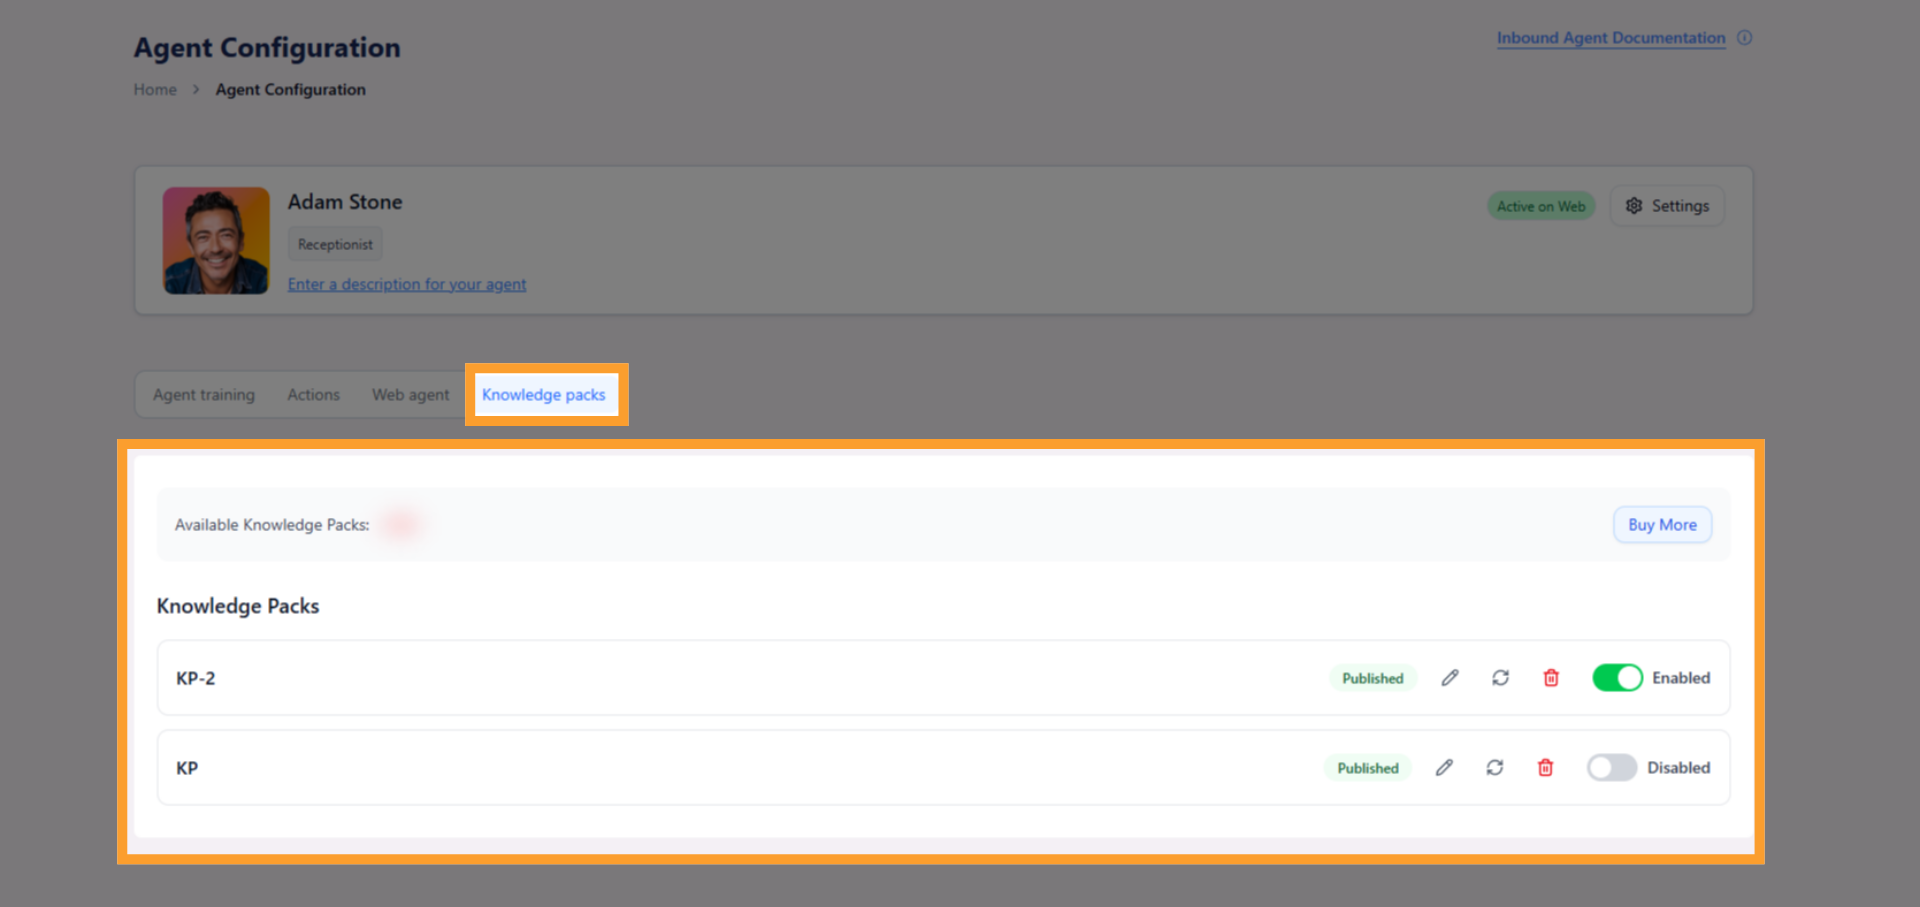
In your inbound agent configuration screen, scroll down and click “Knowledge Packs.”
-
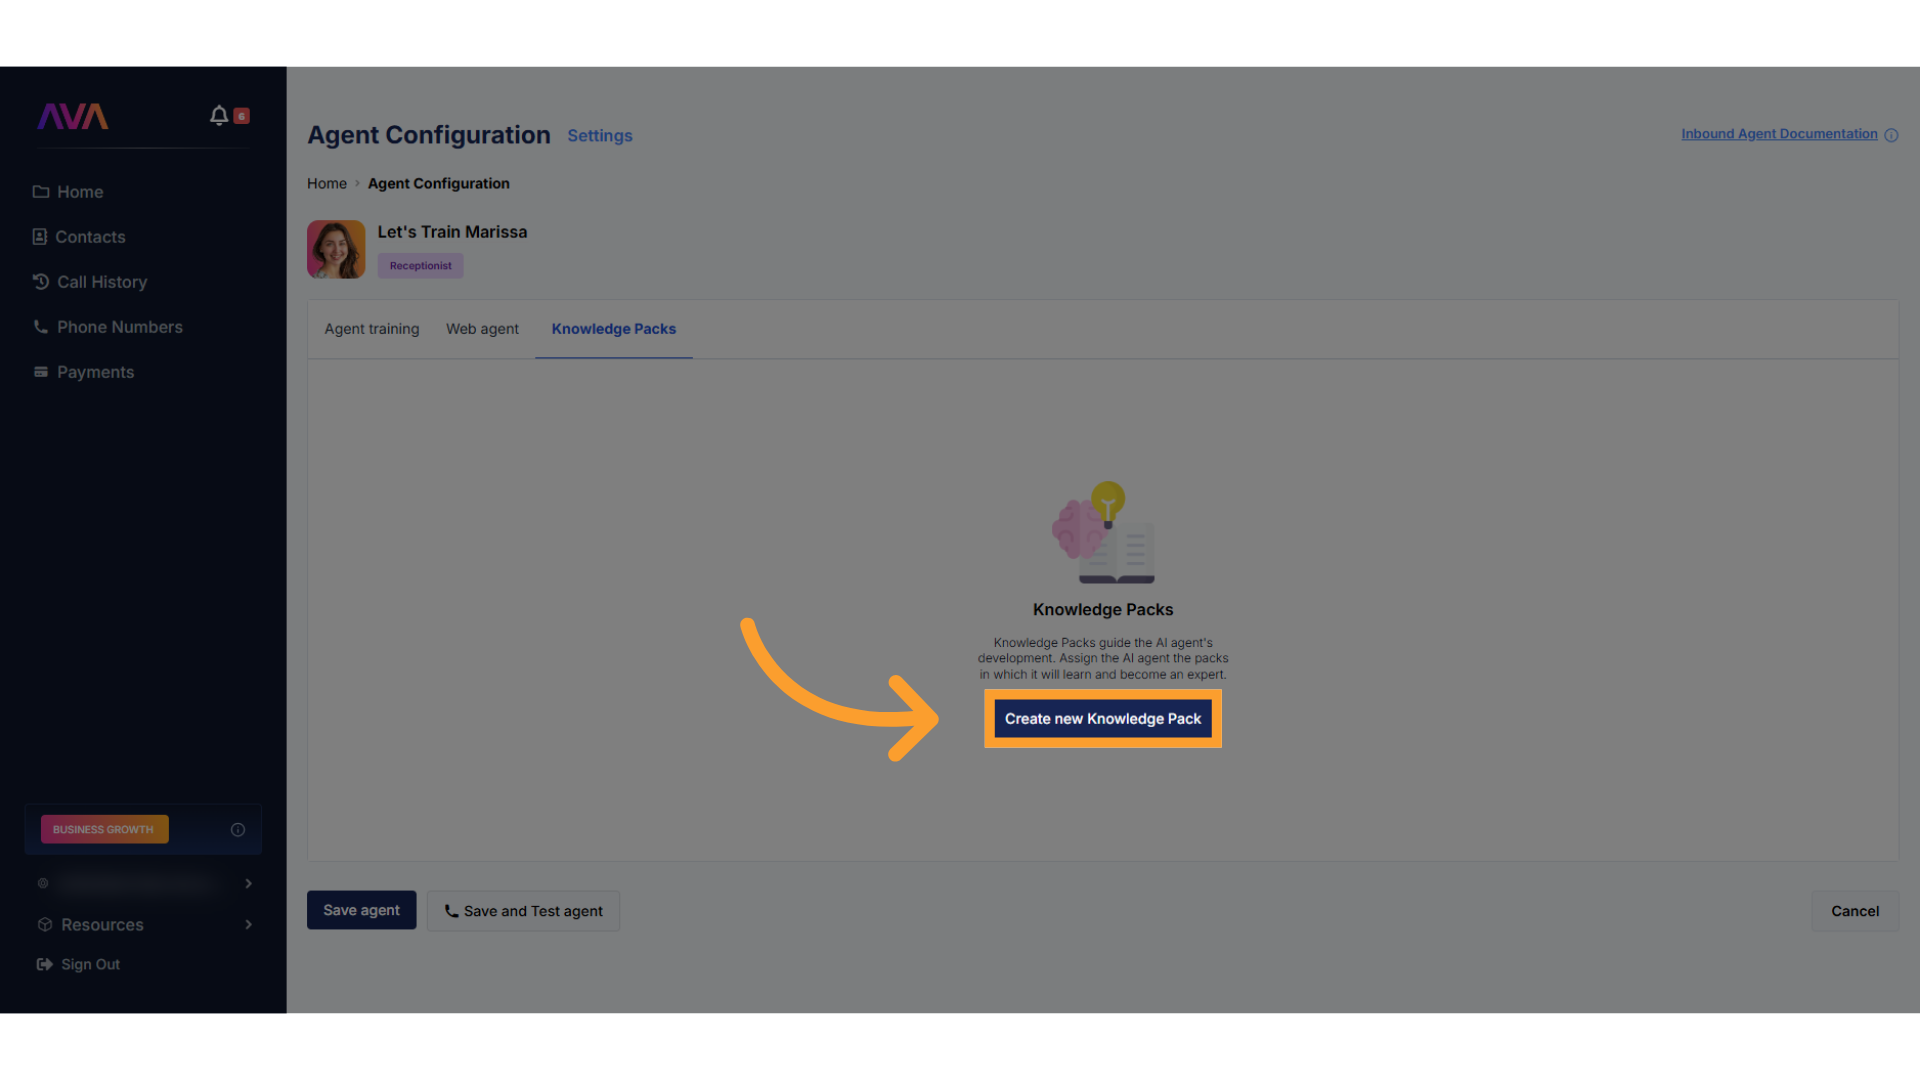
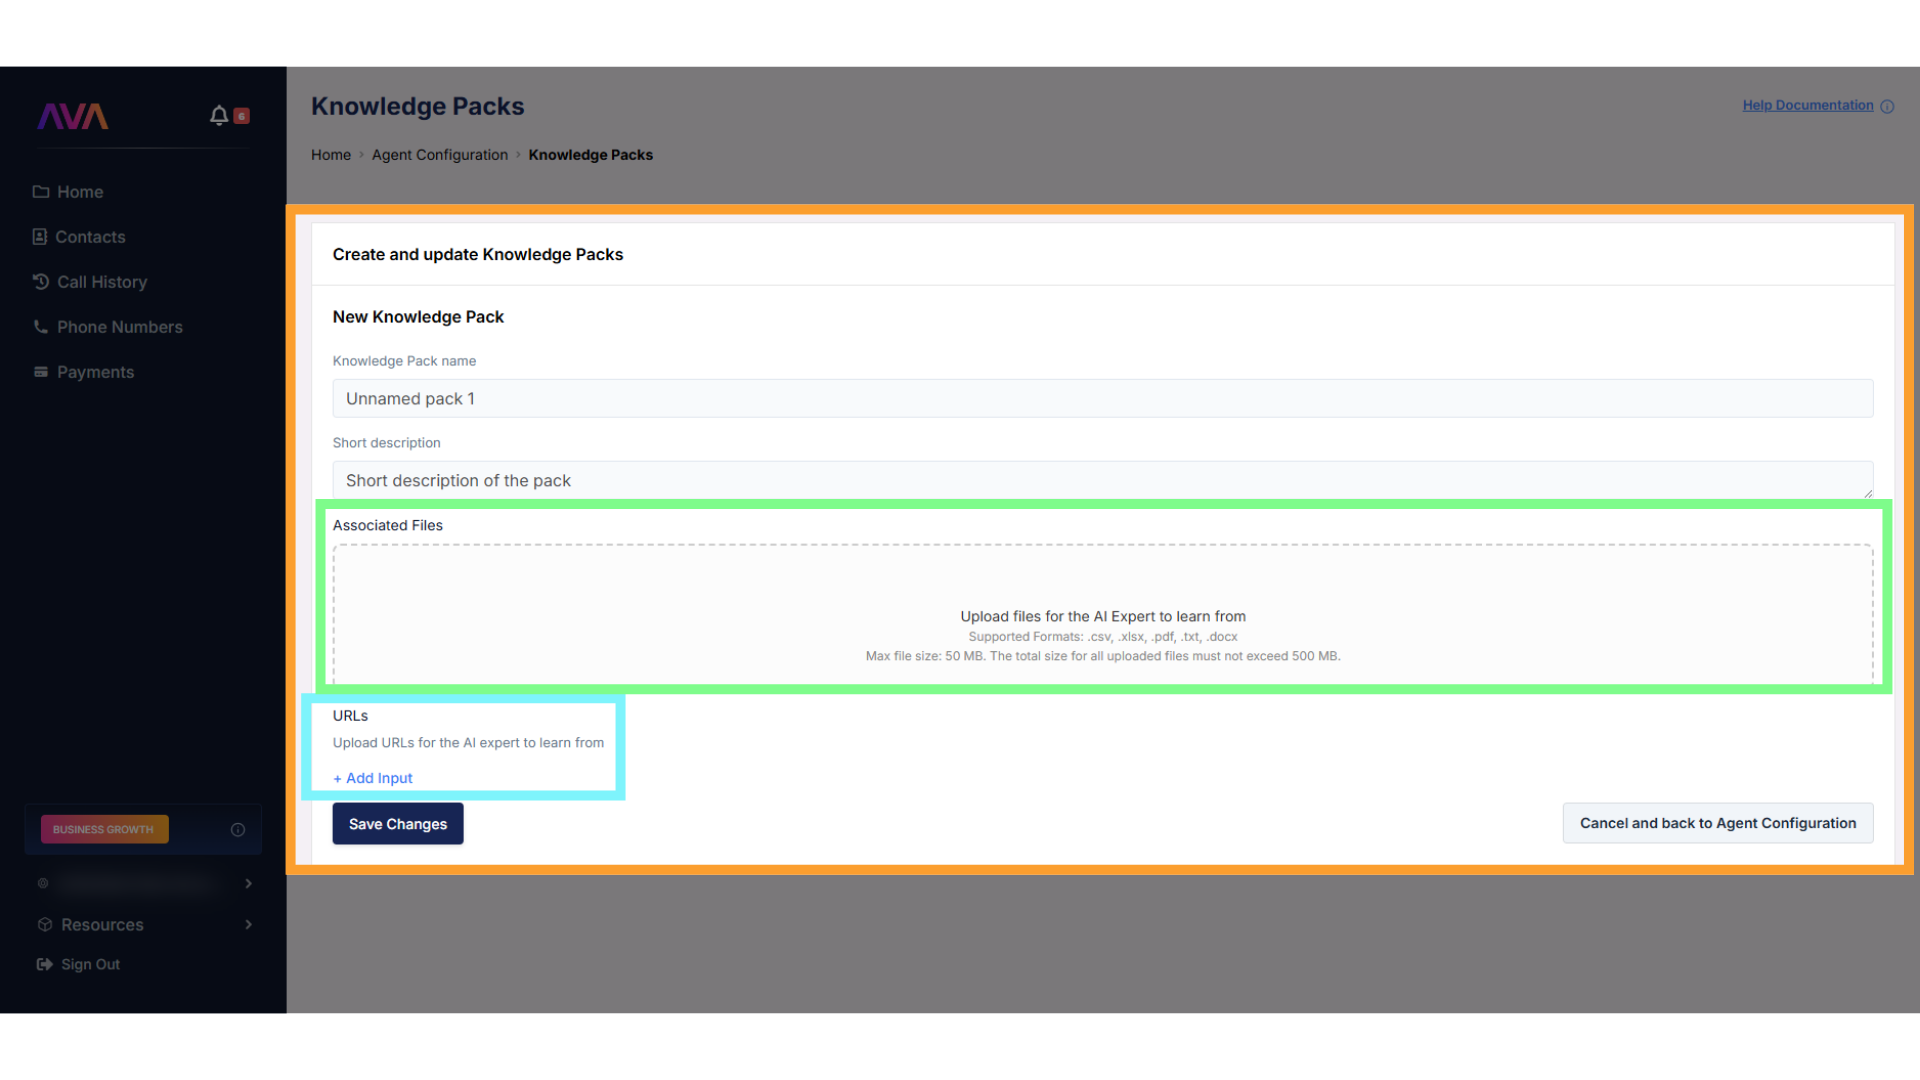
Click “Create New Knowledge Pack” to launch the builder.
-
Choose one or both of the following sources:
- Upload files in
.csv,.xlsx,.pdf,.txt, or.docxformat- Up to 50MB per file; total upload limit of 500MB, maximum of 25 files.
- Enter URLs to let thinkrr scan web pages for reference content
- Upload files in
-
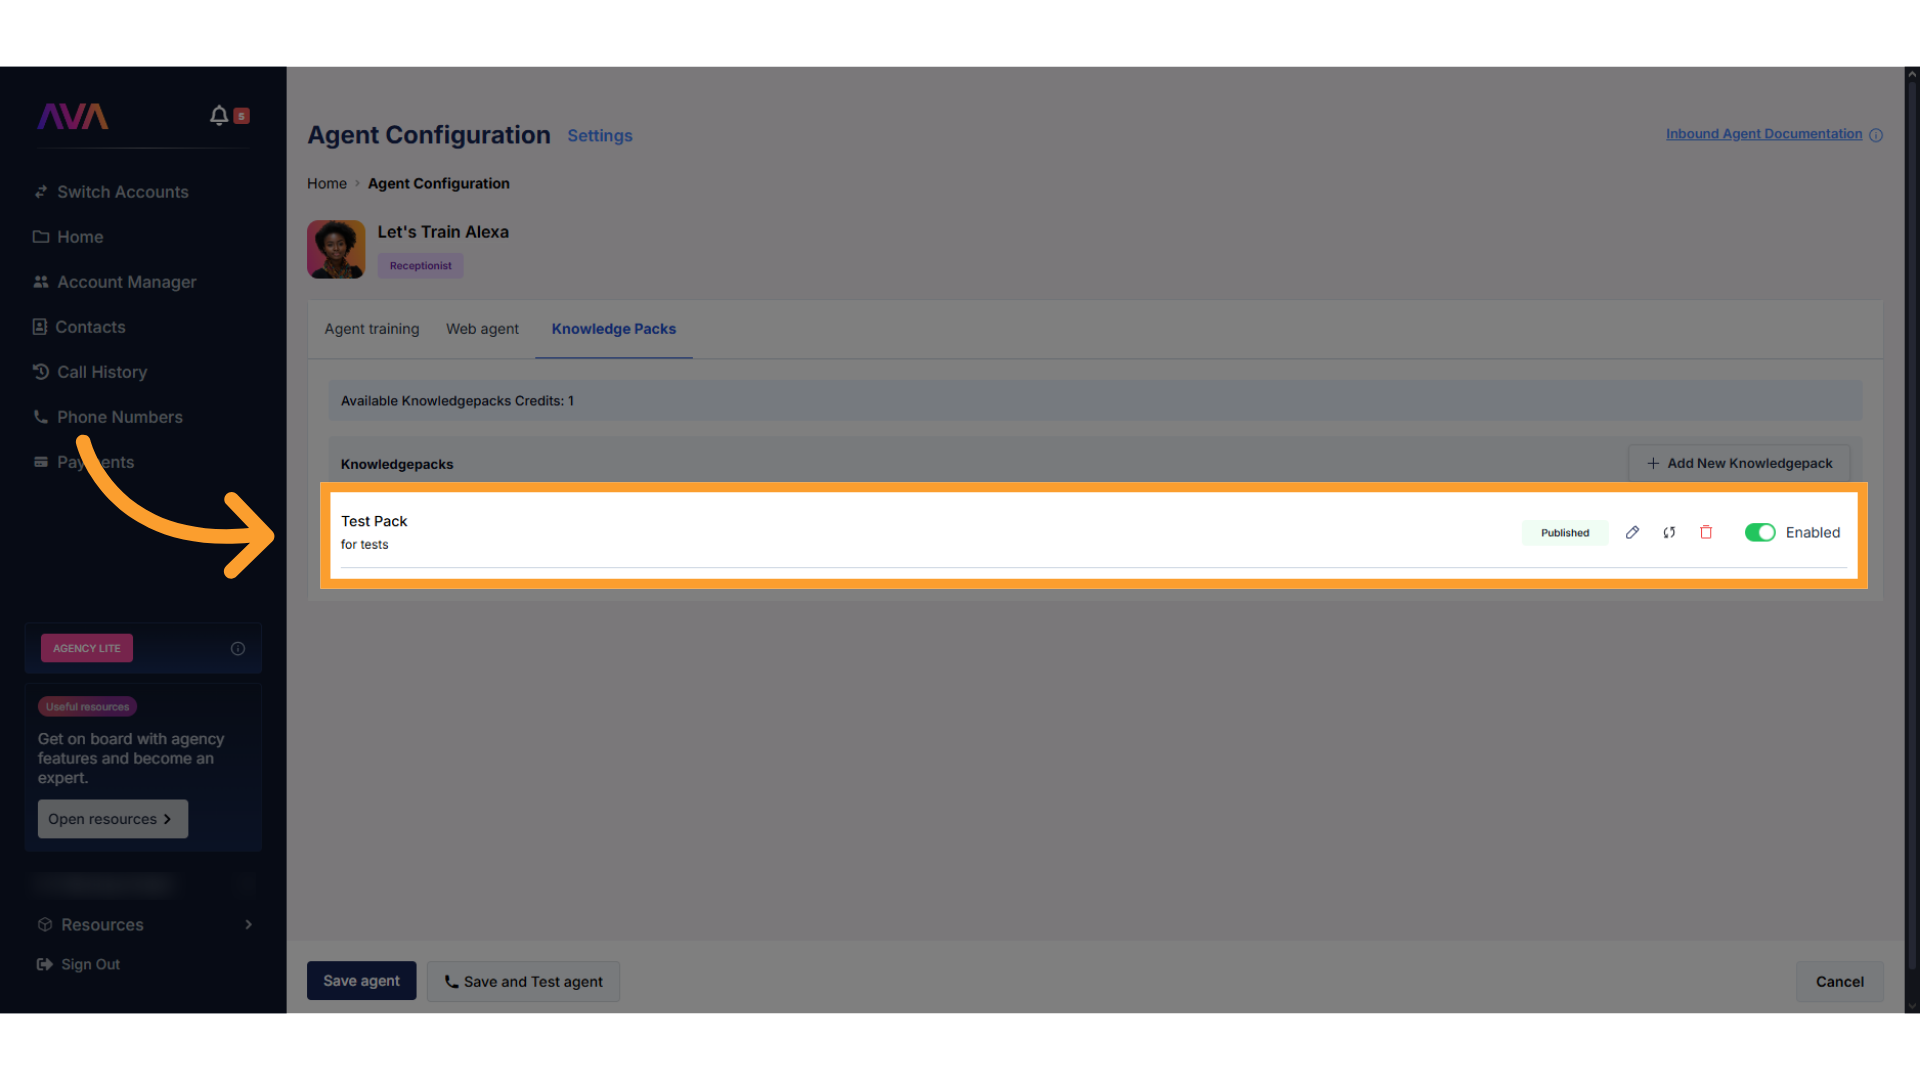
Once created, you can edit, delete, or refresh your pack from the right-hand menu.
- To disable access temporarily, simply turn off the pack instead of deleting it.
-
You can re-enable the same pack at any time without losing the content.
Configure Settings
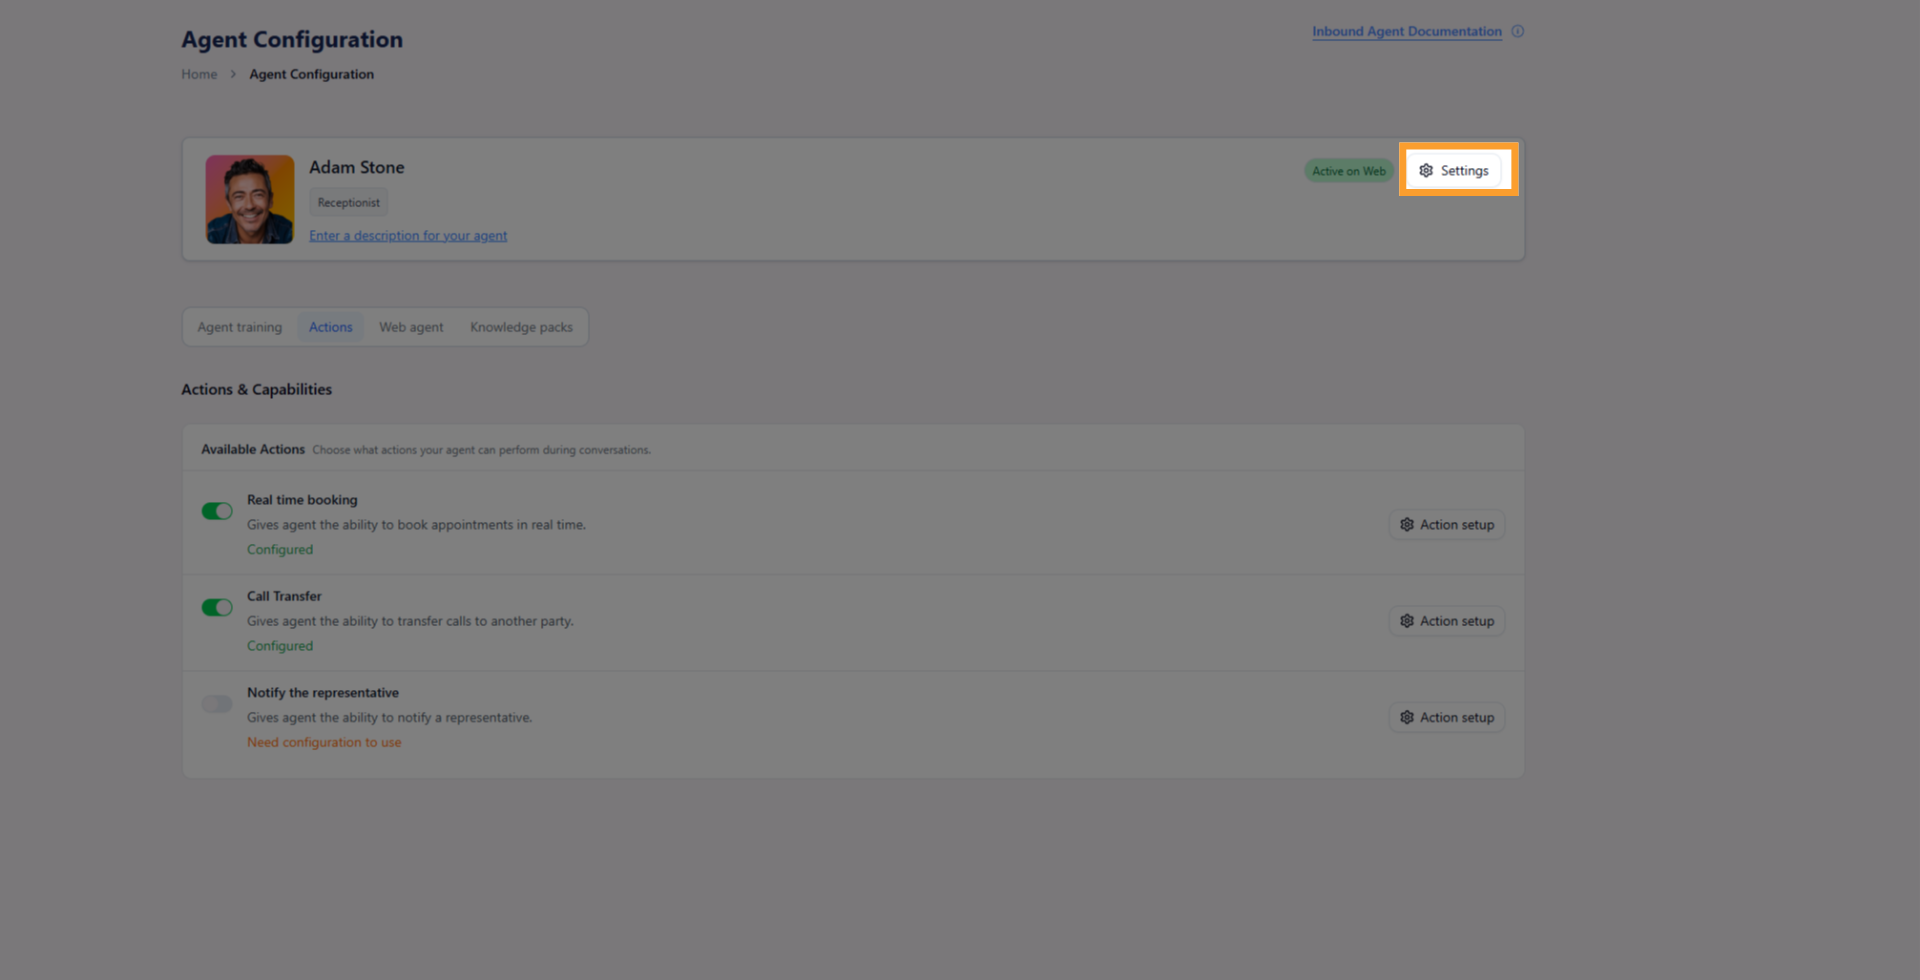
- After training and assigning actions, you can return to adjust settings at any time.
- Click the Settings button at the top left of your agent’s page. This reopens the same three tabs—Agent Settings, Call Settings, and Voice Settings—allowing you to revisit or update any configuration made during setup.
FAQs & Troubleshooting
General Questions
Can I create multiple Inbound Agents?
Can I create multiple Inbound Agents?
Can I assign the same phone number to two inbound agents?
Can I assign the same phone number to two inbound agents?
Can an inbound agent be used for web chat?
Can an inbound agent be used for web chat?
Can inbound agents handle multiple calls at the same time?
Can inbound agents handle multiple calls at the same time?
Do I need to train the agent from my website during creation?
Do I need to train the agent from my website during creation?
Troubleshooting Questions
My Inbound Agent isn’t picking up calls.
My Inbound Agent isn’t picking up calls.
- Ensure the assigned phone number is correct.
- Ensure you have minutes added to the account the agent is set up
My web Agent isn’t appearing on my website.
My web Agent isn’t appearing on my website.
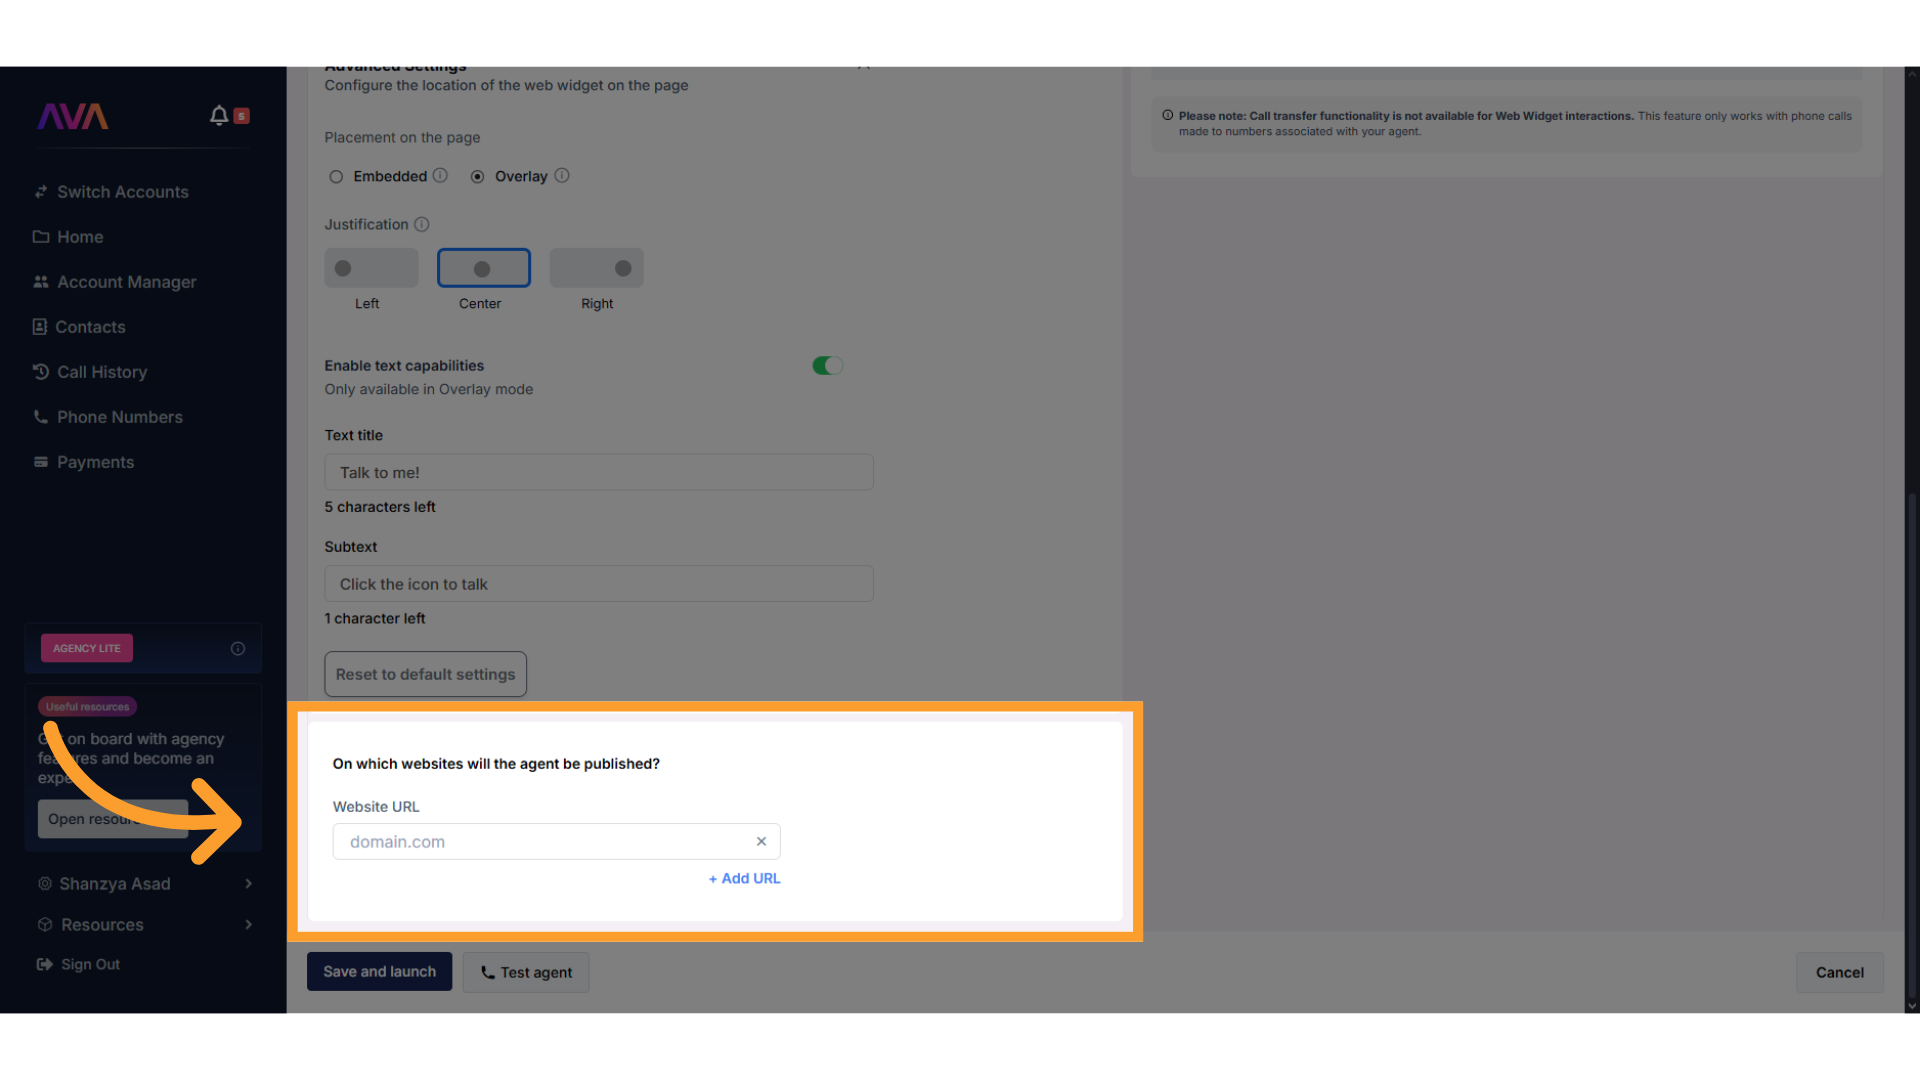
- Confirm that the correct domain is entered in the Web Agent settings.
- Ensure that the code snippet is embedded correctly in the website.
My test call isn’t working.
My test call isn’t working.
- Allow microphone and speaker permissions in your browser.
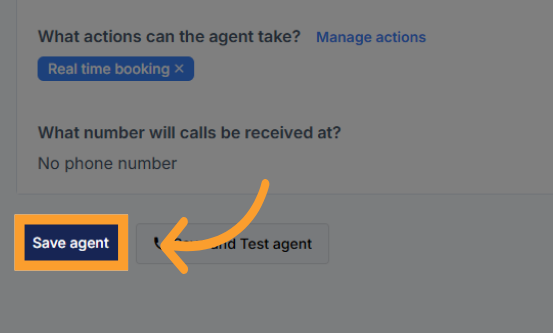
- Make sure the Inbound Agent is saved before testing.
For additional questions or guidance, try using our Virtual Support Agent! Available 24/7 to help resolve most issues quickly at thinkrr.ai/support. If you still need assistance, visit our support site at help.thinkrr.ai and submit a Ticket or contact our team directly at [email protected].


.gif?s=8febf82937e8de13774c40336d00ed1b)